Chrysler Aspen (2009 year). Manual - part 12


  Index      Chrysler     Chrysler Aspen (2009 year) - manual in english


Search            copyright infringement  


Content      ..     10      11      12      13     ..


Chrysler Aspen (2009 year). Manual - part 12


115 Volt Inverter Outlet — If Equipped

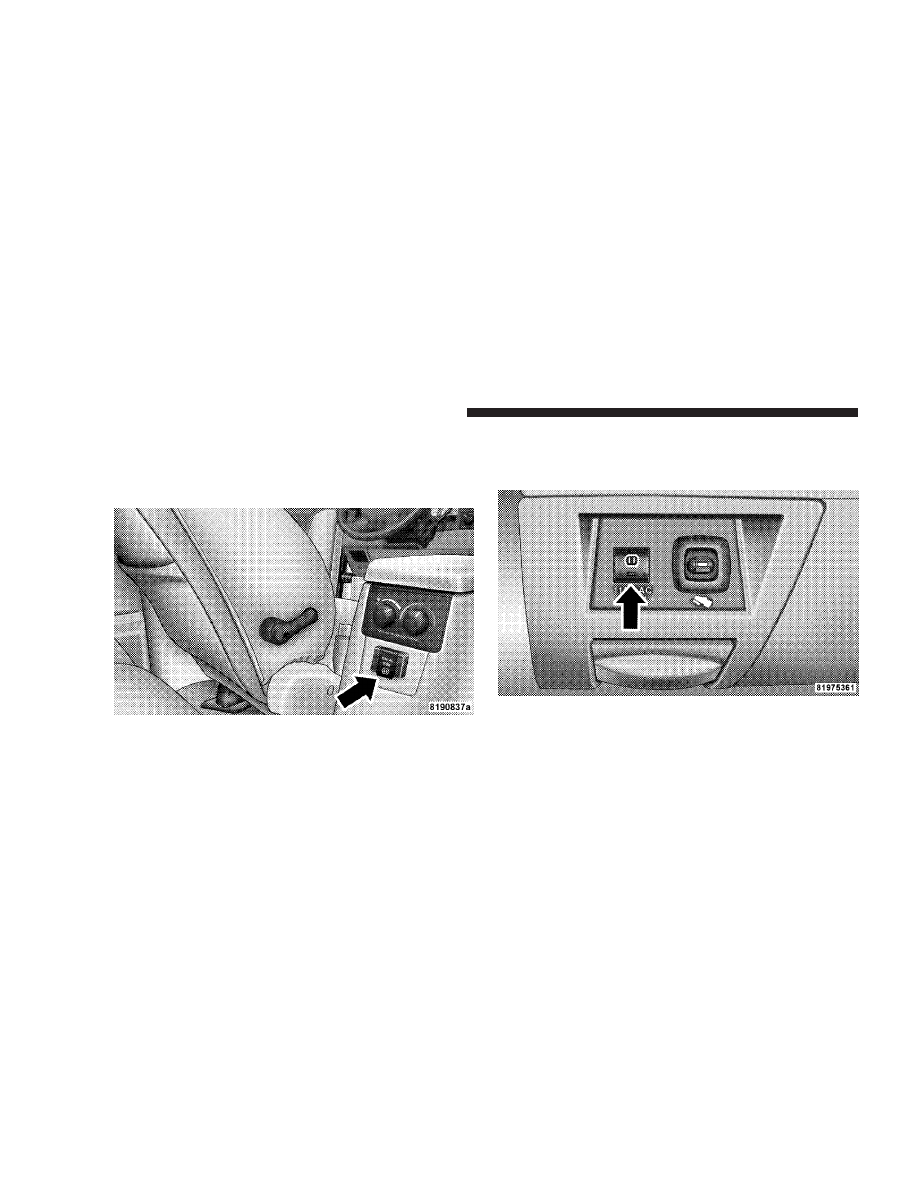
This vehicle may also be equipped with a 115 Volt (150
Watts Maximum) outlet on the rear of the front center
console.

This outlet can power cell phones, electronics and other
low power devices and is controlled by a switch located
in left lower instrument panel.

To turn on the power inverter press the switch once.
Pressing the switch a second time will turn the power
inverter off.

115 Volt Inverter Outlet

115 Volt Inverter Switch

188

UNDERSTANDING THE FEATURES OF YOUR VEHICLE

-------------------------------------------------------------------------------------------------------------------------------------------------------------

NOTE:

• When the inverter switch is pressed, there will be a

delay of approximately one second before the inverter
status indicator turns on. The status Indicator of the
AC power inverter indicates whether the inverter is
producing AC power.

• Due to built-in overload protection, the inverter will

shut down if the power rating is exceeded.

WARNING!

To void serious injury or death:
• Do not use a Three-Prong adapter.

• Do not insert any objects into the receptacles.

• Do not touch with wet hands.
• Close the lid when not in use.

• If this outlet is mishandled it may cause an electric

shock and failure.

FLOOR CONSOLE

Front Floor Console Features

The floor console between the driver’s and front passen-
ger’s seat, has the following features:

• Miscellaneous storage compartments
• Portable phone storage bin
• Portable phone cord routing on the sides of the console

lid and the base.

• 12 Volt reconfigurable power outlet inside storage

compartment

• Side open armrest lid
• Tissue holder and pen holder
• Coin slots
• Removable CD bin

UNDERSTANDING THE FEATURES OF YOUR VEHICLE

189

3

-------------------------------------------------------------------------------------------------------------------------------------------------------------

• 115 V Inverter Plug
• RCA Jacks

The coin slots are located under the instrument panel
center stack.

Cupholders
Your vehicle has eight cupholders. Four are located in the
center console, two are located in the second row armrest
or rear floor console (if equipped), and two are located in
the left-hand quarter panel for third row occupants. The
cupholders and storage bin located in the front of the
center console can be accessed by pressing on the access
doors.

Floor Console

190

UNDERSTANDING THE FEATURES OF YOUR VEHICLE

-------------------------------------------------------------------------------------------------------------------------------------------------------------

NOTE:

In colder temperatures you may experience a

slight delay on console doors opening; the console door
speed will come back to normal after 1–2 cycles.

The front storage bin in the center console is equipped
with a removable bin mat. This mat can be removed by
pulling on the tab located on the front edge of the bin
mat. Removing this mat will allow you to retrieve any
lost items that are between the bin doors.

Cupholder Doors

Bin Mat Tab

UNDERSTANDING THE FEATURES OF YOUR VEHICLE

191

3

-------------------------------------------------------------------------------------------------------------------------------------------------------------

Power Outlet and Portable Phone Storage
The console is equipped with a power outlet, portable
phone storage bin and phone cord routing. The phone
storage bin can be used when easy access to the phone is
needed. In addition, the power outlet inside the console
compartment can be used to power up the phone while it
is being stored in the bin.

To use the power outlet, plug in the portable power
recharge cord and place the cord along the opening
under the forward portion of the storage bin. Close the
console armrest lid and plug the power cord into the
phone while resting the phone in the bin. The power
outlet may be used for any portable item with a standard
12 Volt power outlet adapter, requiring up to 20 Amps of
current.

Rear Floor Console Features — If Equipped

The rear floor console us located between the second row
bucket seat and has the following features:

• Miscellaneous storage compartments
• Cupholders
• Portable phone cord routing on either side, between

the lid and base

• 12 Volt power outlet inside storage compartment
• Tissue holder and pen holder
• Second row heated seat switches
• Four slots for DVDs

192

UNDERSTANDING THE FEATURES OF YOUR VEHICLE

-------------------------------------------------------------------------------------------------------------------------------------------------------------

To access the storage bin, lift up on the console door latch.

CARGO AREA FEATURES — IF EQUIPPED

The cargo management system consists of a removable
cargo liner and removable cargo organizer.

Rear Floor Console

1 — Side Cover Latch
2 — Main Cover Latch
3 — Cargo Divider Handles

UNDERSTANDING THE FEATURES OF YOUR VEHICLE

193

3

-------------------------------------------------------------------------------------------------------------------------------------------------------------

To open the side cover, pull on the cover latch, and attach
the cord to the upper cargo net hook.

To open the main cover, pull up on the latch, and attach
the cord to the rear seat head restraint post.

To open the cargo divider, lift up on the cargo divider
handles, raising the doors to the full open position. Raise
the side panels until they engage into the doors.

Side Cover

1 — Cargo Divider Door
2 — Cargo Divider Side Panel

194

UNDERSTANDING THE FEATURES OF YOUR VEHICLE

-------------------------------------------------------------------------------------------------------------------------------------------------------------

To remove the cargo management system from the ve-
hicle, pull the right-hand side of the organizer toward
you so that the right pin slides out of the slot in the
vehicle. Push the organizer to the right and lift out of the
vehicle.

REAR WINDOW FEATURES

Rear Window Wiper/Washer

The rear window controls are located on the climate
control panel.For vehicles equipped with manual climate
controls the controls are located on the upper left corner.

Manual Climate Control Panel

UNDERSTANDING THE FEATURES OF YOUR VEHICLE

195

3

-------------------------------------------------------------------------------------------------------------------------------------------------------------

For vehicles equipped with Automatic Climate Controls
(ATC) the controls can be found on the lower right corner.

A rotating switch located on the climate control
panel turns the rear wiper ON or OFF. Pressing the

rotating switch inward activates the rear window washer.
Rotating the switch will enable one of five intermittent

delay times for the rear wiper. The delay times range
from 1 second to approximately 20 seconds.

If the rear wiper is operating when the ignition is turned
OFF, the wiper will automatically return to the Park
position. When the vehicle is restarted, the wiper will
resume operation.

Rear Window Defrosting

A push-button type switch is located in the climate
control panel. Press the switch and the rear win-

dow defroster and electric remote control heated mirrors
(if equipped) will turn on. An amber indicator on the
push-button will light when the defroster is turned on. A
symbol will be displayed when the defroster is turned on
with an ATC control. Push again to turn off prior to
time-out. The defroster will automatically turn off after
15 minutes. For an additional 10 minutes of operation,

Automatic Climate Control Panel

196

UNDERSTANDING THE FEATURES OF YOUR VEHICLE

-------------------------------------------------------------------------------------------------------------------------------------------------------------

push the button a second time. To prevent excessive
battery drain, use the defroster only when the engine is
operating.

CAUTION!

Use care when washing the inside of the rear window
to prevent damage to heating elements. Use a soft
cloth and a mild washing solution, wiping parallel to
the heating elements. Also, keep all objects a safe
distance from the window to prevent damaging the
heating elements.

FACTORY INSTALLED ROOF LUGGAGE RACK

A factory installed luggage rack is located on the vehicles
roof.

The load carried on the roof when equipped with a
luggage rack must not exceed 150 lbs (68 kg), and should
be uniformly distributed over the cargo area.

The side rails between the stantions should be used to tie
down cargo. Check the straps frequently to be sure that
the load remains securely attached.

Roof Luggage Rack

UNDERSTANDING THE FEATURES OF YOUR VEHICLE

197

3

-------------------------------------------------------------------------------------------------------------------------------------------------------------

NOTE:

Crossbars are offered by Mopar

t accessories.

External racks do not increase the total load carrying
capacity of the vehicle. Be sure that the total occupant
and luggage load inside the vehicle, plus the load on the
luggage rack, do not exceed the maximum vehicle load
capacity.

CAUTION!

To avoid damage to the roof rack and vehicle, do not
exceed the maximum roof rack load capacity. Always
distribute heavy loads as evenly as possible and
secure the load appropriately.
Long loads which extend over the windshield, such
as wood panels or surfboards, should be secured to
both the front and rear of the vehicle.
Place a blanket or other protection between the
surface of the roof and the load.

(Continued)

CAUTION! (Continued)

Travel at reduced speeds and turn corners carefully
when carrying large or heavy loads on the roof rack.
Wind forces, due to natural causes or nearby truck
traffic, can add sudden upward loads. This is espe-
cially true on large flat loads and may result in
damage to the cargo or your vehicle.

WARNING!

Cargo must be securely tied down before driving
your vehicle. Improperly secured loads can fly off the
vehicle, particularly at high speeds, resulting in per-
sonal injury or property damage. Follow the roof rack
cautions when carrying cargo on your roof rack.

198

UNDERSTANDING THE FEATURES OF YOUR VEHICLE

-------------------------------------------------------------------------------------------------------------------------------------------------------------

UNDERSTANDING YOUR INSTRUMENT PANEL

CONTENTS

Instruments And Controls . . . . . . . . . . . . . . . . 202
Instrument Cluster . . . . . . . . . . . . . . . . . . . . . 203
Instrument Cluster Description . . . . . . . . . . . . 204
Setting The Analog Clock . . . . . . . . . . . . . . . . 216
Electronic Digital Clock . . . . . . . . . . . . . . . . . 216

▫ Clock Setting Procedure . . . . . . . . . . . . . . . . 217

AM/FM/CD/DVD Multimedia System Radio

(RER/REN) – If Equipped . . . . . . . . . . . . . . . . 217

▫ Operating Instructions — Voice Recognition

System (VR) — If Equipped . . . . . . . . . . . . . 218

▫ Operating Instructions — Hands-Free

Communication (UConnect

t) — If Equipped . . 218

▫ Clock Setting Procedure . . . . . . . . . . . . . . . . 218

Sales Code RES — AM/FM Stereo Radio With

CD Player (MP3 AUX Jack). . . . . . . . . . . . . . . . 220

▫ Operating Instructions - Radio Mode . . . . . . . 220
▫ Operation Instructions - CD Mode For CD

And MP3 Audio Play . . . . . . . . . . . . . . . . . . 223

▫ Notes On Playing MP3 Files . . . . . . . . . . . . . 226
▫ Operation Instructions - Auxiliary Mode . . . . 228

4

-------------------------------------------------------------------------------------------------------------------------------------------------------------

Sales Code RES/RSC — AM/FM Stereo Radio

With CD Player (MP3 AUX Jack) And Sirius
Radio. 
. . . . . . . . . . . . . . . . . . . . . . . . . . . . . . 229

▫ Operating Instructions - Radio Mode . . . . . . . 229
▫ Operation Instructions - CD Mode For CD

And MP3 Audio Play . . . . . . . . . . . . . . . . . . 235

▫ Notes On Playing MP3 Files . . . . . . . . . . . . . 237
▫ List Button (CD Mode For MP3 Play) . . . . . . 240
▫ Info Button (CD Mode For MP3 Play) . . . . . . 240

Universal Consumer Interface (UCI)

— If Equipped. . . . . . . . . . . . . . . . . . . . . . . . . 241

▫ Connecting The iPodt . . . . . . . . . . . . . . . . . 242
▫ Using This Feature . . . . . . . . . . . . . . . . . . . 242
▫ Controlling The iPodt Using Radio Buttons . . 243

▫ Play Mode . . . . . . . . . . . . . . . . . . . . . . . . . 243
▫ List Or Browse Mode . . . . . . . . . . . . . . . . . . 244

Satellite Radio — If Equipped

(REN/REQ/RER/RES/REU Radios Only). . . . . 246

▫ System Activation . . . . . . . . . . . . . . . . . . . . 246
▫ Electronic Serial Number/Sirius

Identification Number (ESN/SID) . . . . . . . . . 247

▫ Selecting Satellite Mode . . . . . . . . . . . . . . . . 248
▫ Satellite Antenna . . . . . . . . . . . . . . . . . . . . . 248
▫ Reception Quality . . . . . . . . . . . . . . . . . . . . 248
▫ Operating Instructions - Satellite Mode . . . . . 248
▫ Operating Instructions - Hands-Free Phone

(If Equipped) . . . . . . . . . . . . . . . . . . . . . . . . 251

200

UNDERSTANDING YOUR INSTRUMENT PANEL

-------------------------------------------------------------------------------------------------------------------------------------------------------------

▫ Operating Instructions - Video Entertainment

System (VES

t) (If Equipped). . . . . . . . . . . . . 251

Sirius Backseat TV™— If Equipped . . . . . . . . . 251
Video Entertainment System (Sales Code XRV)

— If Equipped. . . . . . . . . . . . . . . . . . . . . . . . . 252

Remote Sound System Controls — If Equipped . . 252

▫ Radio Operation . . . . . . . . . . . . . . . . . . . . . 253
▫ CD Player . . . . . . . . . . . . . . . . . . . . . . . . . . 253

CD/DVD Maintenance . . . . . . . . . . . . . . . . . . 253
Radio Operation And Cellular Phones . . . . . . . 254
Climate Controls . . . . . . . . . . . . . . . . . . . . . . 255

▫ Manual Control . . . . . . . . . . . . . . . . . . . . . . 255
▫ Air Conditioning Operation . . . . . . . . . . . . . 255
▫ Front Blower Control . . . . . . . . . . . . . . . . . . 256

▫ Front Mode Control . . . . . . . . . . . . . . . . . . . 256
▫ Rear Temperature Control — If Equipped . . . 259
▫ Rear Window Defrosting And Rear Window

Washer/Wiper . . . . . . . . . . . . . . . . . . . . . . . 259

▫ Automatic Temperature Control (ATC)

— If Equipped. . . . . . . . . . . . . . . . . . . . . . . 260

▫ Automatic Control . . . . . . . . . . . . . . . . . . . . 260
▫ Level Of Automatic Control . . . . . . . . . . . . . 261
▫ Manual Control (ATC) . . . . . . . . . . . . . . . . . 261
▫ Rear Zone Climate Control — If Equipped . . . 265
▫ Rear Rotary Temperature Control . . . . . . . . . 266
▫ Front Unit To Rear Unit Chart . . . . . . . . . . . 267
▫ Operating Tips . . . . . . . . . . . . . . . . . . . . . . 267
▫ Operating Tips Chart . . . . . . . . . . . . . . . . . . 269

UNDERSTANDING YOUR INSTRUMENT PANEL

201

4

-------------------------------------------------------------------------------------------------------------------------------------------------------------

INSTRUMENTS AND CONTROLS

1 — Headlight Switch

7 — Radio

13 — Transfer Case Switch*

2 — Air Outlets

8 — Climate Control

14 — Speed Control Switches

3 — Demister Outlets

9 — Rear Washer / Wiper

15 — Hood Release

4 — Instrument Cluster

10 — Power Outlet

16 — Adjustable Pedal Control Switch*

5 — Airbags

11 — Heated Seat Switches*

17 — 115v Inverter Switch

6 — Glove Compartment

12 — Electronic Stability System (ESP) Off

Switch

* If Equipped

202

UNDERSTANDING YOUR INSTRUMENT PANEL

-------------------------------------------------------------------------------------------------------------------------------------------------------------

Instrument Cluster

UNDERSTANDING YOUR INSTRUMENT PANEL

203

4

-------------------------------------------------------------------------------------------------------------------------------------------------------------


Content      ..     10      11      12      13     ..