Chrysler Crossfire. Manual - part 921


  Index      Chrysler     Chrysler Crossfire - service repair manual 2005 year


Search            


Content   ..  919  920  921  922   ..


Chrysler Crossfire. Manual - part 921


8. Remove the screw (4) located behind the left air

outlet deflector by removing the deflector to reveal
the screw.

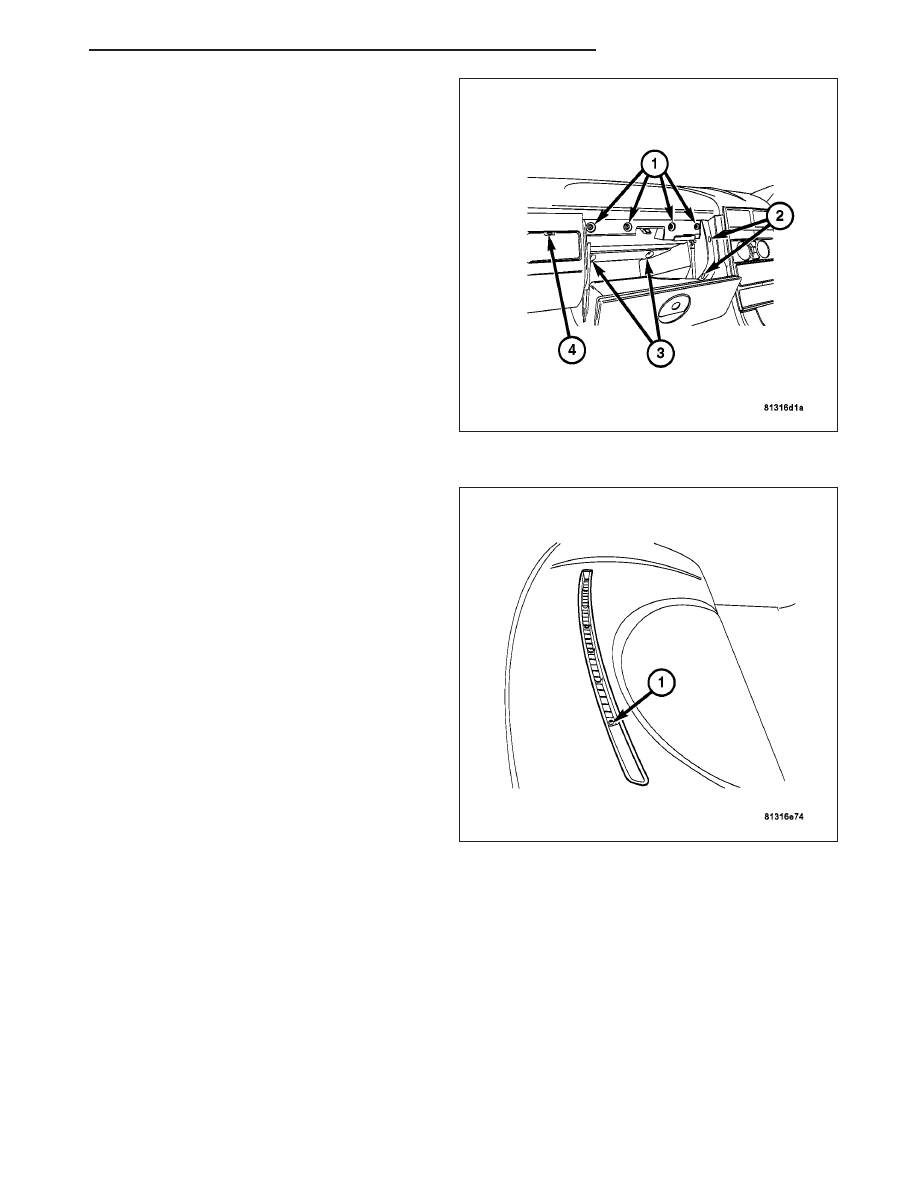
9. Open the glove compartment and remove the

screws (1) attaching it the top section of the I/P.

10. Remove the defroster grille screws (1) and the

defroster grille pulling it outwards.

11. Remove the bolts on left and right under the

defroster grille.

CAUTION: Damage to the top section of I/P can
occur if the A-pillar sheet metal clips were not
removed.

12. Lift the top section of the I/P and remove toward

rear.

13. Lay the top section of I/P down on a suitable

surface.

ZH

INSTRUMENT PANEL

23 - 355

REMOVAL - LOWER I/P PANEL LEFT

1. Remove the air nozzle and the screw behind the

nozzle.

2. Remove the screw (3) attaching the cover under

the steering column then remove the cover (2).

3. Remove the fuse panel cover.

4. Remove the screws (1) attaching the lower instru-

ment cover (5) to the illumination control module
(4) and the side of the instrument panel to the sup-
port bar (6). Remove the screw at the top of lower
cover to cluster cover.

5. Remove the illumination control module (7).

6. Pull the lower instrument cover (2) off of the cluster

cover.

7. Remove the screw (2) attaching the hood latch

release handle bezel to the lower instrument panel
and then guide the handle through the lower cover
(1).

23 - 356

INSTRUMENT PANEL

ZH

8. Separate the lower panel (2) from the cluster cover

(1) and then remove the lower instrument panel.

REMOVAL - LEFT I/P PANEL - RHD

1. Remove the air outlet deflector from the I/P then

remove the screw (4) from behind the deflector.

2. Open the glove compartment and disconnect the

shock and the limiter strap from the door of the
glove compartment.

3. Remove the screws from the hinge of the glove

compartment door removing the glove compart-
ment from the vehicle.

4. Remove the screws (1, 2 and 3).

ZH

INSTRUMENT PANEL

23 - 357

5. Remove the I/P side cover.

6. Remove the screw (1) attaching the lower I/P to the

upper panel.

7. Remove the two screws (2) from the lower panel

then remove the lower I/P from the vehicle.

23 - 358

INSTRUMENT PANEL

ZH


Content   ..  919  920  921  922   ..