Chrysler Crossfire. Manual - part 902


  Index      Chrysler     Chrysler Crossfire - service repair manual 2005 year


Search            


Content   ..  900  901  902  903   ..


Chrysler Crossfire. Manual - part 902


DOOR

TABLE OF CONTENTS

page

page

CHECK STRAP

REMOVAL

. . . . . . . . . . . . . . . . . . . . . . . . . . . . 279

INSTALLATION

. . . . . . . . . . . . . . . . . . . . . . . . 280

DOOR

REMOVAL

. . . . . . . . . . . . . . . . . . . . . . . . . . . . 281

INSTALLATION

. . . . . . . . . . . . . . . . . . . . . . . . 282

ADJUSTMENTS

ADJUSTMENT

. . . . . . . . . . . . . . . . . . . . . . . 283

DOOR GLASS

REMOVAL

. . . . . . . . . . . . . . . . . . . . . . . . . . . . 284

INSTALLATION

. . . . . . . . . . . . . . . . . . . . . . . . 285

ADJUSTMENTS

ADJUSTMENT

. . . . . . . . . . . . . . . . . . . . . . . 287

EXTERIOR HANDLE

REMOVAL

. . . . . . . . . . . . . . . . . . . . . . . . . . . . 289

INSTALLATION

. . . . . . . . . . . . . . . . . . . . . . . . 290

WINDOW REGULATOR

REMOVAL

. . . . . . . . . . . . . . . . . . . . . . . . . . . . 292

INSTALLATION

. . . . . . . . . . . . . . . . . . . . . . . . 293

LATCH

REMOVAL

. . . . . . . . . . . . . . . . . . . . . . . . . . . . 294

INSTALLATION

. . . . . . . . . . . . . . . . . . . . . . . . 295

LOCK CYLINDER

REMOVAL

. . . . . . . . . . . . . . . . . . . . . . . . . . . . 296

INSTALLATION

. . . . . . . . . . . . . . . . . . . . . . . . 297

TRIM PANEL

REMOVAL

. . . . . . . . . . . . . . . . . . . . . . . . . . . . 299

INSTALLATION

. . . . . . . . . . . . . . . . . . . . . . . . 300

CHECK STRAP

REMOVAL

1. Remove the door trim panel. (Refer to 23 - BODY/

DOOR - FRONT/TRIM PANEL - REMOVAL).

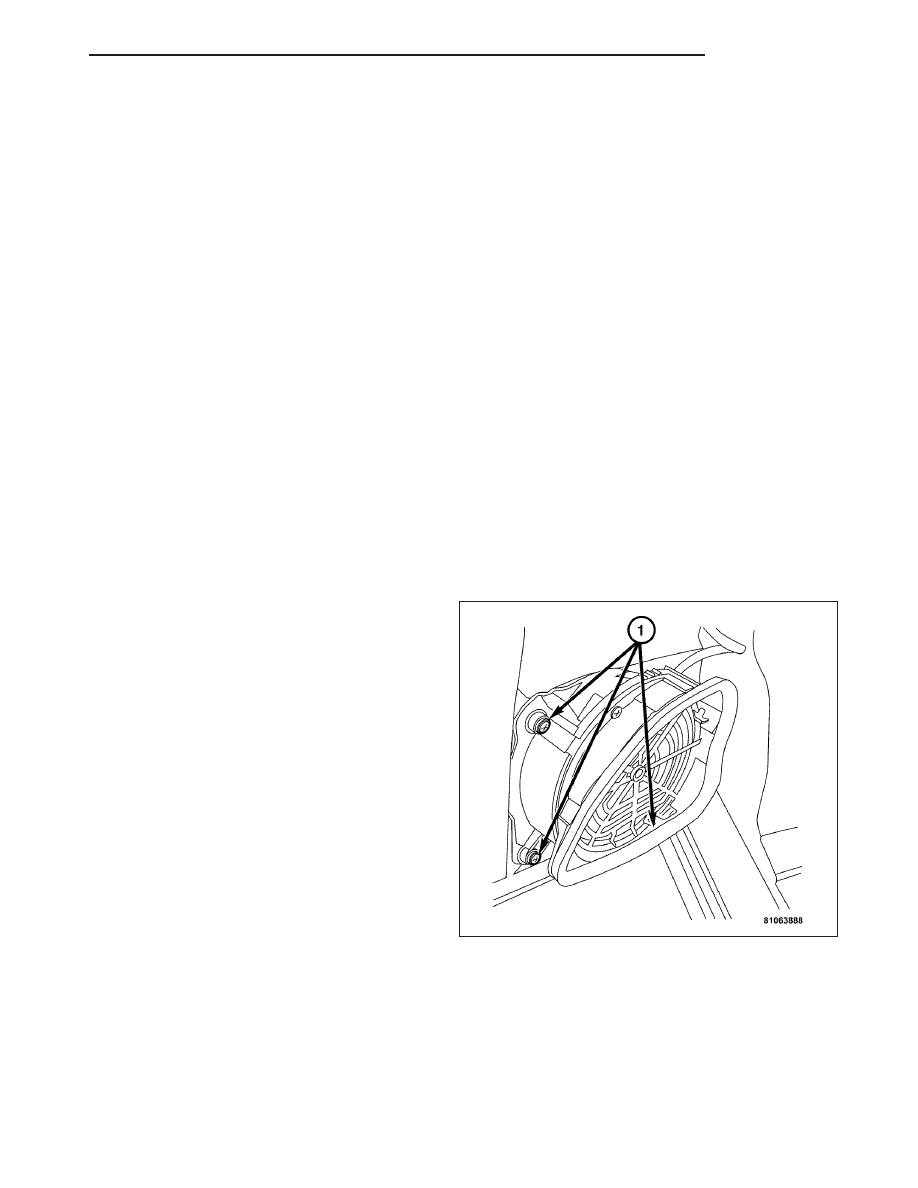
2. Remove the door speaker by removing the screws

(1) attaching it to the door.

3. Remove the door foil from the inner door panel

front area. Replace any damaged door foil.

ZH

DOOR

23 - 279

4. Remove the plastic seal located over the check

strap bolt (6).

CAUTION: Avoid damaging the vehicle’s paint.

5. Remove the torx screw (4) and then remove the

retaining plate (3).

6. Remove the bolts (1) attaching the check strap to

the door.

7. Remove the seal from the door check strap.

8. Remove the door check strap through the installa-

tion opening in the inner door panel.

INSTALLATION

Note: Lubricate the door check strap below the
plastic cover.

1. Install the door check strap through the installation

opening in the inner door panel.

2. Install the screw (3), then install the seal (5) to the

door check strap.

Note: Tighten the bolts on the end first.

3. Install the two bolts (1) attaching the door check

strap (2) to the door. Tighten to 10 N·m (88 in.
lbs.).

4. Install the torx screw (4) and install the retaining

plate.

23 - 280

DOOR

ZH

5. Install the door foil to the inner door panel front

area.

6. Install the door speaker by installing the screws (1)

attaching it to the door.

7. Install the door trim panel on the front door. (Refer

to 23 - BODY/DOOR - FRONT/TRIM PANEL -
INSTALLATION).

DOOR

REMOVAL

CAUTION: Use care when removing any compo-
nent that is attached to the vehicles painted sur-
face. Take the necessary precautions to avoid
paint damage while servicing the vehicle.

1. Remove the check strap. (Refer to 23 - BODY/

DOOR - FRONT/CHECK STRAP - REMOVAL).

2. Disconnect and remove the lock air line (1) from

the door lock. Then remove the air line from the
door.

ZH

DOOR

23 - 281

CAUTION: To avoid paint damage, have an assis-
tant help while removing the door.

3. Disconnect the side view mirror (1) and the power

window motor connector (5).

4. Remove the bolts from the bottom and top hinge

and then slowly pull door away from A-pillar.

5. Remove the protective hose (3) from the front door

and pull out all electrical leads as well as the lock
air line.

6. Remove the front door and lay down on secure

clean area.

INSTALLATION

CAUTION: To avoid paint damage, have an assis-
tant help while installing the door.

1. Install the protective hose on the front door and

thread all electrical leads as well as the air line
lead into the door.

2. Slowly position the door onto the A-pillar then

install the bolts to the bottom and top hinge.
Tighten to 32 N·m (24 ft. lbs.).

3. Connect the rearview mirror (1) and the power win-

dow motor (4) electrical connector.

4. Install the door check strap to the A-pillar. (Refer to 23 - BODY/DOOR - FRONT/CHECK STRAP -

INSTALLATION).

23 - 282

DOOR

ZH


Content   ..  900  901  902  903   ..