Chrysler Crossfire. Manual - part 321
DRIVER AIRBAG SQUIB CIRCUIT (CONTINUED)
4.
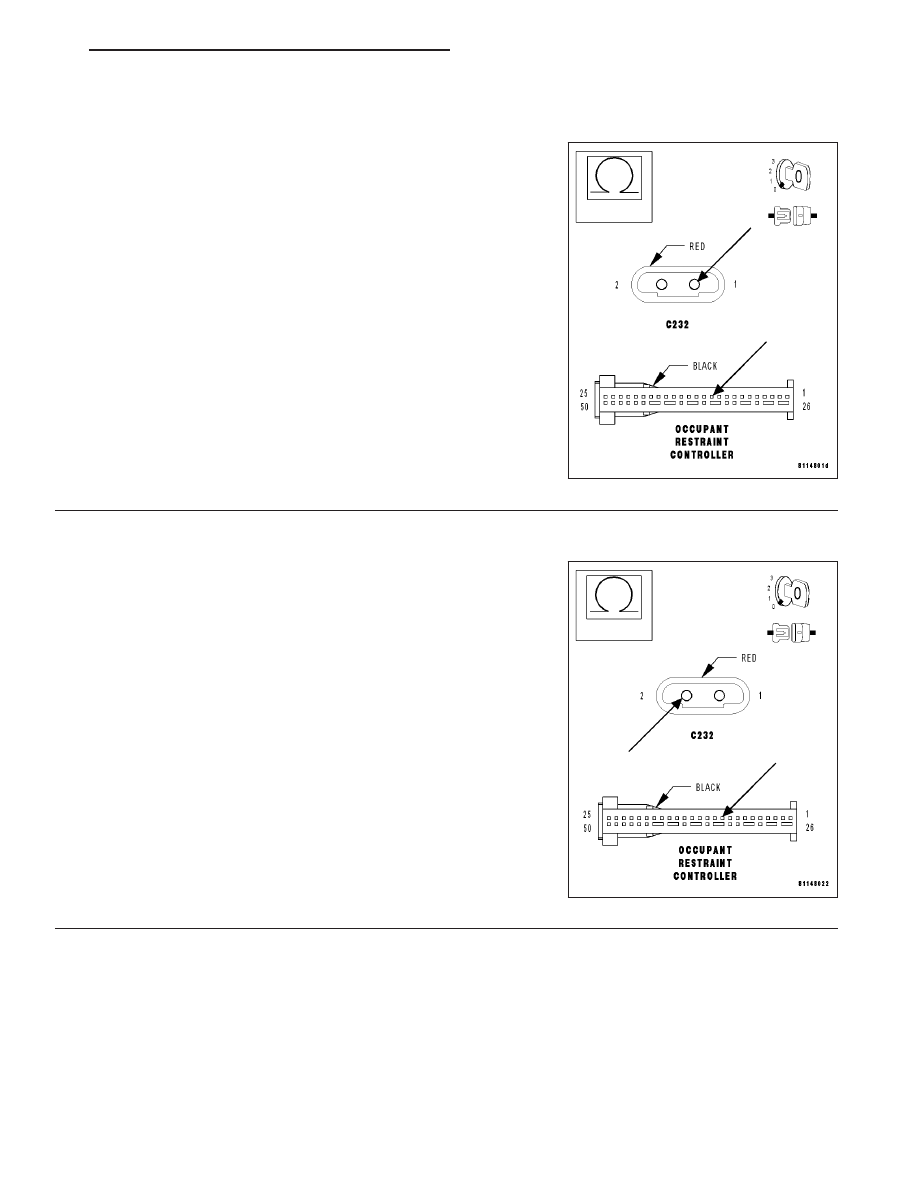
MEASURE THE RESISTANCE OF THE DRIVER SQUIB LINE 1 CIRCUIT
WARNING: TURN THE IGNITION OFF, DISCONNECT THE BAT-
TERY AND WAIT TWO MINUTES BEFORE PROCEEDING.
Disconnect the ORC harness connector.
Note: Check connectors - Clean/repair as necessary.
Connect the appropriate harness adapter to the ORC connector.
Disconnect the Load Tool from the Clockspring connector.
Measure the resistance of the Driver Squib Line 1 circuit from the
ORC adapter to the Clockspring 2–wire connector.
Is the resistance below 1.0 ohm?
Yes
>> Go to 5
No
>> Repair the Driver Squib Line 1 circuit for an open.
Perform AIRBAG VERIFICATION TEST.
Note: When reconnecting the Airbag System components, the
ignition must be turned off and the battery must be disconnected.
5.
MEASURE THE RESISTANCE OF THE DRIVER SQUIB LINE 2 CIRCUIT
WARNING: TURN THE IGNITION OFF, DISCONNECT THE BAT-
TERY AND WAIT TWO MINUTES BEFORE PROCEEDING.
Measure the resistance of the Driver Squib Line 2 circuit from the
ORC adapter to the Clockspring 2–wire connector.
Is the resistance below 1.0 ohm?
Yes
>> Go to 6
No
>> Repair the Driver Squib Line 2 circuit for an open.
Perform AIRBAG VERIFICATION TEST.
Note: When reconnecting the Airbag System components, the
ignition must be turned off and the battery must be disconnected.
ZH
RESTRAINTS - ELECTRICAL DIAGNOSTICS
8O - 7