Chrysler 300/300 Touring/300C, Dodge Magnum. Manual - part 745
DRIVER AIRBAG TRIM COVER
REMOVAL
1. Disconnect and isolate the battery negative cable.
WARNING: Wait two minutes for the airbag system
reserve capacitor to discharge before beginning
any airbag system or component service. Failure
to do so may result in accidental airbag deploy-
ment, personal injury or death.
CAUTION: Do not pull on the horn switch feed pig-
tail wire to disengage the connector from the
driver airbag or to disconnect the horn switch to
steering wheel wire harness connection. Improper
pulling on this pigtail wire or connection can
result in damage to the horn switch membrane or
feed circuit.
2. Remove the driver airbag (2) (Refer to 8 - ELEC-
TRICAL/RESTRAINTS/DRIVER
AIRBAG
-
REMOVAL).
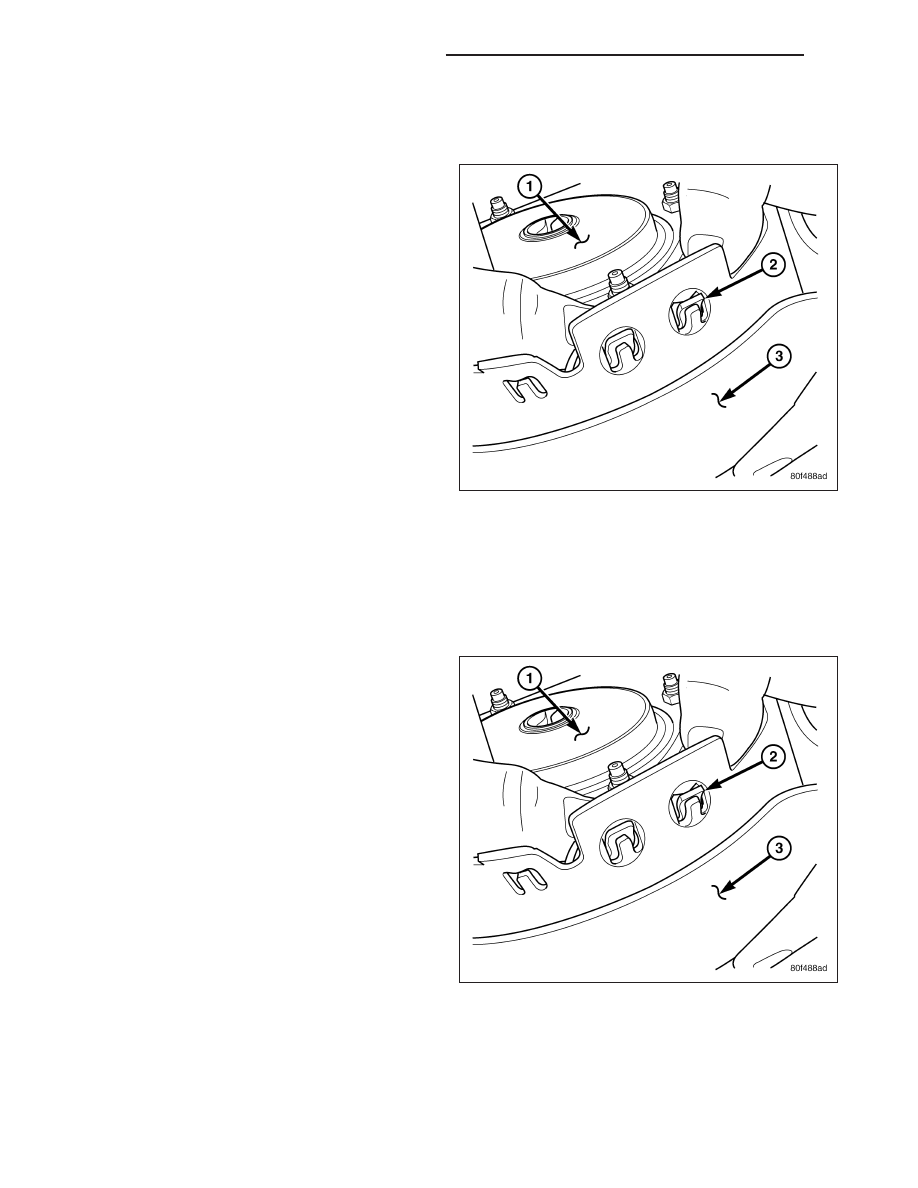
3. With driver airbag removed, pick a corner and push down on the inflator (1) or latch hook mounting plate until the
latch hooks (2) push out of the driver airbag cover (3).
4. Remove driver airbag from driver airbag cover.
5. The membrane type horn switch is integral to the driver airbag trim cover. If inoperative, the entire trim cover
must be replaced.
INSTALLATION
1. Place the driver airbag into new driver airbag trim
cover. Be careful not to pinch the airbag cushion
between the latch hook mounting plate and the trim
cover.
NOTE: Make sure that the horn switch wire har-
ness is routed through the cut-out on the side of
the trim cover and positioned in the hook on the
back of the housing. Attach connector to the
housing.
2. Push down on the latch hook mounting plate and
guide the latch hooks into the slots on the driver
airbag cover.
8O - 386
RESTRAINTS - SERVICE INFORMATION
LX