Chrysler 300/300 Touring/300C, Dodge Magnum. Manual - part 255
BELT TENSIONER
DESCRIPTION
Correct drive belt tension is required to ensure opti-
mum performance of the belt (1) driven engine acces-
sories. If specified tension is not maintained, belt
slippage may cause; engine overheating, lack of
power steering assist, loss of air conditioning capacity,
reduced generator output rate, and greatly reduced
belt life.
It is not necessary to adjust belt tension on the 2.7L/
3.5L
or
5.7L/6.1L
engines.
These
engines
are
equipped with an automatic belt tensioner (2). The
tensioner maintains correct belt tension at all times.
Due to use of this belt tensioner (2), do not attempt to
use a belt tension gauge on these engines.
OPERATION
The automatic belt tensioner maintains belt tension by using internal spring pressure, a pivoting arm and pulley to
apply force against the drive belt.
REMOVAL
2.7L ENGINE
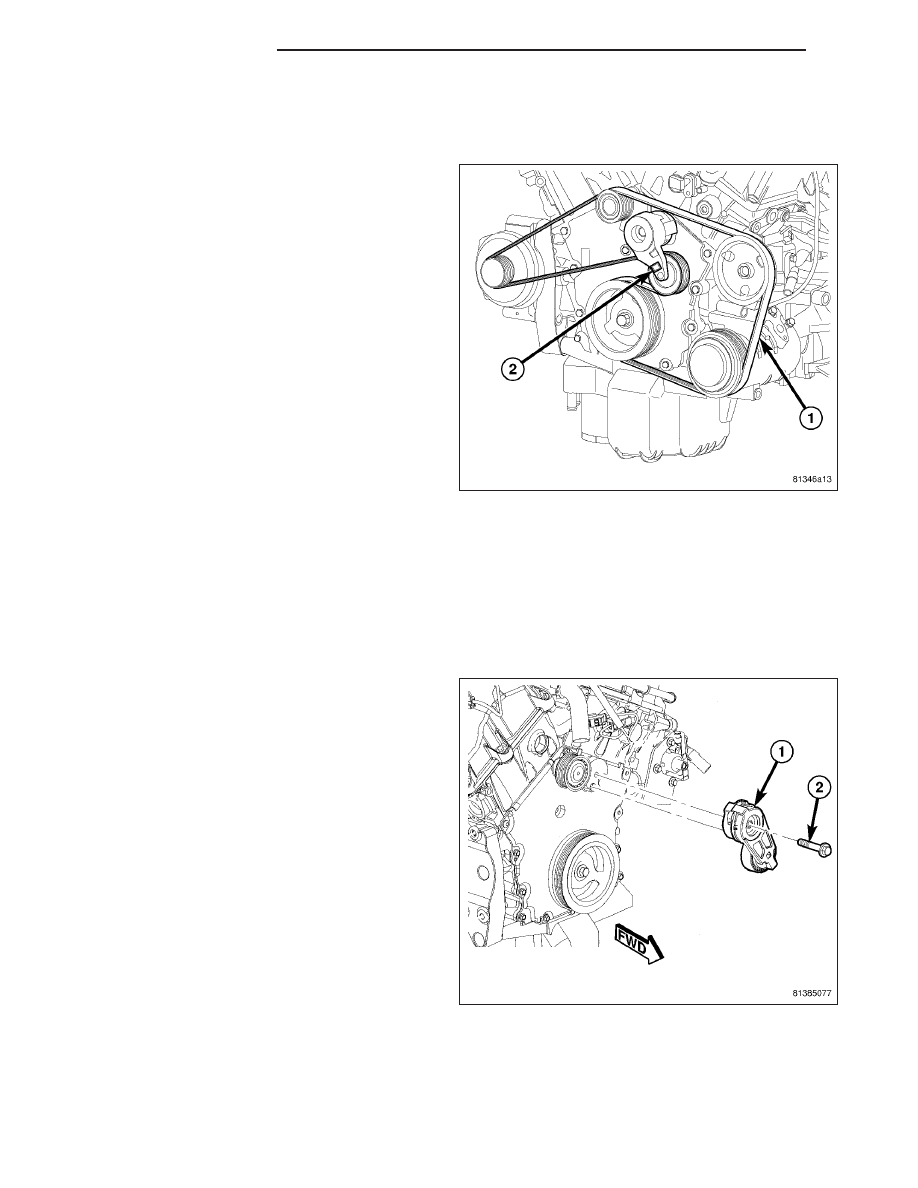
On all engines, the tensioner (1) is equipped with
an indexing tang on back of tensioner and an
indexing stop on tensioner housing. If a new belt
is being installed, tang must be within approxi-
mately 6 - 8mm (0.24 - 0.32 in.) of indexing stop
(i.e. tang is approximately between the two index-
ing stops). Belt is considered new if it has been
used 15 minutes or less.
If the above specification cannot be met, check for:
•
The wrong belt being installed (incorrect length/
width)
•
Worn bearings on an engine accessory (A/C
compressor, power steering pump, water pump,
idler pulley or generator)
•
Belt is not installed in pulley grooves
•
A pulley on an engine accessory being loose
•
Misalignment of an engine accessory
•
Belt incorrectly routed.
NOTE: A used belt should be replaced if tensioner indexing arrow has moved to the minimum tension indi-
cator. Tensioner travel stops at this point.
1. Remove accessory drive belt (Refer to 7 - COOLING/ACCESSORY DRIVE/DRIVE BELTS - REMOVAL).
7 - 24
ACCESSORY DRIVE
LX