Chrysler 300/300 Touring/300C, Dodge Magnum. Manual - part 253
STANDARD PROCEDURE
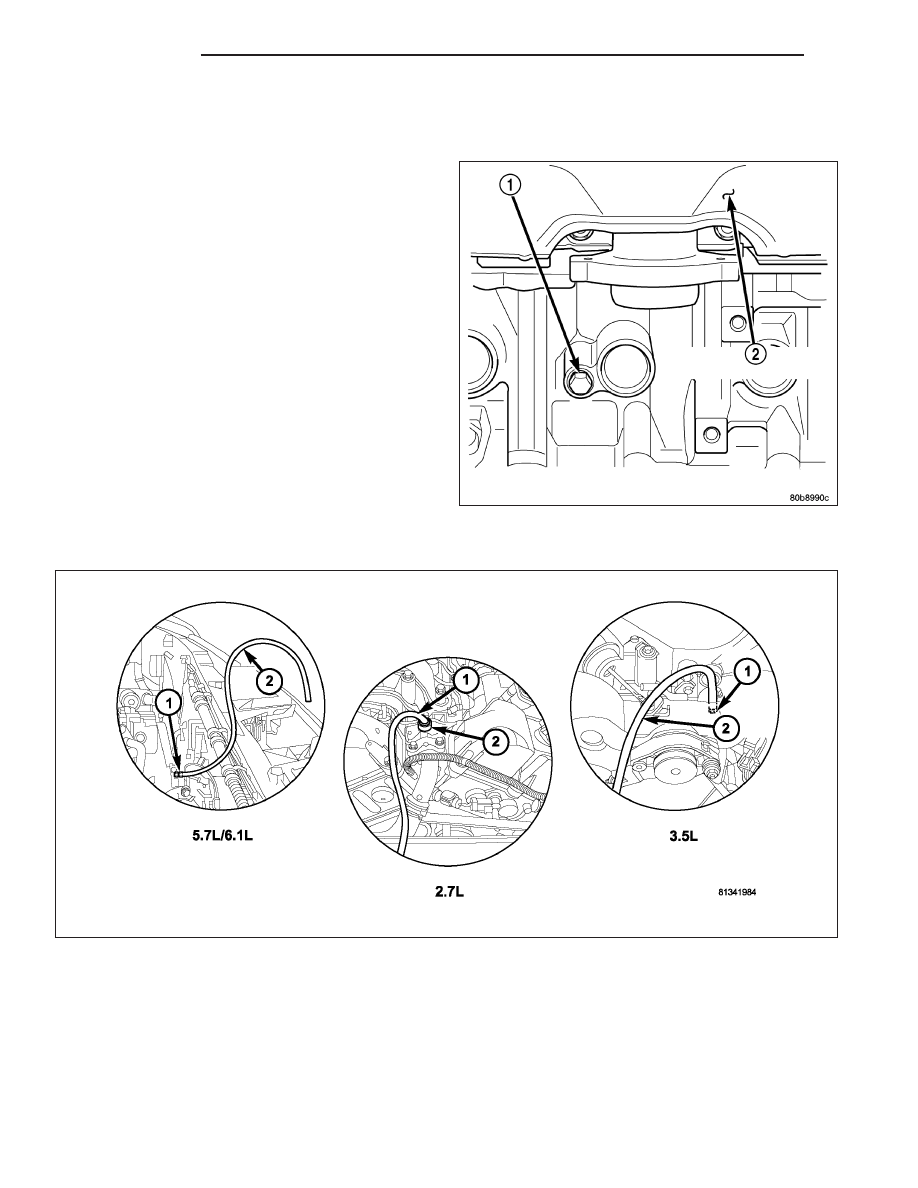
DRAINING COOLING SYSTEM - ALL ENGINES
WARNING: Do not remove cylinder block drain
plugs or loosen radiator draincock with system
hot and under pressure. Serious burns from cool-
ant can occur.
NOTE: Typical drain plug shown in illustration.
DO NOT WASTE reusable coolant. If solution is clean,
drain coolant into a clean container for reuse.
1. Remove radiator pressure cap.
2. Loosen radiator petcock.
3. Remove drain plug (1).
COOLING SYSTEM FILLING
The use of aluminum cylinder blocks, cylinder heads and water pumps requires special corrosion protection. In
order to maintain the required protection for these components and cooling system performance, only use the
appropriate fluid (Refer to LUBRICATION & MAINTENANCE/FLUID TYPES - DESCRIPTION) when servicing the
vehicle. This coolant offers the best engine cooling without corrosion when mixed with 50% distilled water to obtain
a freeze point of -37° C (-35° F). If it loses color or becomes contaminated, drain, flush, and replace with fresh
properly mixed coolant solution.
WARNING: Make sure engine cooling system is cool before removing pressure cap or any hose. severe
personal injury may result from escaping hot coolant. The cooling system is pressurized when hot.
7 - 16
COOLING
LX