Chrysler 300/300 Touring/300C, Dodge Magnum. Manual - part 1706


  Index      Chrysler     Chrysler 300/300 Touring/300C, Dodge Magnum - service repair manual


Search            


Content   ..  1704  1705  1706  1707   ..


Chrysler 300/300 Touring/300C, Dodge Magnum. Manual - part 1706


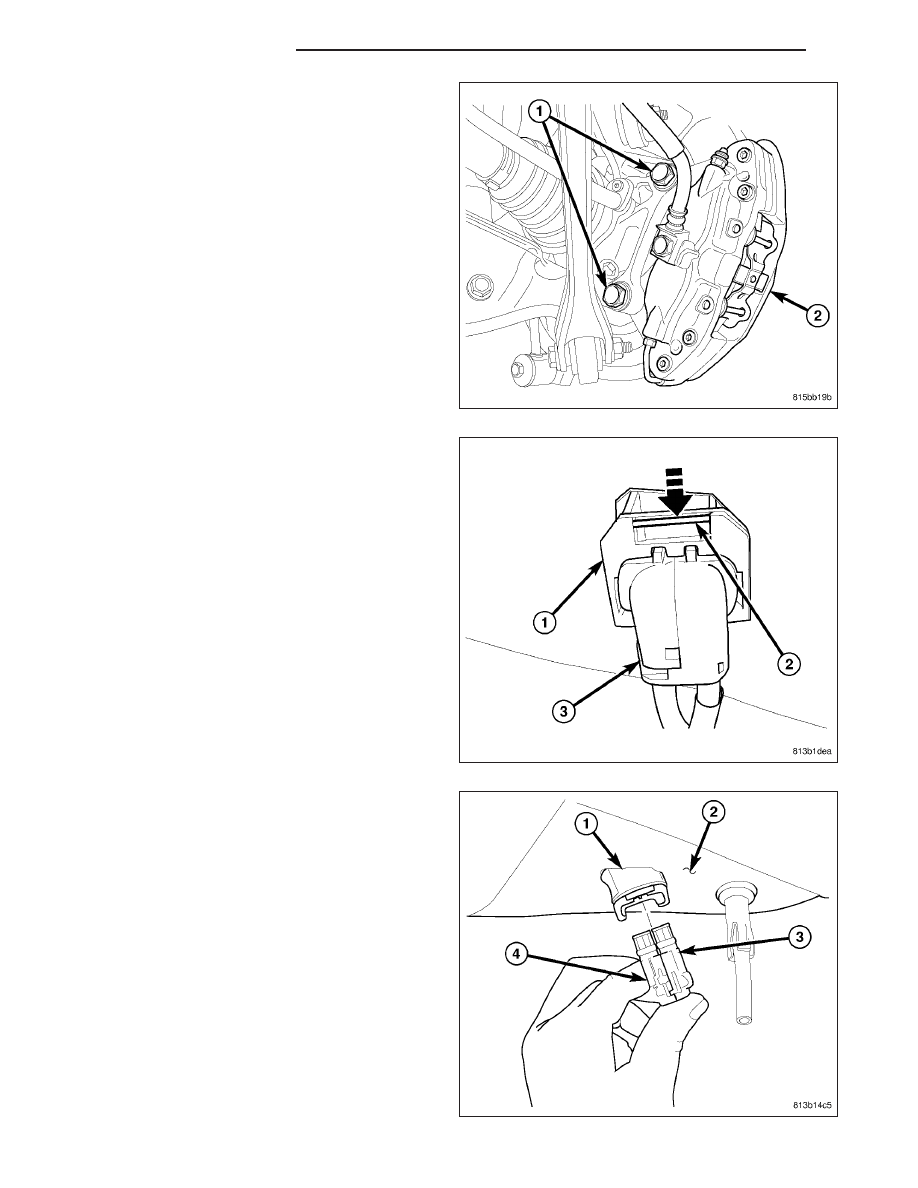
15. If equipped with SRT8 disc brakes, on each rear

disc brake, remove the lower and upper caliper
mounting bolts (1).

16. If equipped with SRT8 disc brakes, on each rear

disc brake, remove brake caliper (2) with pads
from knuckle and brake rotor. Hang assembly out
of way using wire or a bungee cord. Use care not
to overextend brake hose when doing this.

17. If equipped with SRT8 disc brakes, remove jack

from under spring link.

NOTE: To remove wheel speed sensor connector
from body wiring harness connector, move retain-
ing clip (2) and pull sensor connector outward.

18. Remove wheel speed sensor connectors (3 and

4) from body wiring harness connector (1) located
in luggage compartment floor pan (2).

13 - 24

FRAME & BUMPERS

LX

19. Unclip left wheel speed sensor cable (3) from

routing clip (1) near body connector.

20. On each side of vehicle, remove shock absorber

(1) lower mounting bolt (2) and nut (4).

21. Carefully mark location of rear crossmember on

body at all four mount (bushing) locations using a
marker or crayon. Do not use a scratch awl to
mark location.

22. Position an extra pair of jack stands under and

support forward end of engine cradle to help sta-
bilize

vehicle

during

rear

suspension

removal/installation.

LX

FRAME & BUMPERS

13 - 25

23. Position under-hoist utility jack or transmission

jack (2) under center of rear crossmember (1).
Raise jack head to contact crossmember and
secure in place.

WARNING: Before opening fuel system, review all
Warnings and Cautions.

24. Remove fuel filler tube. (Refer to 14 - FUEL SYS-

TEM/FUEL DELIVERY/FUEL TANK FILLER TUBE
- REMOVAL)

NOTE: If equipped with AWD, when removing
crossmember mounting bolts in following step, be
sure to not to misplace spacers (1) between cross-
member mounts (2) and body.

13 - 26

FRAME & BUMPERS

LX

25. Remove both front (3) and both rear (2) mounting

bolts fastening crossmember (1) in place.

26. Slowly lower crossmember using jack until crossmember is at a comfortable working level.

27. Remove coil springs and isolators (1, 2 and 5)

from spring links.

28. Remove bolt (1) from bushing prior to removal.

LX

FRAME & BUMPERS

13 - 27


Content   ..  1704  1705  1706  1707   ..