Chrysler Town & Country/Voyager, Dodge Caravan, Plymouth Voyager. Manual - part 85
FLUID LEVEL AND CONDITION
The transmission and differential sump have a
common oil sump with a communicating opening
between the two.
The torque converter fills in both the ‘‘P’’ Park and
‘‘N’’ Neutral positions. Place the selector lever in ‘‘P’’
Park to be sure that the fluid level check is accurate.
The engine should be running at idle speed for at
least one minute, with the vehicle on level
ground. This will assure complete oil level stabi-
lization between differential and transmission.
The fluid should be at normal operating temperature
(approximately 82 C. or 180 F.). The fluid level is
correct if it is in the ‘‘HOT’’ region (cross-hatched area)
on the oil level indicator.
Low fluid level can cause a variety of conditions
because it allows the pump to take in air along with the
fluid. As in any hydraulic system, air bubbles make the
fluid spongy, therefore, pressures will be low and build
up slowly.
Improper filling can also raise the fluid level too
high. When the transaxle has too much fluid, the gears
churn up foam and cause the same conditions which
occur with a low fluid level.
In either case, the air bubbles can cause over heat-
ing, fluid oxidation, and varnishing, which can inter-
fere with normal valve, clutch, and accumulator opera-
tion. Foaming can also result in fluid escaping from the
transaxle vent where it may be mistaken for a leak.
Along with fluid level, it is important to check the
condition of the fluid. When the fluid smells burned,
and is contaminated with metal or friction material
particles, a complete transaxle overhaul is needed. Be
sure to examine the fluid on the dipstick closely. If
there is any doubt about its condition, drain out a
sample for a double check.
After the fluid has been checked, seat the dipstick
fully to seal out water and dirt.
SELECTION OF LUBRICANT
It is important that the proper lubricant be used in
these transmissions. MOPAR
t ATF PLUS (Automatic
Transmission Fluid-Type 7176) should be used to aid in
assuring optimum transmission performance. Fluids of
the type labeled DEXRON II Automatic Transmission
Fluid is not recommended. DEXRON II can be used
only if the recommended fluid is not available. If more
than a small amount of Dexron fluid is used, shutter or
shift quality problems may be encountered. It is impor-
tant that the transmission fluid be maintained at the
prescribed level using the recommended fluids.
SPECIAL ADDITIVES
Chrysler Corporation does not recommend the addi-
tion of any fluids to the transmission, other than the
automatic transmission fluid listed above. An excep-
tion to this policy is the use of special dyes to aid in
detecting fluid leaks. The use of transmission sealers
should be avoided, since they may adversely affect
seals.
FLUID AND FILTER CHANGE
When the factory fill fluid is changed, only fluids of
the type labeled MOPAR
t ATF PLUS (Automatic
Transmission fluid) Type 7176 should be used. A filter
change should be made at the time of the oil change.
Also the magnet (on the inside of the oil pan) should be
cleaned with a clean, dry cloth.
If the transaxle is disassembled for any reason, the
fluid and filter should be changed.
FLUID DRAIN AND REFILL
(1) Raise vehicle on a hoist (See Lubrication, ‘‘Group
0’’). Place a drain container with a large opening, under
transaxle oil pan.
(2) Loosen pan bolts and tap the pan at one corner to
break it loose allowing fluid to drain, then remove the
oil pan.
(3) Install a new filter and O-ring on bottom of the
valve body.
(4) Clean the oil pan and magnet. Reinstall pan
using Mopar
t Silicone Rubber Adhesive Sealant or
equivalent. Tighten oil pan bolts to 19 N
Im (165 in.
lbs.).
(5) Pour four quarts of MOPAR
t ATF PLUS (Auto-
matic Transmission Fluid) Type 7176 through the fill
tube.
(6) Start engine and allow to idle for at least one
minute. Then, with parking and service brakes ap-
plied, move selector lever momentarily to each posi-
tion, ending in the park or neutral position.
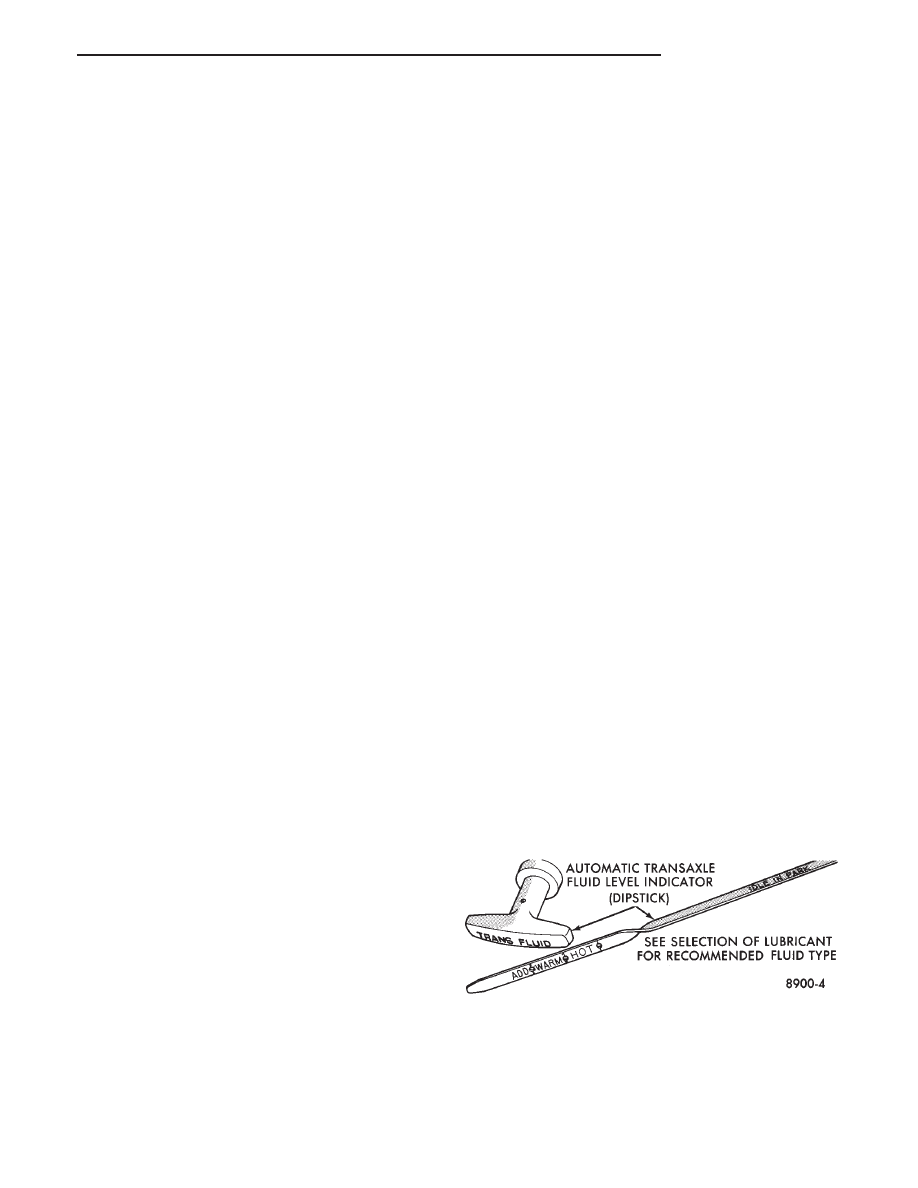
(7) Add sufficient fluid to bring level to 1/8 inch
below the ADD mark (Fig. 3).
Recheck fluid level after transaxle is at normal
operating temperature. The level should be in the HOT
region (Fig. 3).
To prevent dirt from entering transaxle, make cer-
tain that dipstick is seated into the dipstick fill tube
(Fig. 4).
Fig. 3 Oil Level Indicator
.
TRANSAXLE
21 - 89