Chevrolet Silverado / GMC Sierra. Manual - part 496
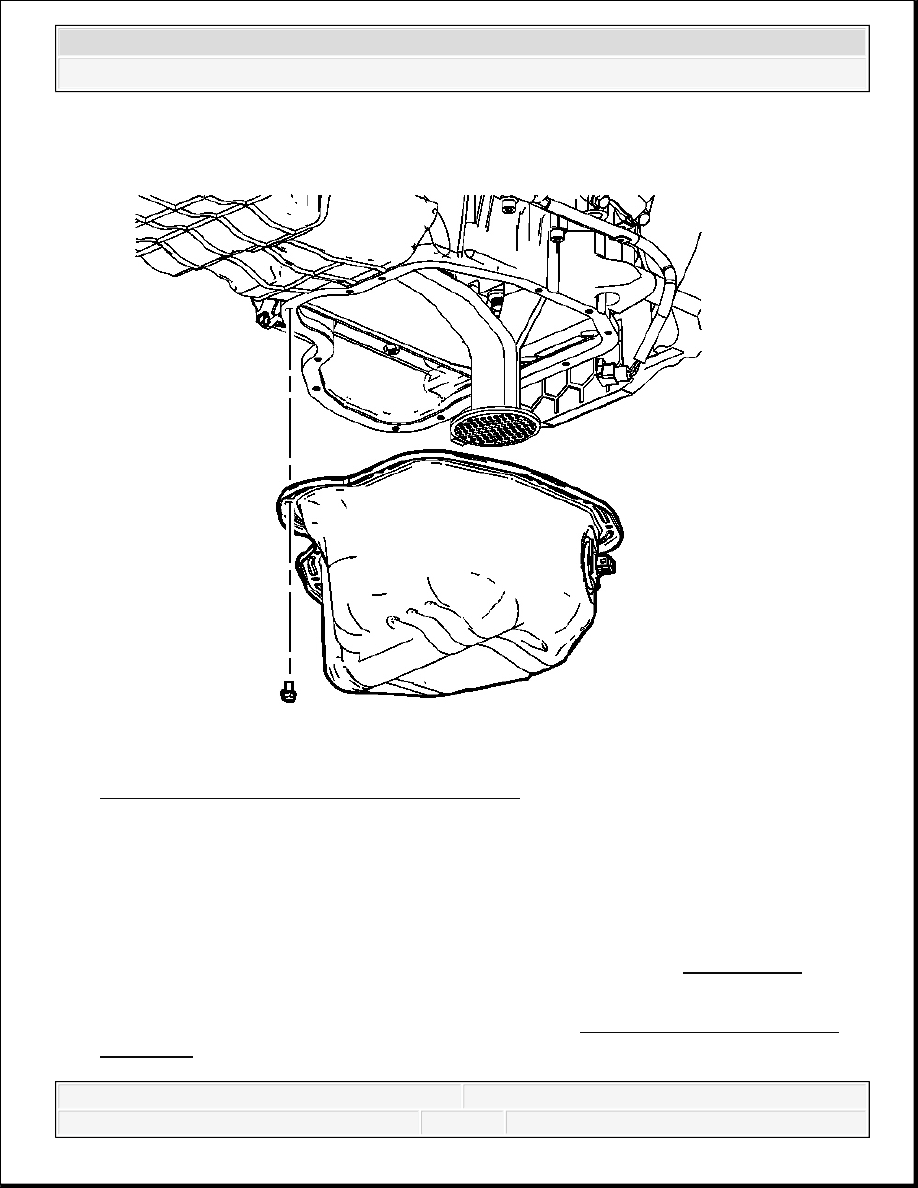
Fig. 287: View Of Lower Oil Pan & Bolts/Nuts
Courtesy of GENERAL MOTORS CORP.
9. Remove the lower oil pan bolts/nuts.
10. Separate the lower oil pan from the upper oil pan using J 37228 . See Special Tools .
11. Remove the lower oil pan.
12. If necessary, clean and inspect the lower oil pan. Refer to Lower Oil Pan Cleaning and
Inspection .
IMPORTANT: DO NOT damage the sealing surfaces when separating the
lower oil pan from the upper oil pan.
2008 Chevrolet Silverado 1500
2008 ENGINE Engine Mechanical - 6.6L - Cab & Chassis Sierra, Cab & Chassis Silverado, Sierra & Silverado

Installation Procedure
Fig. 288: Determining Sealant Bead Dimensions
Courtesy of GENERAL MOTORS CORP.
1. Apply a 2-3 mm (0.79-0.118 in) by 0.5-1.5 mm (0.02-0.06 in ) wide bead of sealant to the
lower oil pan mating surface. Refer to Sealers, Adhesives, and Lubricants for the correct
part number.
2008 Chevrolet Silverado 1500
2008 ENGINE Engine Mechanical - 6.6L - Cab & Chassis Sierra, Cab & Chassis Silverado, Sierra & Silverado

Fig. 289: View Of Lower Oil Pan & Bolts/Nuts
Courtesy of GENERAL MOTORS CORP.
2. Install the lower oil pan.
3. Install the lower oil pan bolts/nuts.
2008 Chevrolet Silverado 1500
2008 ENGINE Engine Mechanical - 6.6L - Cab & Chassis Sierra, Cab & Chassis Silverado, Sierra & Silverado

Fig. 290: Lower Oil Pan Bolts Tightening Sequence
Courtesy of GENERAL MOTORS CORP.
4. Tighten the oil pan bolts/nuts in the sequence shown.
NOTE:
Refer to Fastener Notice .
2008 Chevrolet Silverado 1500
2008 ENGINE Engine Mechanical - 6.6L - Cab & Chassis Sierra, Cab & Chassis Silverado, Sierra & Silverado