Chevrolet Silverado / GMC Sierra. Manual - part 277

Fig. 145: View Of Front Cover & Gasket
Courtesy of GENERAL MOTORS CORP.
1. Apply a 5 mm (0.20 in) bead of sealant 20 mm (0.80 in) long to the oil pan to engine block
junction. Refer to Sealers, Adhesives, and Lubricants for the correct part number.
2. Install the front cover gasket and cover.
3. Install the front cover bolts until snug. Do not overtighten.
Fig. 146: View Of Oil Pan-To-Front Cover Bolts
Courtesy of GENERAL MOTORS CORP.
4. Install the oil pan-to-front cover bolts until snug. Do not over tighten.
2008 Hummer H2
2008 ENGINE Engine Mechanical - 6.2L - H2
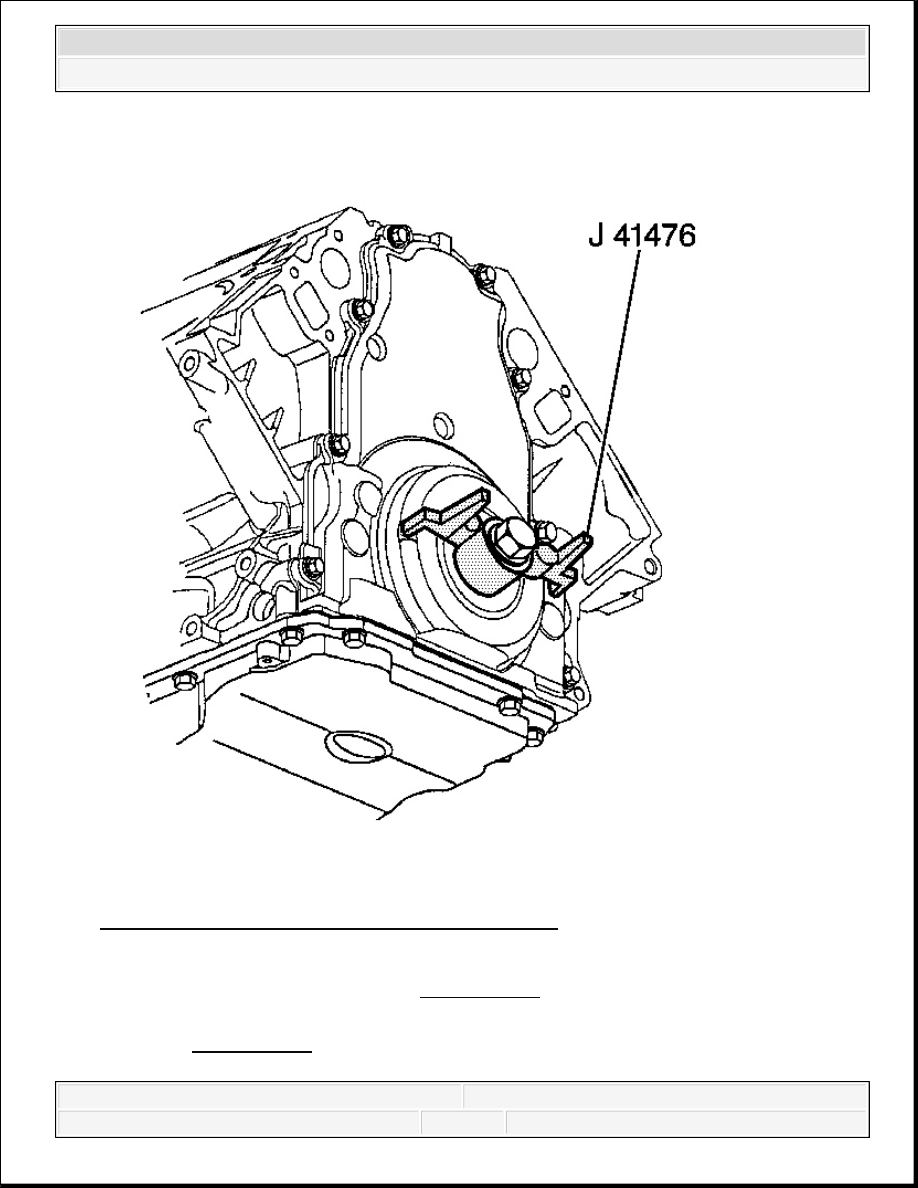
Fig. 147: View of J 41476 Installed To Front Cover
Courtesy of GENERAL MOTORS CORP.
5. Install J 41476 to the front cover. See Special Tools.
6. Align the tapered legs of the J 41476 with the machined alignment surfaces on the front
cover. See Special Tools.
2008 Hummer H2
2008 ENGINE Engine Mechanical - 6.2L - H2
7. Install the crankshaft balancer bolt until snug. Do not overtighten.
Tighten:
1. Tighten the oil pan to front cover bolts to 25 N.m (18 lb ft).
2. Tighten the engine front cover bolts to 25 N.m (18 lb ft).
8. Remove the J 41476 . See Special Tools.
9. Install a NEW crankshaft front oil seal. Refer to Crankshaft Front Oil Seal
Replacement.
10. Install the water pump. Refer to Water Pump Replacement .
CAMSHAFT POSITION ACTUATOR SOLENOID VALVE REPLACEMENT
Tools Required
J 45059 Angle Meter. See Special Tools.
Removal Procedure
NOTE:
Refer to Fastener Notice .
2008 Hummer H2
2008 ENGINE Engine Mechanical - 6.2L - H2

Fig. 148: View Of CMP Actuator Solenoid Valve
Courtesy of GENERAL MOTORS CORP.
1. Remove the camshaft position (CMP) actuator magnet. Refer to Camshaft Position
Actuator Magnet Replacement.
2. Remove and discard the CMP actuator solenoid valve.
Installation Procedure
2008 Hummer H2
2008 ENGINE Engine Mechanical - 6.2L - H2