Content .. 2330 2331 2332 2333 ..
Chevrolet Silverado / GMC Sierra. Manual - part 2332
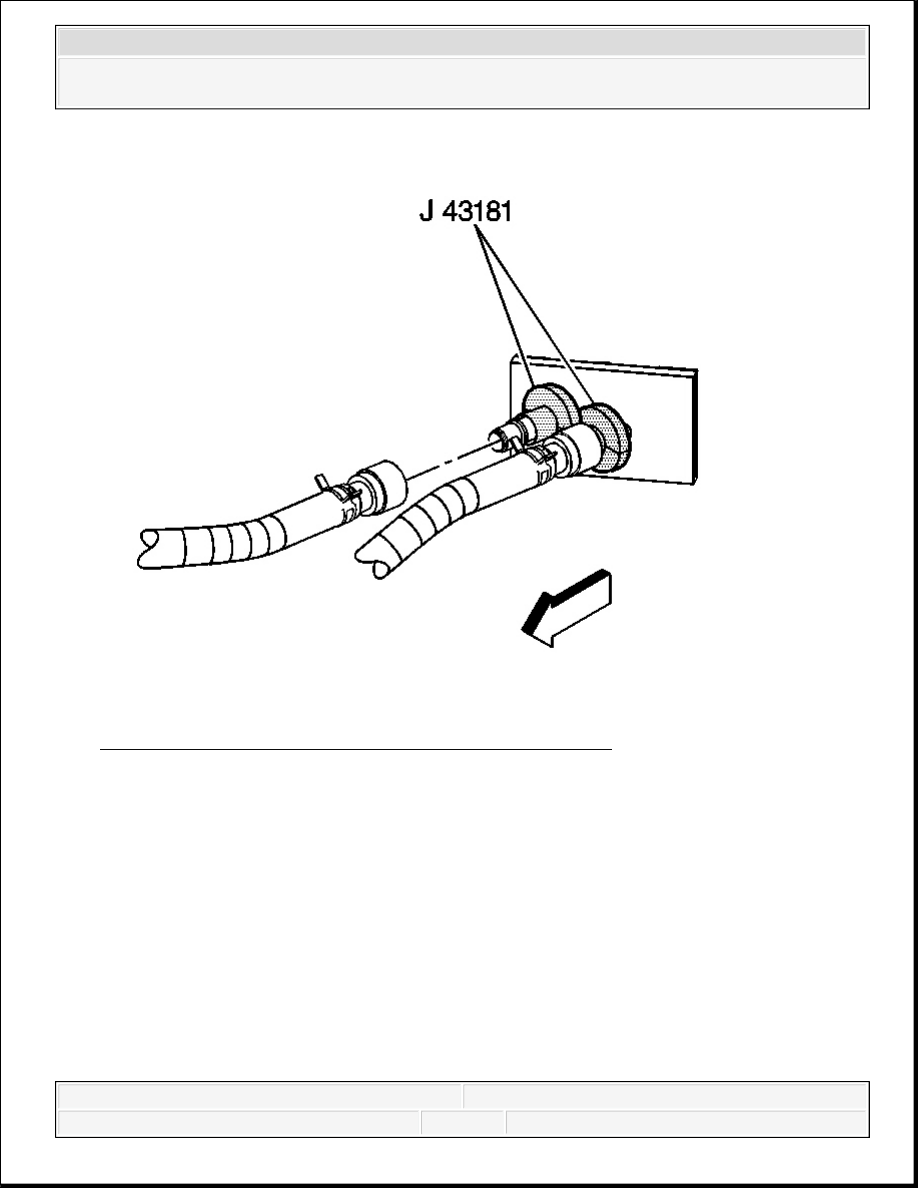
Fig. 72: Identifying Heater Hose To Heater Core Fittings
Courtesy of GENERAL MOTORS CORP.
2. Using the J 43181 disconnect the inlet heater hose from the heater core.
1. Install the J 43181 to the heater core pipe.
2. Close the tool around the heater core pipe.
3. Firmly pull the tool into the quick connect end of the heater hose.
4. Firmly grasp the heater hose. Pull the heater hose forward in order to disengage the
inlet hose from the heater core.
3. Using the J 43181 disconnect the surge tank outlet hose from the heater core.
1. Install the J 43181 to the heater core pipe.
2. Close the tool around the heater core pipe.
3. Firmly pull the tool into the quick connect end of the heater hose.
2008 Chevrolet Silverado 1500
2008 HVAC Heating, Ventilation, and Air Conditioning - Cab & Chassis Sierra, Cab & Chassis Silverado, Sierra &
Silverado
4. Firmly grasp the heater hose. Pull the heater hose forward in order to disengage the
surge tank outlet hose from the heater core.
4. Remove the upper intake manifold sight shield. Refer to Upper Intake Manifold Sight
Shield Replacement .
5. Remove the battery. Refer to Battery Replacement .
6. Remove the accumulator. Refer to Air Conditioning Accumulator Replacement (Non-
HP2).
7. Remove the instrument panel to the service position. Refer to Instrument Panel Service
Positioning (Without SLT) or Instrument Panel Service Positioning (With SLT) .
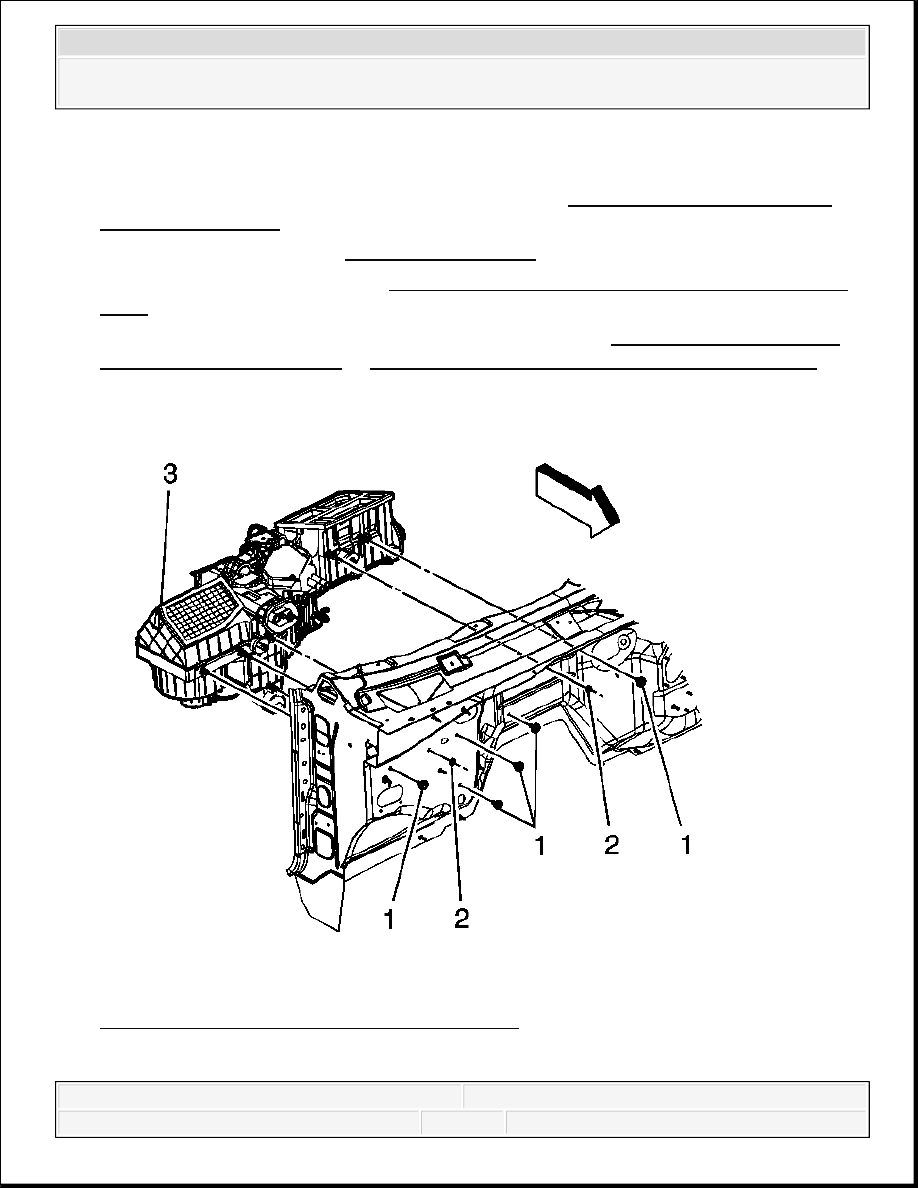
Fig. 73: View Of HVAC Module, Nuts & Bolts
Courtesy of GENERAL MOTORS CORP.
2008 Chevrolet Silverado 1500
2008 HVAC Heating, Ventilation, and Air Conditioning - Cab & Chassis Sierra, Cab & Chassis Silverado, Sierra &
Silverado
8. Remove the nuts (2) from the HVAC module (3).
9. Remove the bolts (1) from the HVAC module (3).
10. Remove the HVAC module (3).
Installation Procedure
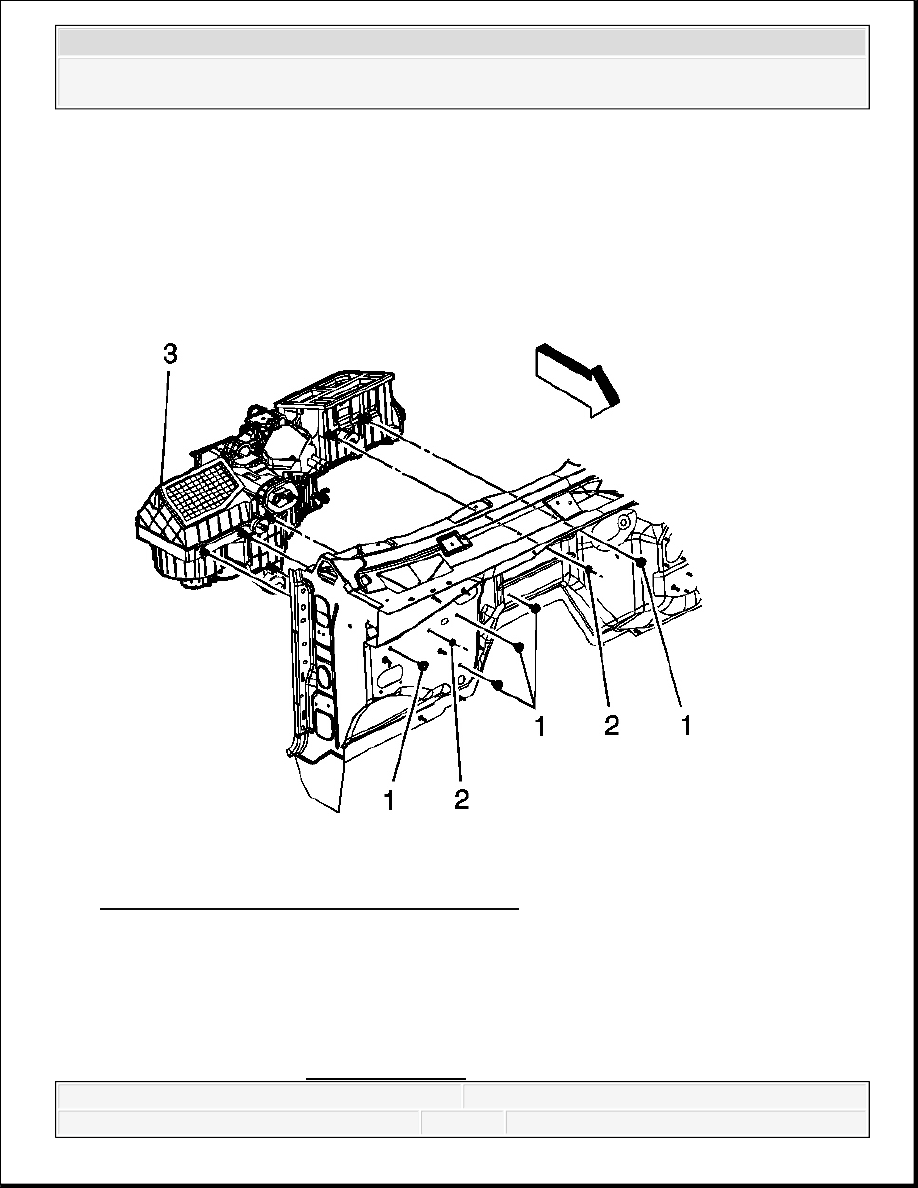
Fig. 74: View Of HVAC Module, Nuts & Bolts
Courtesy of GENERAL MOTORS CORP.
1. If replacing the HVAC module, transfer the components from the old HVAC module as
necessary.
2. Install the HVAC module (3).
NOTE:
Refer to Fastener Notice .
2008 Chevrolet Silverado 1500
2008 HVAC Heating, Ventilation, and Air Conditioning - Cab & Chassis Sierra, Cab & Chassis Silverado, Sierra &
Silverado
3. Install the nuts (2) to the HVAC module (3).
Tighten: Tighten the nuts to 9 N.m (80 lb in).
4. Install the bolts (1) to the HVAC module (3).
Tighten: Tighten the bolts to 4 N.m (35 lb in).
5. Connect the electrical harness and the ground connections.
6. Install the HVAC module drain hose.
7. Install the instrument panel. Refer to Instrument Panel Service Positioning (Without
SLT) or Instrument Panel Service Positioning (With SLT) .
8. Install the upper intake manifold sight shield. Refer to Upper Intake Manifold Sight
Shield Replacement .
9. Install the battery. Refer to Battery Replacement .
10. Install the accumulator. Refer to Air Conditioning Accumulator Replacement (Non-
HP2).
2008 Chevrolet Silverado 1500
2008 HVAC Heating, Ventilation, and Air Conditioning - Cab & Chassis Sierra, Cab & Chassis Silverado, Sierra &
Silverado
Content .. 2330 2331 2332 2333 ..