Content .. 2321 2322 2323 2324 ..
Chevrolet Silverado / GMC Sierra. Manual - part 2323
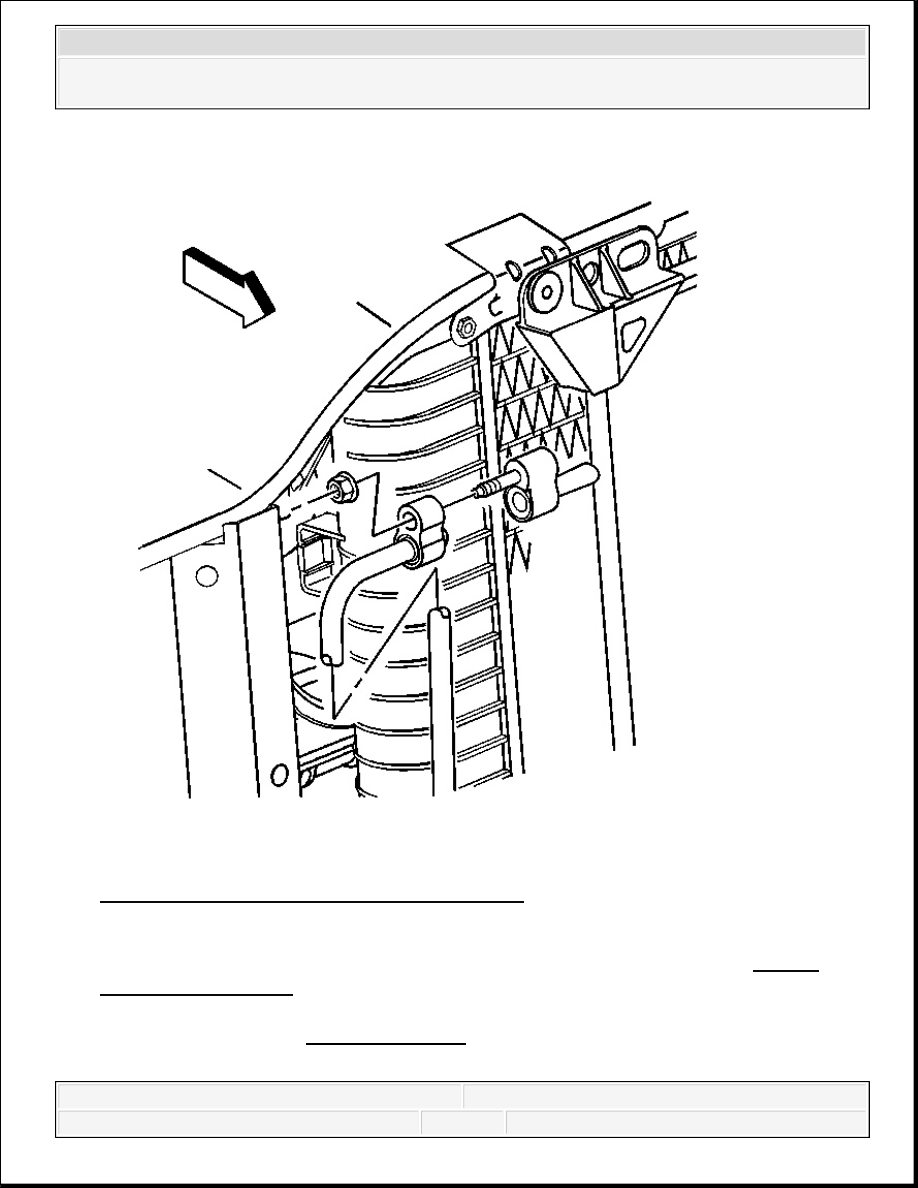
Fig. 44: View Of Discharge Hose At Condenser
Courtesy of GENERAL MOTORS CORP.
3. Install the discharge hose to the condenser using new sealing washers. Refer to Sealing
Washer Replacement.
NOTE:
Refer to Fastener Notice .
2008 Chevrolet Silverado 1500
2008 HVAC Heating, Ventilation, and Air Conditioning - Cab & Chassis Sierra, Cab & Chassis Silverado, Sierra &
Silverado
4. Install the discharge hose nut to the condenser.
Tighten: Tighten the nut to 16 N.m (12 lb ft).
5. Install the upper air baffle. Refer to Radiator Air Upper Baffle and Deflector
Replacement .
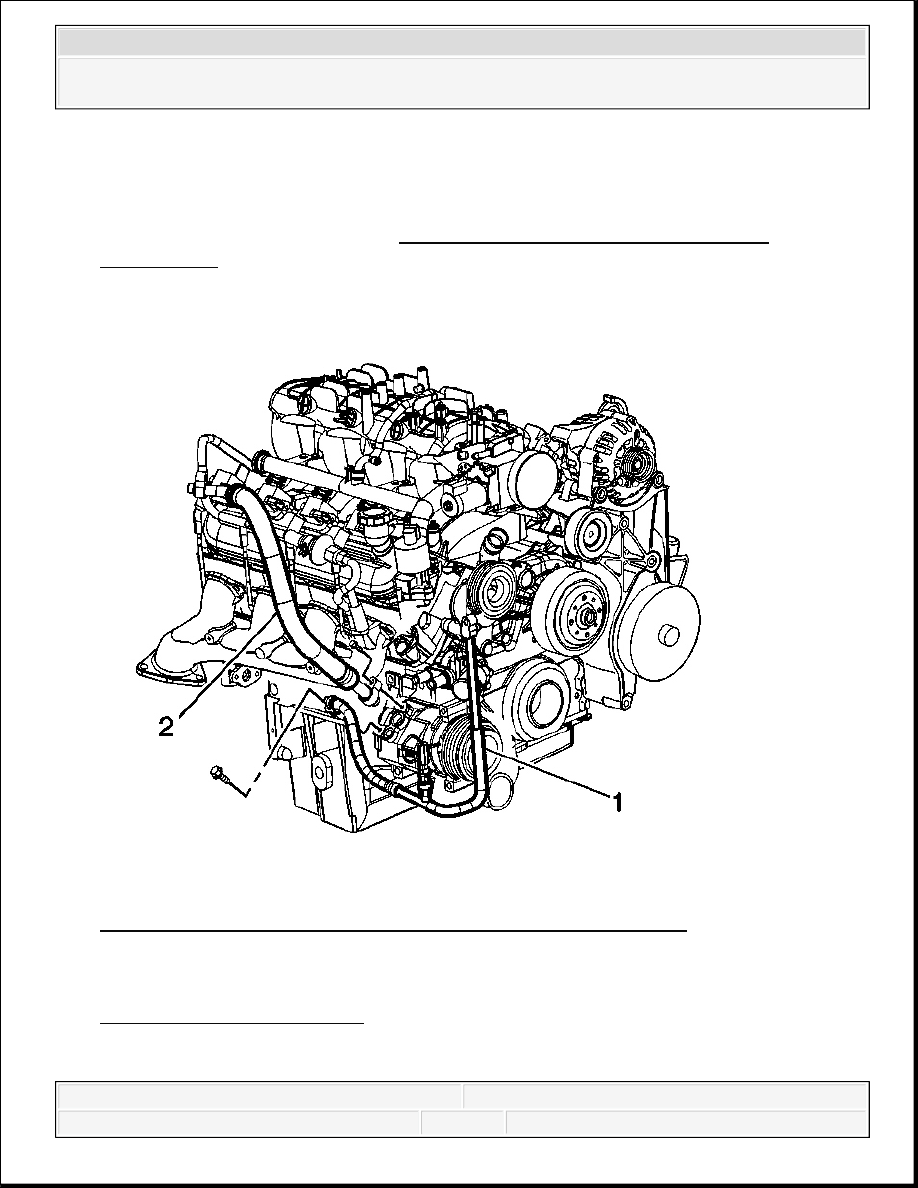
Fig. 45: Identifying Suction/Discharge Hoses To A/C Compressor
Courtesy of GENERAL MOTORS CORP.
6. Install the discharge hose (1) to the A/C compressor using new sealing washers. Refer to
Sealing Washer Replacement.
7. Install the discharge hose mounting bolt.
2008 Chevrolet Silverado 1500
2008 HVAC Heating, Ventilation, and Air Conditioning - Cab & Chassis Sierra, Cab & Chassis Silverado, Sierra &
Silverado
Tighten: Tighten the bolt to 16 N.m (12 lb ft).
8. Evacuate and recharge the A/C system. Refer to Refrigerant Recovery and Recharging.
9. Leak test the fittings of the component using the J 39400-A . See Special Tools.
DISCHARGE HOSE REPLACEMENT (LMM)
Tools Required
J 39400-A Halogen Leak Detector. See Special Tools.
Removal Procedure
1. Recover the refrigerant. Refer to Refrigerant Recovery and Recharging.
2008 Chevrolet Silverado 1500
2008 HVAC Heating, Ventilation, and Air Conditioning - Cab & Chassis Sierra, Cab & Chassis Silverado, Sierra &
Silverado
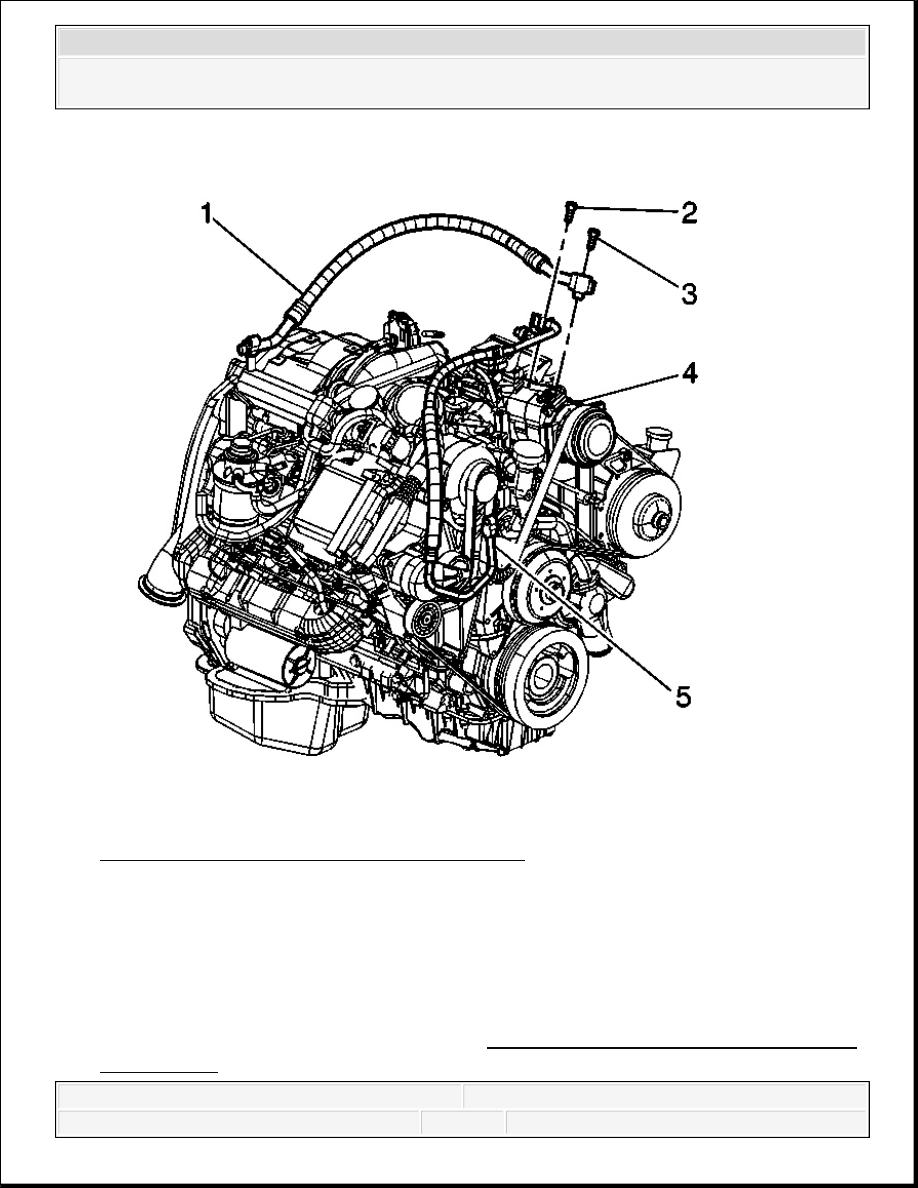
Fig. 46: View Of Discharge Hose & Connectors
Courtesy of GENERAL MOTORS CORP.
2. Remove the discharge hose mounting bolt (2) from the A/C compressor.
Discard the bolt.
3. Remove the discharge hose (5) from the A/C compressor.
4. Remove the upper radiator air baffle. Refer to Radiator Air Upper Baffle and Deflector
Replacement .
2008 Chevrolet Silverado 1500
2008 HVAC Heating, Ventilation, and Air Conditioning - Cab & Chassis Sierra, Cab & Chassis Silverado, Sierra &
Silverado
Content .. 2321 2322 2323 2324 ..