Content .. 2314 2315 2316 2317 ..
Chevrolet Silverado / GMC Sierra. Manual - part 2316
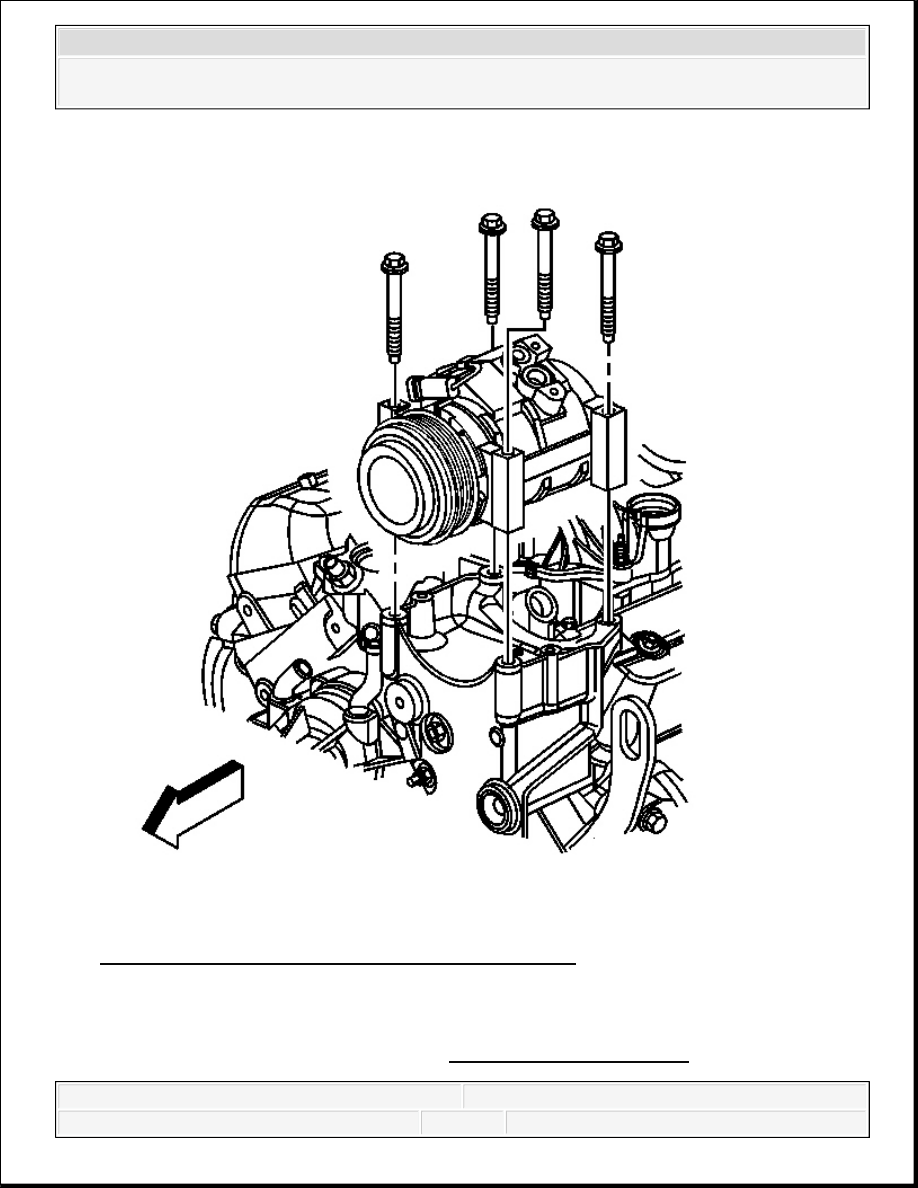
Fig. 19: View Of A/C Compressor & Mounting Bolts
Courtesy of GENERAL MOTORS CORP.
10. Remove the A/C compressor mounting bolts.
11. If replacing the A/C compressor. Refer to Compressor Oil Balancing.
2008 Chevrolet Silverado 1500
2008 HVAC Heating, Ventilation, and Air Conditioning - Cab & Chassis Sierra, Cab & Chassis Silverado, Sierra &
Silverado

Installation Procedure
Fig. 20: View Of A/C Compressor & Mounting Bolts
Courtesy of GENERAL MOTORS CORP.
1. Remove the caps or tape from the hose and line ends.
2008 Chevrolet Silverado 1500
2008 HVAC Heating, Ventilation, and Air Conditioning - Cab & Chassis Sierra, Cab & Chassis Silverado, Sierra &
Silverado
2. Install the A/C compressor.
3. Install the A/C compressor mounting bolts.
Tighten: Tighten the bolts to 50 N.m (37 lb ft).
4. Connect the electrical connection.
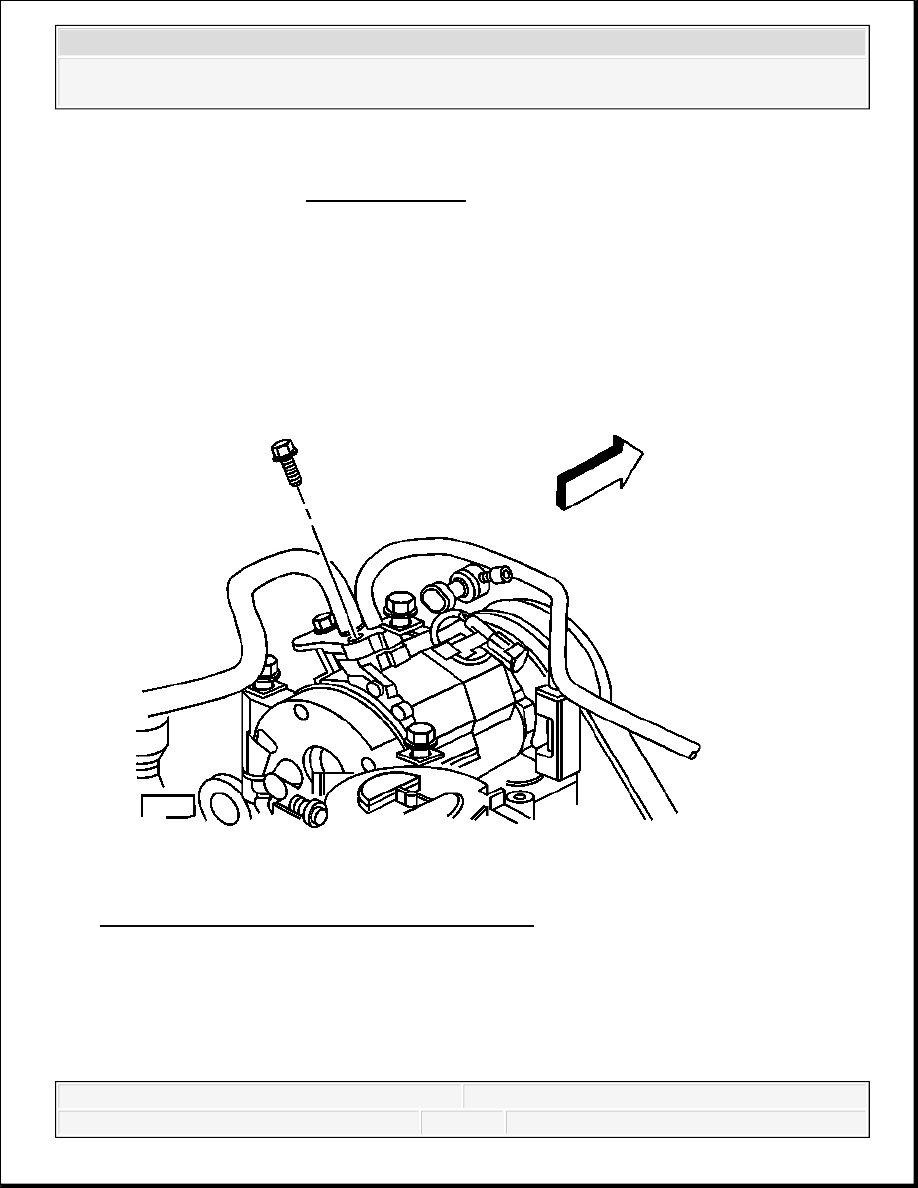
Fig. 21: View Of Discharge & Suction Hose Bolt
Courtesy of GENERAL MOTORS CORP.
5. Install the A/C discharge and suction hose to the compressor using new sealing washers.
6. Install the A/C discharge and suction hose bolt to the A/C compressor.
Tighten: Tighten the bolt to 16 N.m (12 lb ft).
NOTE:
Refer to Fastener Notice .
2008 Chevrolet Silverado 1500
2008 HVAC Heating, Ventilation, and Air Conditioning - Cab & Chassis Sierra, Cab & Chassis Silverado, Sierra &
Silverado
7. Install the drive belt. Refer to Drive Belt Replacement .
8. Evacuate and recharge the A/C system. Refer to Refrigerant Recovery and Recharging.
9. Leak test the fittings of the component using the J 39400-A . See Special Tools.
COMPRESSOR CLUTCH PLATE/HUB ASSEMBLY REPLACEMENT (4.3L, 6.6L)
Removal Procedure
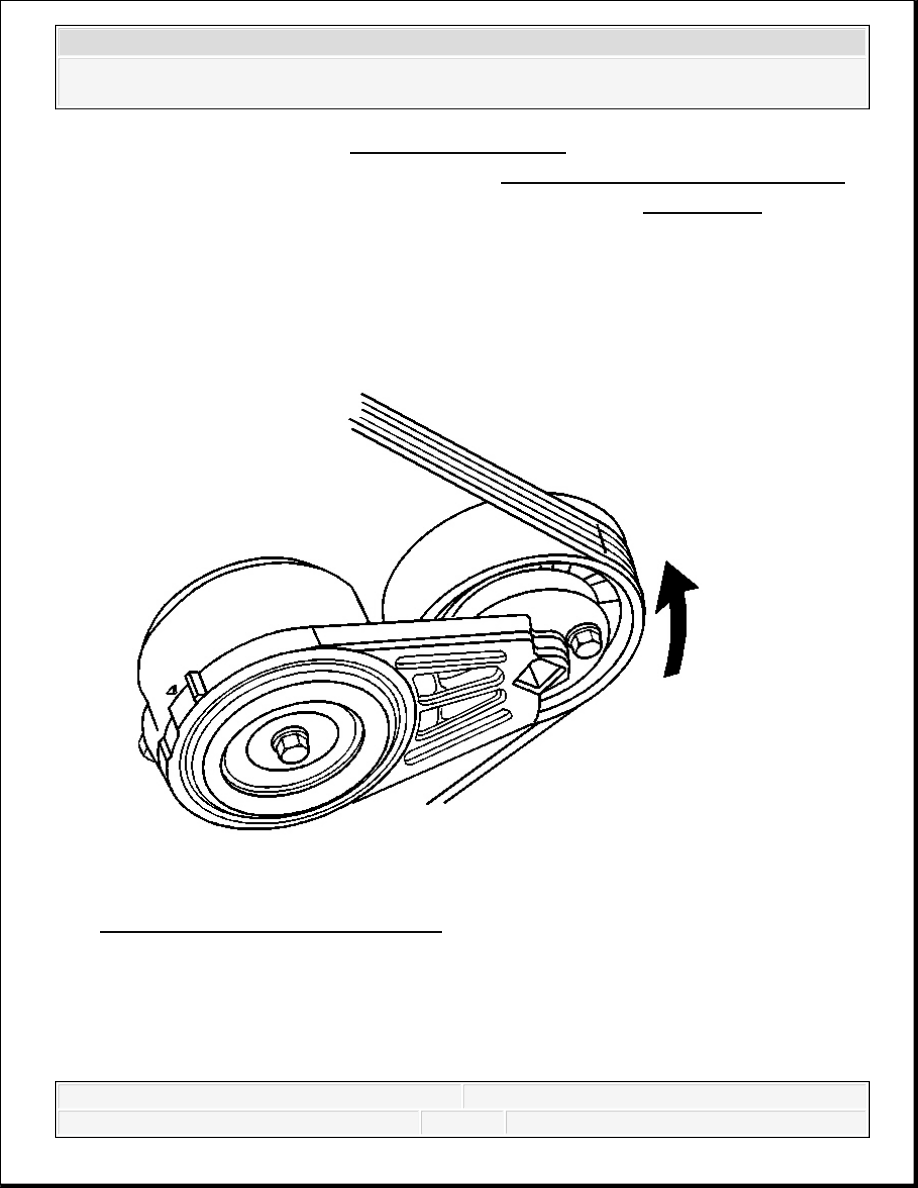
Fig. 22: View Of Drive Belt Tensioner
Courtesy of GENERAL MOTORS CORP.
1. Install a ratchet into the air conditioning belt tensioner adapter opening.
2. Rotate the belt tensioner counterclockwise in order to relieve the tension on the belt.
3. Remove the belt from the air conditioning (A/C) compressor.
2008 Chevrolet Silverado 1500
2008 HVAC Heating, Ventilation, and Air Conditioning - Cab & Chassis Sierra, Cab & Chassis Silverado, Sierra &
Silverado
Content .. 2314 2315 2316 2317 ..