Chevrolet Silverado / GMC Sierra. Manual - part 1298


  Index      Chevrolet     Chevrolet Silverado / GMC Sierra - service repair manual 2007-2009 year


Search            


Content   ..  1296  1297  1298  1299   ..


Chevrolet Silverado / GMC Sierra. Manual - part 1298


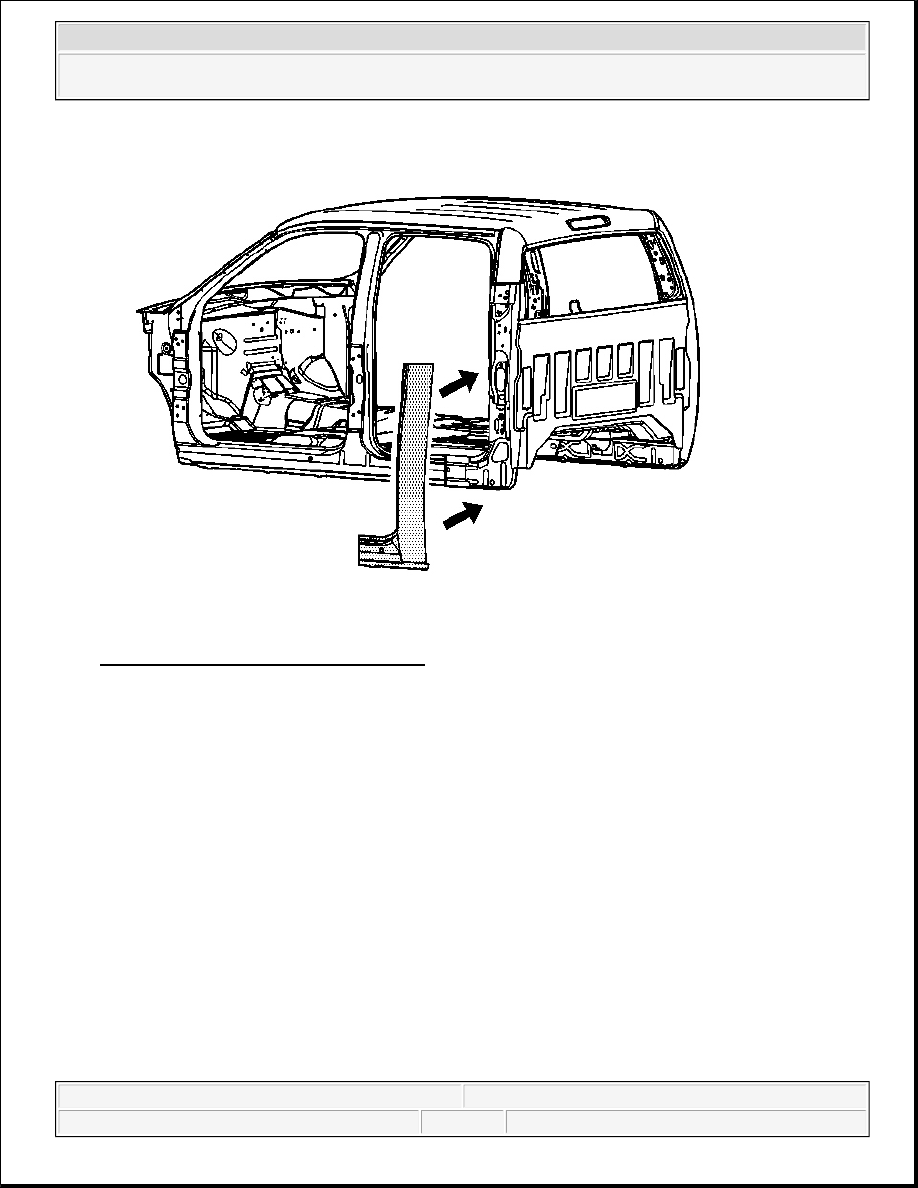
Fig. 107: View Of New Rear Pillar Section 
Courtesy of GENERAL MOTORS CORP. 

8. Position the rear pillar to the vehicle using 3-dimensional measuring equipment. Clamp in place. 


2008 Chevrolet Silverado 1500 

2008 ACCESSORIES & EQUIPMENT Collision Repair - - Cab & Chassis Sierra, Cab & Chassis Silverado, Sierra & 

Silverado


Microsoft 


Friday, August 21, 2009 2:21:00 PM

Page 118 

© 2005 Mitchell Repair Information Company, LLC. 

Fig. 108: Plug Welding Seams 
Courtesy of GENERAL MOTORS CORP. 

9. Plug weld accordingly. 

10. Clean and prepare all welded surfaces.  

11. Apply the sealers and anti-corrosion materials to the repair area, as necessary. Refer to Anti-Corrosion 

Treatment and Repair .  

12. Paint the repair area. Refer to Basecoat/Clearcoat Paint Systems .  

13. Install all related panels and components.  

14. Connect the negative battery cable. Refer to Battery Negative Cable Disconnection and Connection 

(w/Single Battery) or Battery Negative Cable Disconnection and Connection (w/Auxiliary Battery) 
or Battery Negative Cable Disconnection and Connection (w/Dual Batteries) .  

IMPORTANT: To create a solid weld with minimum heat distortion, make 25 mm (1 in) 

stitch welds along the seam with 25 mm (1 in) gaps between them. 
Complete the stitch weld.


2008 Chevrolet Silverado 1500 

2008 ACCESSORIES & EQUIPMENT Collision Repair - - Cab & Chassis Sierra, Cab & Chassis Silverado, Sierra & 

Silverado


Microsoft 


Friday, August 21, 2009 2:21:00 PM

Page 119 

© 2005 Mitchell Repair Information Company, LLC. 

15. Enable the SIR system. Refer to SIR Disabling and Enabling .  

PICKUP BOX FRONT END PANEL REPLACEMENT 

Removal Procedure 

1. Remove the pickup box assembly. Refer to Pickup Box Replacement .  

2. Restore as much damage as possible.  

3. Note the location and remove the sealers and anti-corrosion materials from the repair area as necessary. 

Refer to Anti-Corrosion Treatment and Repair . 

Fig. 109: Drilling Out Pickup Box Front Panel Factory Welds 
Courtesy of GENERAL MOTORS CORP. 

4. Locate and drill out all factory welds. Note the location of the welds for installation of the service part.  

5. Remove the front panel.  

Installation Procedure 

CAUTION: Refer to Approved Equipment for Collision Repair Caution .


2008 Chevrolet Silverado 1500 

2008 ACCESSORIES & EQUIPMENT Collision Repair - - Cab & Chassis Sierra, Cab & Chassis Silverado, Sierra & 

Silverado


Microsoft 


Friday, August 21, 2009 2:21:00 PM

Page 120 

© 2005 Mitchell Repair Information Company, LLC. 

Fig. 110: Drilling Pickup Box Front Panel Plug Weld Holes 
Courtesy of GENERAL MOTORS CORP. 

1. Drill 8 mm (5/16 in) plug weld holes in the service part as necessary in the locations noted from the 

original part. Prepare all mating surfaces as necessary.  

2. Apply GM-approved Weld-Thru Coating or equivalent to all mating surfaces. Refer to Anti-Corrosion 

Treatment and Repair .  

3. Align the service part to the pickup box. 


2008 Chevrolet Silverado 1500 

2008 ACCESSORIES & EQUIPMENT Collision Repair - - Cab & Chassis Sierra, Cab & Chassis Silverado, Sierra & 

Silverado


Microsoft 


Friday, August 21, 2009 2:21:00 PM

Page 121 

© 2005 Mitchell Repair Information Company, LLC. 


Content   ..  1296  1297  1298  1299   ..