Chery Tiggo. Manual - part 399


  Index      Chery     Chery Tiggo - service repair manual 2009 year


Search            


Content   ..  397  398  399  400   ..


Chery Tiggo. Manual - part 399


3. Disconnect the electrical connectors.

4. Remove the radio.

5. Installation is in the reverse order of removal.

6 CD Changer

Removal & Installation

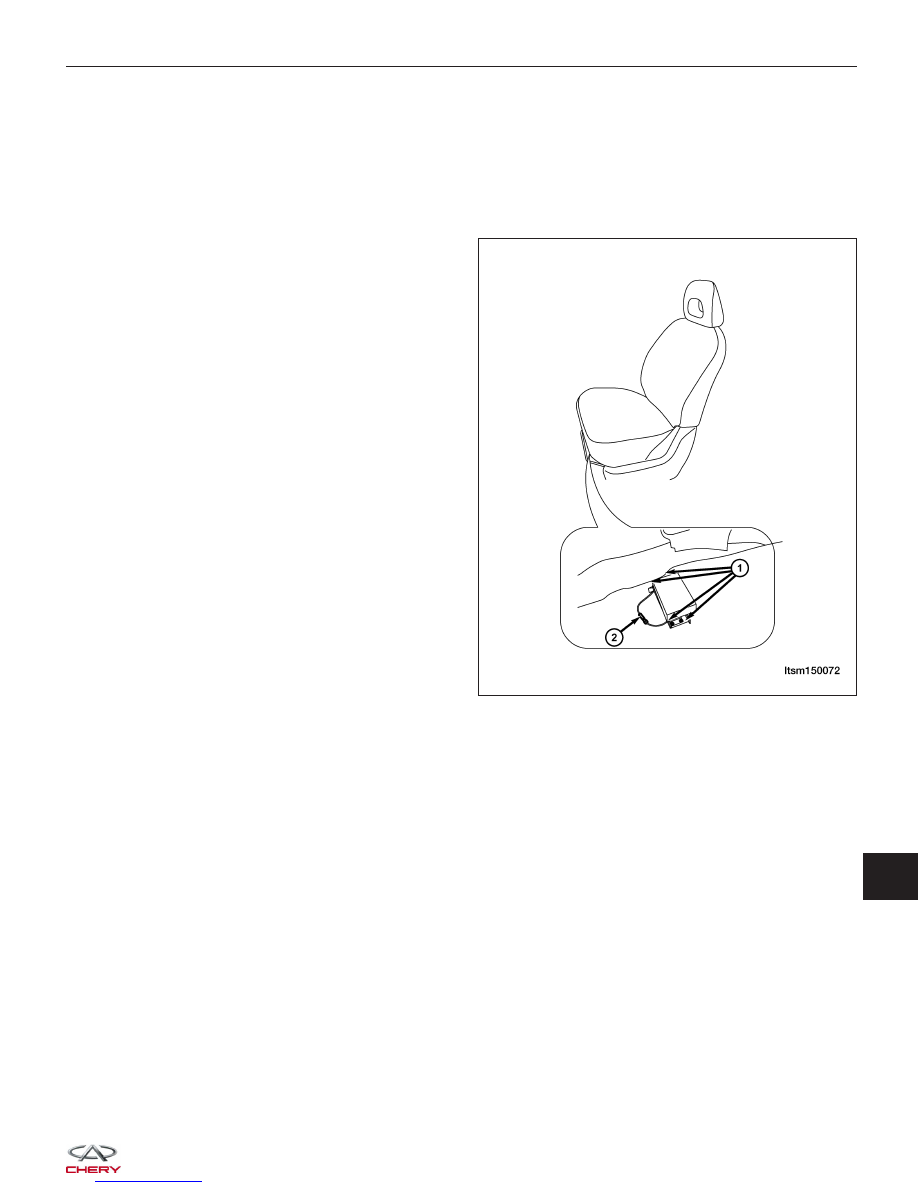
1. Remove the passenger seat.

2. Remove the CD changer 4 mounting bolts (1).

(Tighten: CD changer mounting bolts to 9 ± 3 N·m)

3. Disconnect the CD changer electrical connector

(2).

4. Remove the CD changer.

5. Installation is in the reverse order of removal.

AUDIO SYSTEM

LTSM150072

15


Antenna

Removal & Installation

1. Disconnect the negative battery cable.

2. Pull the rear edge of the headliner down.

3. Disconnect the antenna electrical connector.

4. Remove the antenna mounting nut (1).

5. Installation in the reverse order of removal.

AUDIO SYSTEM

LTSM150073


BODY INTERIOR TRIM

A-Pillar Trim Panel

Removal & Installation

1. Grasp the trim panel and gently pull it away to

release the retaining clips.

2. Using a trim stick, remove the A-pillar trim panel.

3. Installation is in the reverse order of removal.

Installation Notes:
• The A-pillar trim panel retaining clips should be installed to allow the trim panel to fit tightly between the head-

liner and the weatherstrip.

B-Pillar Lower Trim Panel

Removal & Installation

1. Remove the front seat belt lower mounting bolt (1).

2. Using a trim stick, remove the lower trim panel from the B-pillar.

3. Installation is in the reverse order of removal.

BESM150123

LTSM150076

15


B-Pillar Upper Trim Panel

Removal & Installation

1. Remove the front seat belt upper mounting bolt (1).

2. Using a trim stick, remove the B-pillar upper trim panel.

3. Installation is in the reverse order of removal.

C-Pillar Lower Trim Panel

Removal & Installation

1. Remove the rear seat belt mounting bolt (2).

2. Remove the mounting screws (1) under the panel.

3. Remove the storage box.

4. Disconnect the power outlet electrical connector.

5. Using a trim stick, remove the lower trim panel.

6. Installation is in the reverse order of removal.

BODY INTERIOR TRIM

LTSM150077

LTSM150078


Content   ..  397  398  399  400   ..