Chery Tiggo. Manual - part 271


  Index      Chery     Chery Tiggo - service repair manual 2009 year


Search            


Content   ..  269  270  271  272   ..


Chery Tiggo. Manual - part 271


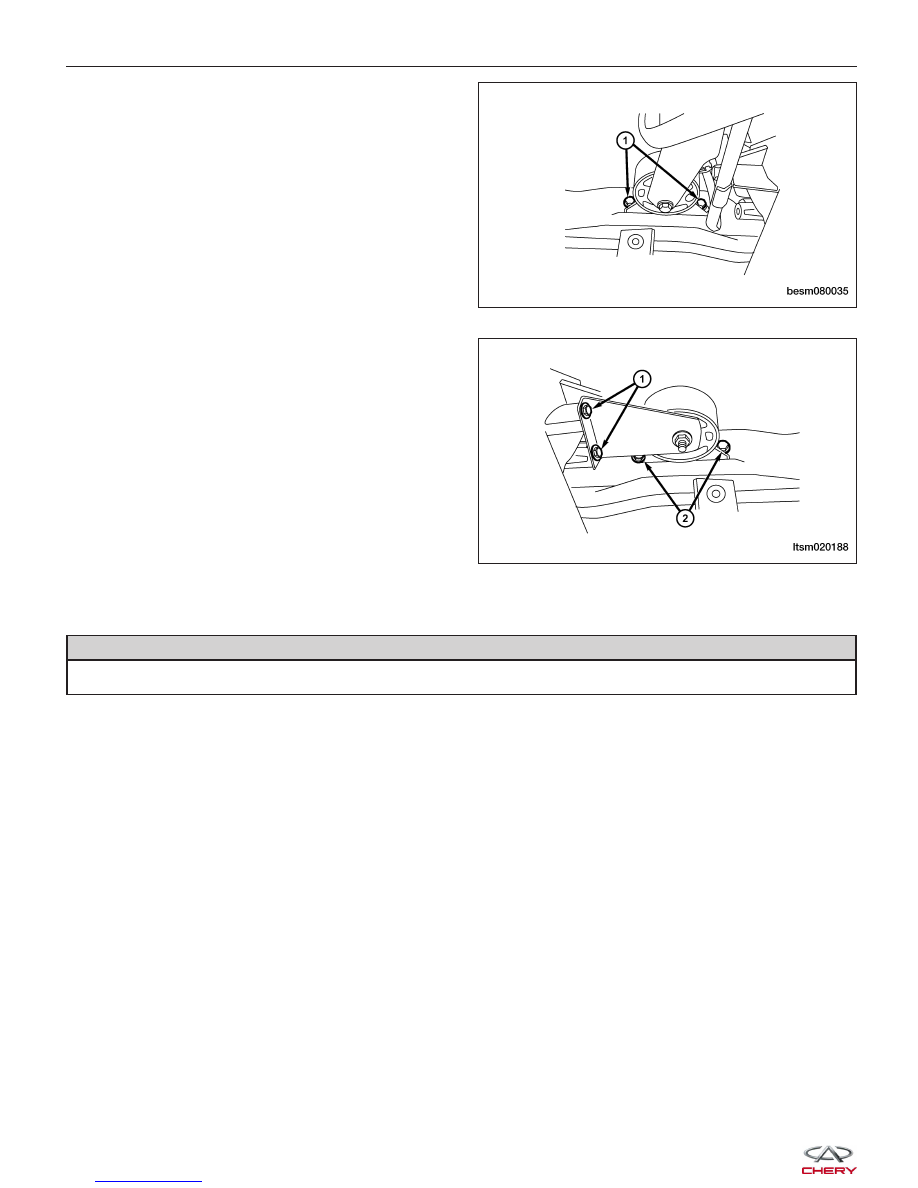
26. Remove the front engine mount bolts (1).

(Tighten: Front mount bolts to 60 N·m)

27. Remove the rear engine mount bolts (1) and the

rear engine mount bracket bolt (2).
(Tighten: Rear mount bolts to 40 N·m)

28. Remove the transaxle mount bolts.

(Tighten: Transaxle mount bolts to 40 N·m)

29. Separate the transaxle from the engine and remove the transaxle from the vehicle.

WARNING!

Use a suitable jack to support the transaxle during removal.

30. Installation is in the reverse order of removal.

ON-VEHICLE SERVICE

BESM080035

LTSM020188


Installation Notes:
• Refill the transaxle fluid through the fill hole (1)

shown in the figure.

• To avoid fluid spills, make sure to use a funnel.

• Add 3.5 L of new automatic transaxle fluid into the transaxle.

• Start the engine and maintain an idle.

• Connect the X-431 scan tool and establish a connection with the TCM and monitor the transaxle fluid tempera-

ture.

• Open the drain plug (2) when the fluid temperature reaches 60 ± 1°. Loosen the fluid limiting duct (1) if neces-

sary.

• Catch any fluid that drains out with a measuring cup.

• If no fluid drains out, or the drained fluid is less than 0.1 liter perform the following:

− 1. Turn off the ignition switch.
− 2. Add 0.5 liter fluid to the transaxle.
− 3. Allow the transaxle fluid to cool down to 50°C.
− 4. Start the engine and maintain an idle.
− 5. Open the drain plug when the fluid temperature reaches 60 ± 1°C.
− 6. Catch any fluid that drains out with a measuring cup.
− 7. Repeat the above steps, until the drained fluid exceeds 0.1 liter.
− 8. Tighten the drain plug to 33 N·m.

ON-VEHICLE SERVICE

LTSM080183

LTSM080184

08


WARNING!

The gearshift lever must be shifted to gear P while adding transaxle fluid.

Automatic Shifter Selector

Removal & Installation

1. Raise and support the vehicle.

2. Disconnect the negative battery cable.

3. Remove the air cleaner and air duct transaxle assembly.

4. Remove the base mounting (1) of the air cleaner

transaxle assembly.

5. Depress the clip then remove the shift cable (1)

from the transaxle gearshift switch and remove the
shift cable clamp (2).

6. Remove the gearshift knob (1).

7. Remove the gearshift cover (2) from the lower

console.

8. Apply the parking brake (apply the parking brake handle to clear lower console during removal).

9. Remove the lower console (See Lower Console Removal & Installation in Section 15 Body & Accessories).

ON-VEHICLE SERVICE

BESM080038

LTSM080186

BESM080049


10. Disconnect the gearshift mechanism connector (1).

11. Remove the shift cable from the gearshift mecha-

nism.

12. Remove the four bolts (2) and then remove the

gearshift mechanism from the bracket.

13. Installation is in the reverse order of removal.

NOTE :
If the battery has low voltage, press the release switch (1) to move the gearshift lever.

ON-VEHICLE SERVICE

LTSM020228

LTSM080188

08


Content   ..  269  270  271  272   ..