Chery QQ6 (S21) / S12LHD. Manual - part 133


  Index      Chery     Chery QQ6 (S21) / S12LHD - service repair manual


Search            


Content   ..  131  132  133  134   ..


Chery QQ6 (S21) / S12LHD. Manual - part 133


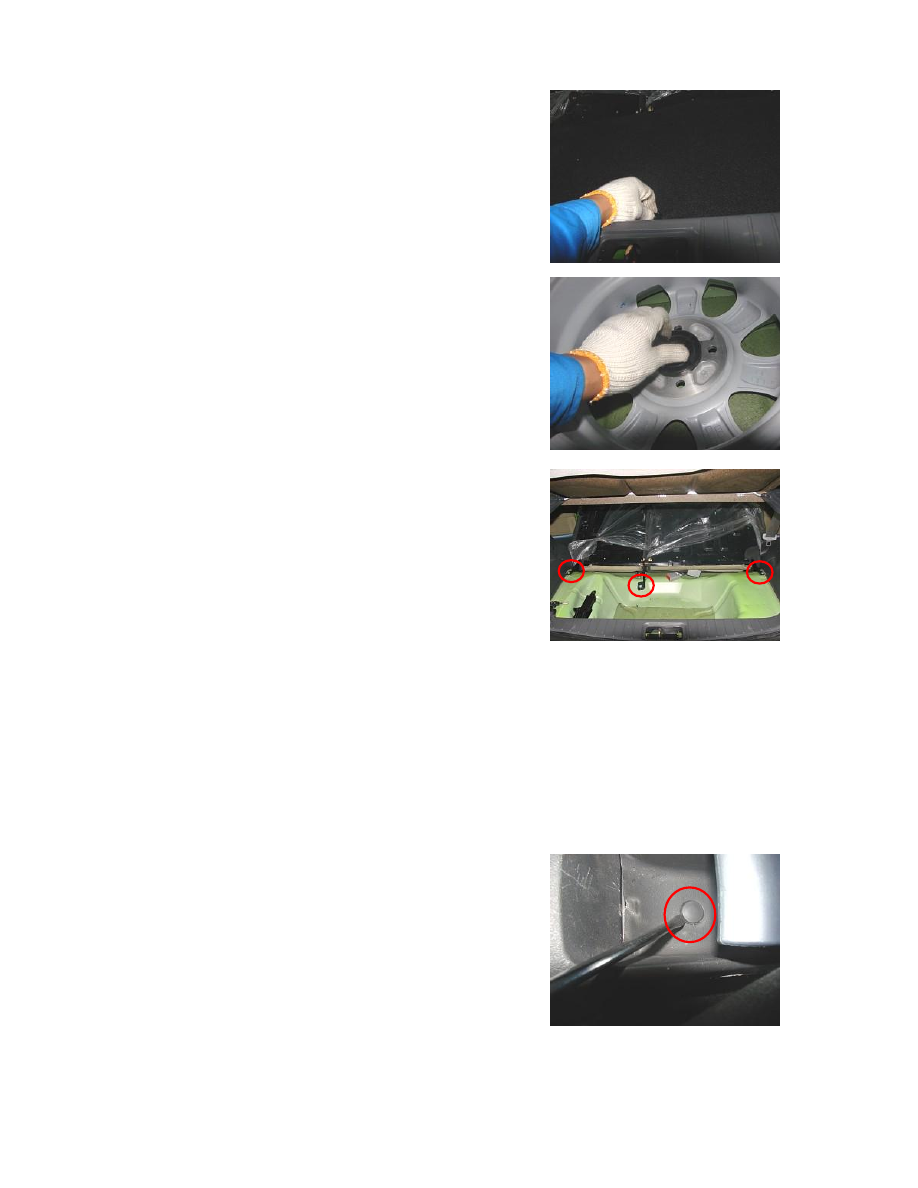
2.6. Open the trunk and take out the trunk vehicle carpet.   


2.7. Loosen off the fixing seat of the spare tire and take it out.   


2.8.  Use  a  13#  socket  wrench  to  loosen  off  the  fixing  bolts  in  the 
rear seat back, and then the rear seat back can be removed. 
Torque: 25±3Nm 


3. Installation Steps 

The installation steps are reverse to those for removal. 

III.  Removal  and  Installation  of  auxiliary 
Instrument Panel   

Preparation of Tools: cross head screwdriver, flat head screwdriver   

1. Removal Steps 

1.1.  Use  a  flat  head  screwdriver  to  pry  open  the  shield  at  the  hand 
brake and gears. 


2.6. Open the trunk and take out the trunk vehiclepet.   


2.7. Loosen off the fixing seat of the spare tire and take it out.   


2.8.  Use  a  13#  socket  wrench  to  loosen  off  the  fixing  bolts  in  the 
rear seat back, and then the rear seat back can be removed. 
Torque: 25±3Nm 


3. Installation Steps 

The installation steps are reverse to those for removal. 

III. Removal of auxiliary Instrument Panel   

Preparation of Tools: cross head screwdriver, flat head screwdriver   

1. Removal Steps 

1.1.  Use  a  flat  head  screwdriver  to  pry  open  the  shield  at  the  hand 
brake and gears. 


1.2. Use a cross head screwdriver to loosen  off the  fixing  screws  of 
the shield 


1.3.  Use  a  flat  head  screwdriver  to  pry  open  the  shield  at  the  hand 
brake and gears. 
Note: Please pry carefully.   


1.4.  Use  a  cross  head  screwdriver  to  remove  the  two  fixing  screws 
below the shield. 


1.5.  Take  out  the  gear  selector  shield  upward  by  hand  (The  shield 
and the auxiliary Instrument Panel are fixed with clips and no fixing 
screws are used). 


1.6. Use a cross head screwdriver to remove the  front fixing screws 
of the auxiliary Instrument  Panel (One on the left and the other one 
the right). 


1.7.  Use  a  cross  head  screwdriver  to  remove  the  rear  fixing  screws 
of the auxiliary Instrument  Panel (One on the left and the other one 
the  right),  and  then  the  suxiliary  Instrument  Panel  can  be 
dismounted. 


2. Installation Steps 

The installation steps are reverse to those for removal. 

IV. Removal and Installation of Vehicle Carpet   

Tools: flat head screwdriver, cross head screwdriver; sleeve wrench


1. Removal Steps 

1.1. Dismount the seats. (See Removal of Seat) 
1.2.  Disassemble  the  auxiliary  Instrument  Panel  (See  Removal  of 
auxiliary Instrument Panel) 
1.3. Remove the seat belt shield. (See Removal of Seat belt) 
1.4. Remove the front/rear sill plates, B pillar and the lower shield. 


Content   ..  131  132  133  134   ..