Acura MDX (2018 year). Manual - part 12
182
uu
Operating the Switches Around the Steering Wheel
u
Wipers and Washers
Co
ntrols
The rear wiper and washer can be used when
the power mode is in ON.
■
Wiper switch (OFF, INT, ON)
Change the wiper switch setting according to
the amount of rain.
■
Washer (
)
Sprays while you rotate the switch to this
position.
Hold it to activate the wiper and to spray the
washer. Once released, it stops operating
after a few more sweeps.
■
Operating in reverse
When you select the transmission to
(
R with the windshield wipers activated, the
rear wiper operates automatically as follows even if its switch is off.
■
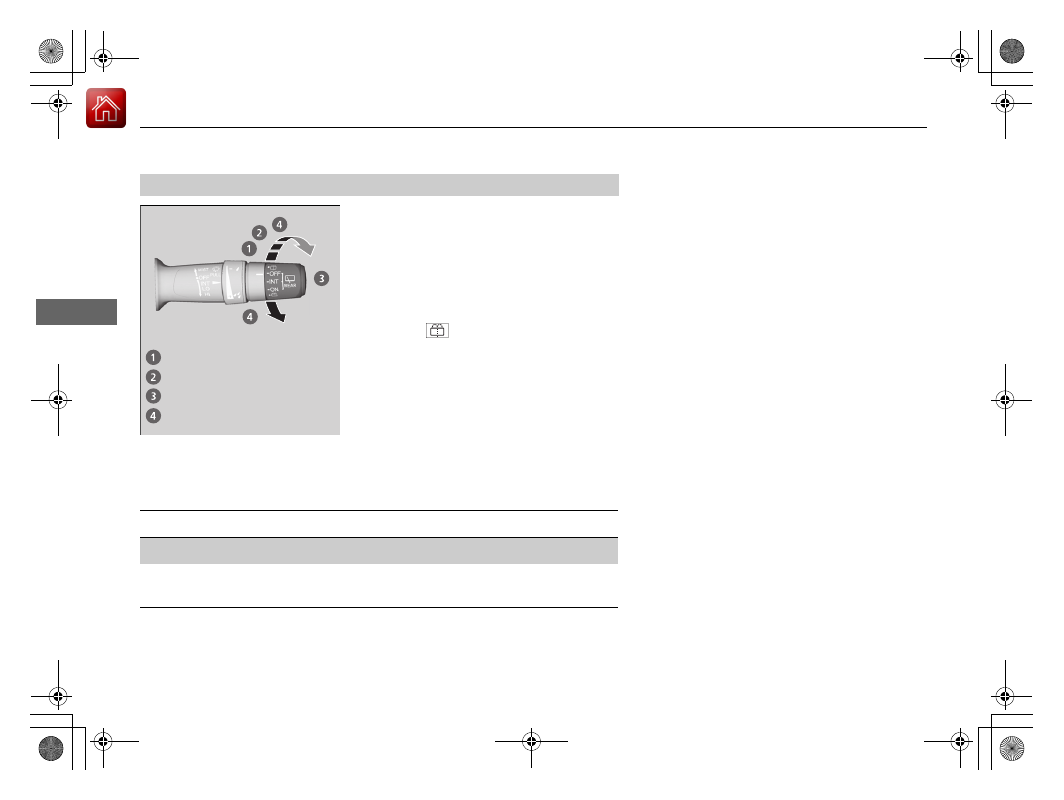
Rear Wiper/Washer
INT: Intermittent
OFF
ON: Continuous wipe
Washer
Windshield Wiper Operation
Rear Wiper Operation
Intermittent
Intermittent
Low speed wipe
High speed wipe
Continuous
18 ACURA MDX-31TZ56400.book 182 ページ 2017年8月23日 水曜日 午後4時1分