Acura RSX (2006 year). Manual - part 4
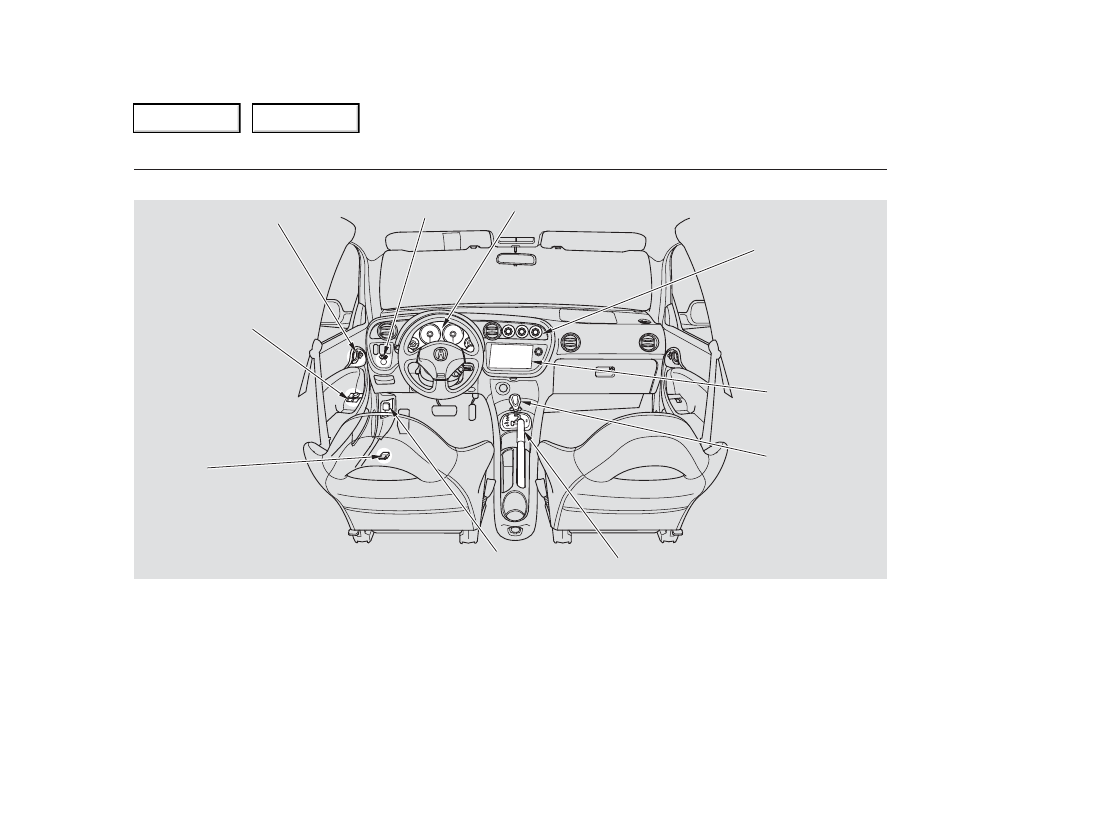
AT model is shown.
Control Locations
50
POWER WINDOW
SWITCHES
MIRROR CONTROLS
GAUGES
AUDIO SYSTEM
SHIFT LEVER
HOOD RELEASE HANDLE
DOOR AND
HATCH LOCK SWITCH
(P.
)
(P.
)
(P.
PARKING BRAKE
(P.
(P.
(P.
(P.
)
INSTRUMENT PANEL INDICATORS(P.
)
CLIMATE CONTROL
SYSTEM
(P.
,
(P.
)
(P.
FUEL FILL
DOOR RELEASE HANDLE
Main Menu
Table of Contents