Acura RL. Manual - part 314


  Index      Acura     Acura RL - service repair manual 2005-2008 year


Search            


Content   ..  312  313  314  315   ..


Acura RL. Manual - part 314


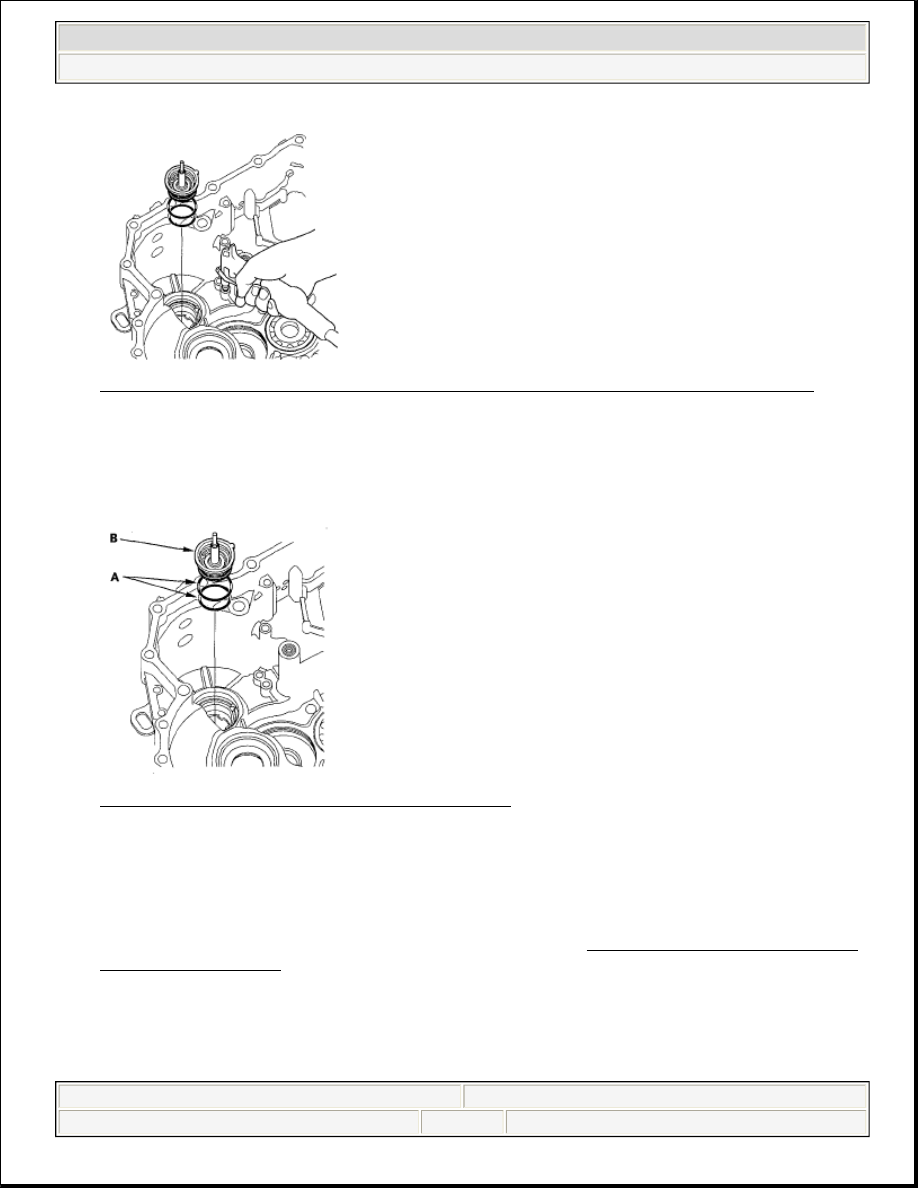
Fig. 445: Applying Air Pressure To ATF Feed Pipe Hole Of 1st-Hold Clutch Pressure Circuit 
Courtesy of AMERICAN HONDA MOTOR CO., INC. 

SECONDARY SHAFT ATF FEED PIPE CAP INSTALLATION 

1. Install the new O-rings (A) on the ATF feed pipe cap (B). 

Fig. 446: Identifying O-Rings On ATF Feed Pipe Cap 
Courtesy of AMERICAN HONDA MOTOR CO., INC. 

2. Install the ATF feed pipe cap in the transmission housing. Do not pinch the O-rings.  

SECONDARY SHAFT ATF FEED PIPE CAP, FEED PIPE REPLACEMENT 

1. Remove the ATF feed pipe cap from the transmission housing (see SECONDARY SHAFT ATF FEED 

PIPE CAP REMOVAL ).  

2. Remove the snap ring (A) from the feed pipe cap (B), then remove the feed pipe guide (C), O-rings (D) 

(E), and 1st clutch ATF feed pipe (F). 


2007 Acura RL 

2005-08 TRANSMISSION Automatic Transmission - RL


me 


Friday, June 05, 2009 1:18:16 PM

Page 427 

© 2005 Mitchell Repair Information Company, LLC. 

Fig. 447: Identifying Feed Pipe Guide, O-Rings And 1st Clutch ATF Feed Pipe 
Courtesy of AMERICAN HONDA MOTOR CO., INC. 

3. Replace the 1st clutch ATF feed pipe or 1st-hold clutch ATF feed pipe/ATF feed pipe cap assembly. The 

1st-hold clutch ATF feed pipe/ATF feed pipe cap is not available separately.  

4. Install the new O-ring (D) over the 1st clutch ATF feed pipe, then install the feed pipe over the 1st-hold 

clutch ATF feed pipe (G) while aligning the feed pipe tabs (H) with the guide in the cap.  

5. Install the new O-ring (E) in the cap and feed pipe guide, then secure the guide with the snap ring.  

MAINSHAFT BEARING REMOVAL 

Special Tools Required  

Driver 07749-0010000  

Attachment, 78 x 80 mm 07NAD-PX40100  

1. To remove the mainshaft bearing, expand the snap ring with snap ring pliers, then push the bearing out. 

Do not remove the snap ring unless it's necessary to clean the groove in the housing. 


2007 Acura RL 

2005-08 TRANSMISSION Automatic Transmission - RL


me 


Friday, June 05, 2009 1:18:16 PM

Page 428 

© 2005 Mitchell Repair Information Company, LLC. 

Fig. 448: Removing Mainshaft Bearing 
Courtesy of AMERICAN HONDA MOTOR CO., INC. 

MAINSHAFT BEARING INSTALLATION 

Special Tools Required  

Driver 07749-0010000  

Attachment, 78 x 80 mm 07NAD-PX40100  

1. Install the bearing in the direction shown. 07749-0010000 

Fig. 449: Identifying Mainshaft Bearing Installation Position 
Courtesy of AMERICAN HONDA MOTOR CO., INC. 

2. Expand the snap ring with the snap ring pliers, and insert the bearing part-way into the housing.  

3. Release the pliers, then push the bearing down into housing until the snap ring snaps in place around it. 


2007 Acura RL 

2005-08 TRANSMISSION Automatic Transmission - RL


me 


Friday, June 05, 2009 1:18:16 PM

Page 429 

© 2005 Mitchell Repair Information Company, LLC. 

4. After installing the bearing, verify that the snap ring (A) is seated in the bearing and housing groove, and 

that the ring end gap (B) is 0-7 mm (0-0.28 in.). 

Fig. 450: Identifying Snap Ring Gap 
Courtesy of AMERICAN HONDA MOTOR CO., INC. 

INTERMEDIARY SHAFT BEARING REPLACEMENT 

Special Tools Required  

Bearing remover shaft set, 20 mm 07936-3710600  

Bearing remover shaft handle 07936-3710100  

Sliding hammer weight 07741-0010201  

Driver 07749-0010000  

Attachment, 37 x 40 mm 07746-0010200  

1. Remove the intermediary shaft bearing from the transmission housing using the bearing remover shaft set 

(20 mm), the bearing remover shaft handle, and the sliding hammer weight. 


2007 Acura RL 

2005-08 TRANSMISSION Automatic Transmission - RL


me 


Friday, June 05, 2009 1:18:16 PM

Page 430 

© 2005 Mitchell Repair Information Company, LLC. 


Content   ..  312  313  314  315   ..