Acura CSX. Manual - part 657
*03
*04
SNR9ANGJ36100000000FAAT10
−
−
−
−
−
−
−
−
YES
NO
Diagnostic Test: Monitor Check
YES
NO
YES
NO
YES
NO
Picture has lines/rolls/other issues or is an
odd color
23-339
23-339
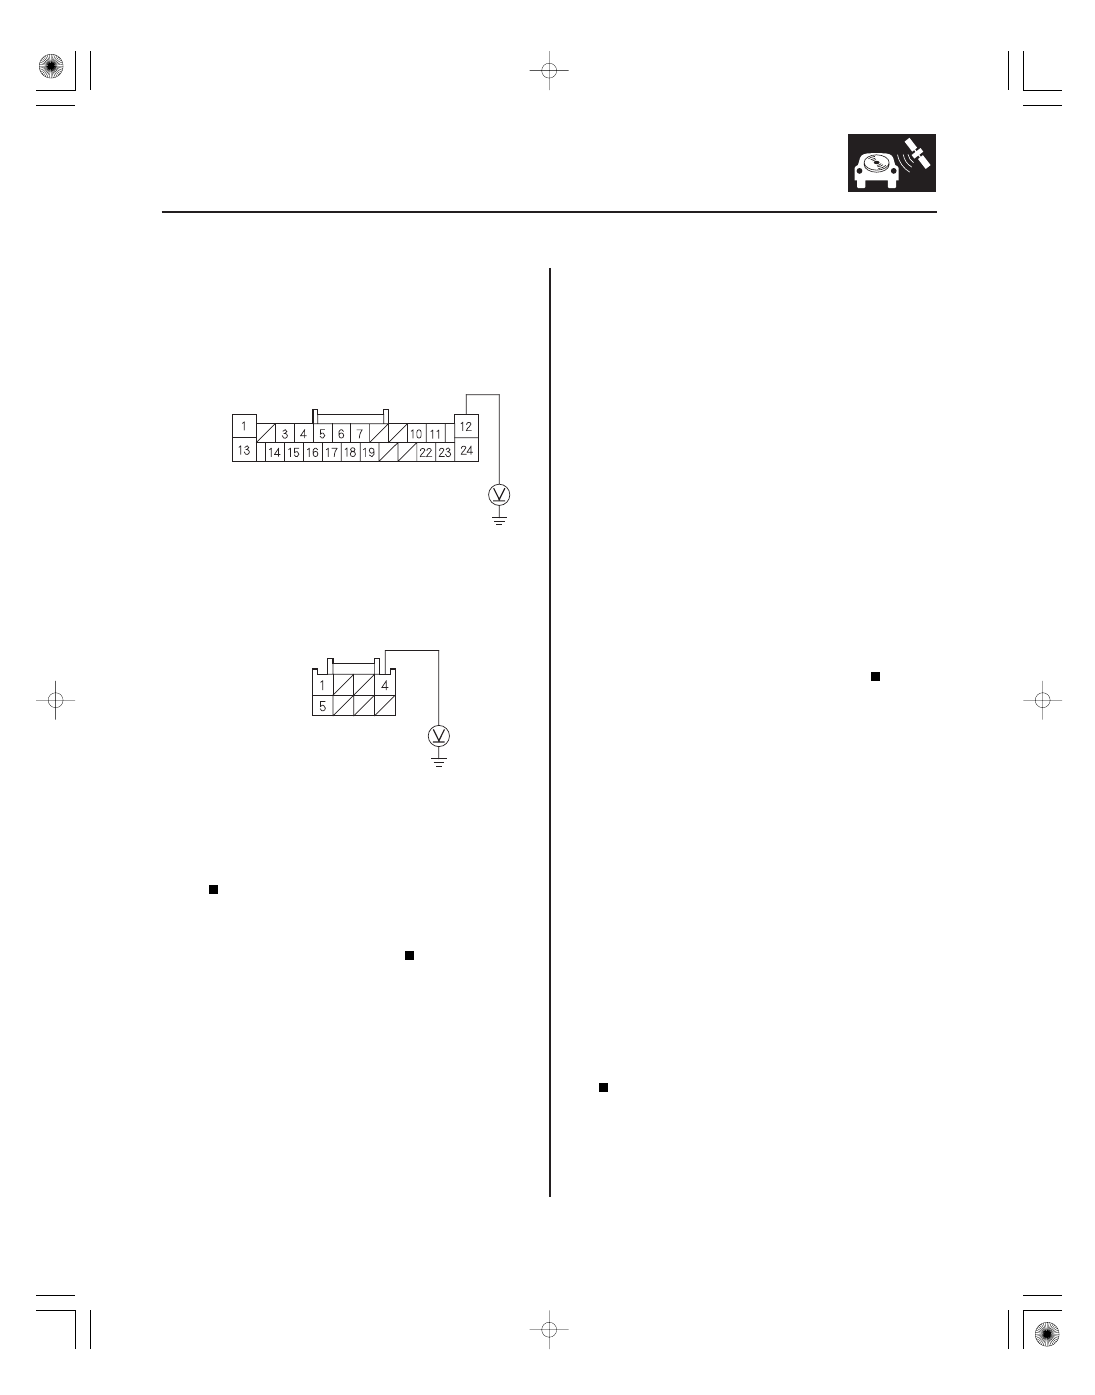
NAVIGATION UNIT CONNECTOR A (24P)
RADIO GND (BLK)
NAVIGATION UNIT CONNECTOR C (8P)
GND (BLK)
9. Measure the voltage between navigation unit
connector A (24P) terminal No. 12 and body ground,
and between navigation unit connector C (8P)
terminal No. 4 and body ground.
Replace the navigation unit (see page 23-355).
Repair open in the wire between the
navigation unit and body ground (G504) (see page
22-30), (G505) (see page 22-32).
NOTE:
• Check the vehicle battery condition frist.
• Make sure that the correct DVD color and version are
installed.
• Check any official Honda service website for more
service information about the navigation system.
• Check the navigation screen settings for brightness,
contrast, black level and the color screen for map
color and menu color.
• Check the connectors for poor connections or loose
terminals.
• Before troubleshooting, make sure you have the
navigation system anti-theft codes.
1. Check for electronic aftermarket accessories
(possibly hidden) mounted near the navigation unit.
Disable the accessories, and recheck.
Go to step 2.
2. Turn the ignition switch to ON (II).
3. Start up the navigation picture.
Go to step 5.
Go to step 4.
4. Go into the Detail Information & Settings, select
Monitor Check, and use RGB Color diagnostic
under Monitor Check (see page 23-302).
Go to step 5.
Replace the navigation unit (see page 23-355).
Wire side of female terminals
Wire side of female terminals
Is ther e less than 0.1 V ?
Ar e ther e any electr onic accessor ies?
Is the pictur e scr olling hor izontally ( lef t to r ight or
r ight to lef t)?
Ar e the r ed, gr een, and blue color ed cir cles
shown?
08/08/21 14:17:50 61SNR030_230_0342