Acura CSX. Manual - part 377
03
04
*01
Replacement - Except Type S Model
19-13
A
10 x 1.0 mm
B
C
A
A
B
B
A
C
C
1. Remove some brake fluid from the master cylinder.
2. Raise the front of the vehicle, and support it with
safety stands in the proper locations (see page
1-11).
3. Remove the front wheels.
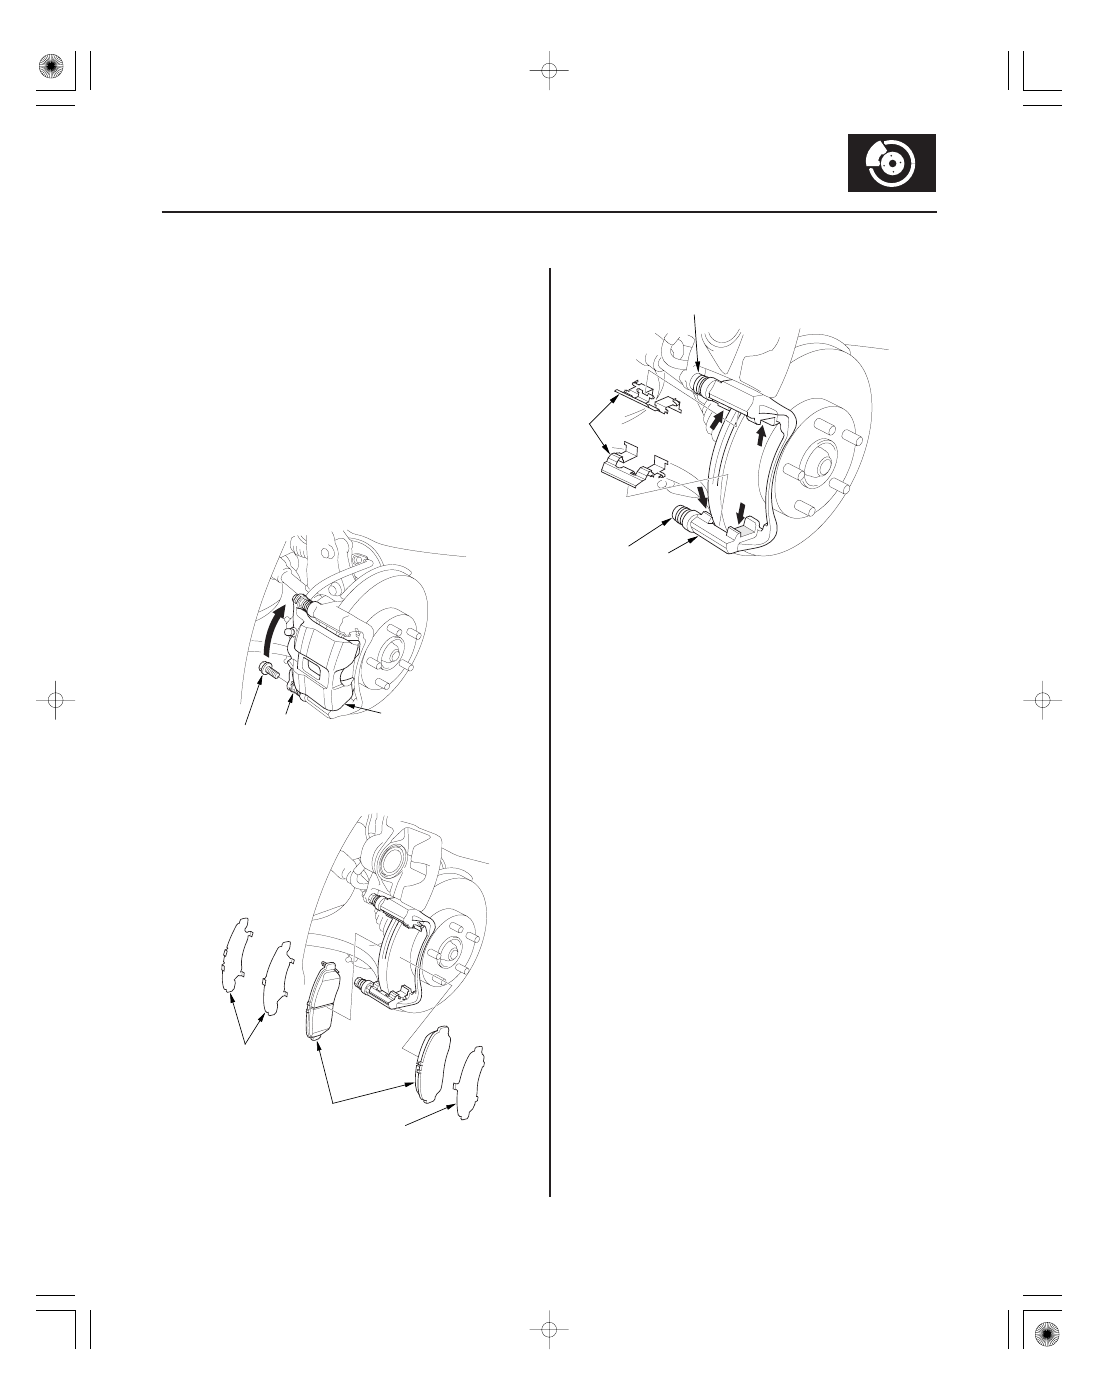
4. Remove the flange bolt (A) while holding the
caliper pin (B) with a wrench. Be careful not to
damage the pin boot, and pivot the caliper (C) up
out of the way. Check the hose and pin boots for
damage and deterioration.
5. Remove the pad shims (A) and the brake pads (B).
6. Remove the pad retainers (A).
7. Clean the caliper bracket (B) thoroughly; remove
any rust, and check for grooves and cracks. Verify
that the caliper pins (C) move in and out smoothly.
Clean and lube if needed.
8. Inspect the brake disc for runout, thickness,
parallelism (see page 19-19) and check for damage
and cracks.
9. Apply a thin coat of M-77 assembly paste (P/N
08798-9010) to the retainer mating surface of the
caliper bracket (indicated by the arrows).
10. Install the pad retainers. Wipe excess assembly
paste off the retainers. Keep the assembly paste off
the brake disc and the brake pads.
08/08/21 15:00:54 61SNR030_190_0013