Acura CSX. Manual - part 277
−
*01
SNR9AA1K77100090986FAAT00
−
−
−
−
−
−
−
−
DTC P0986:
YES
NO
YES
NO
YES
NO
YES
NO
14-189
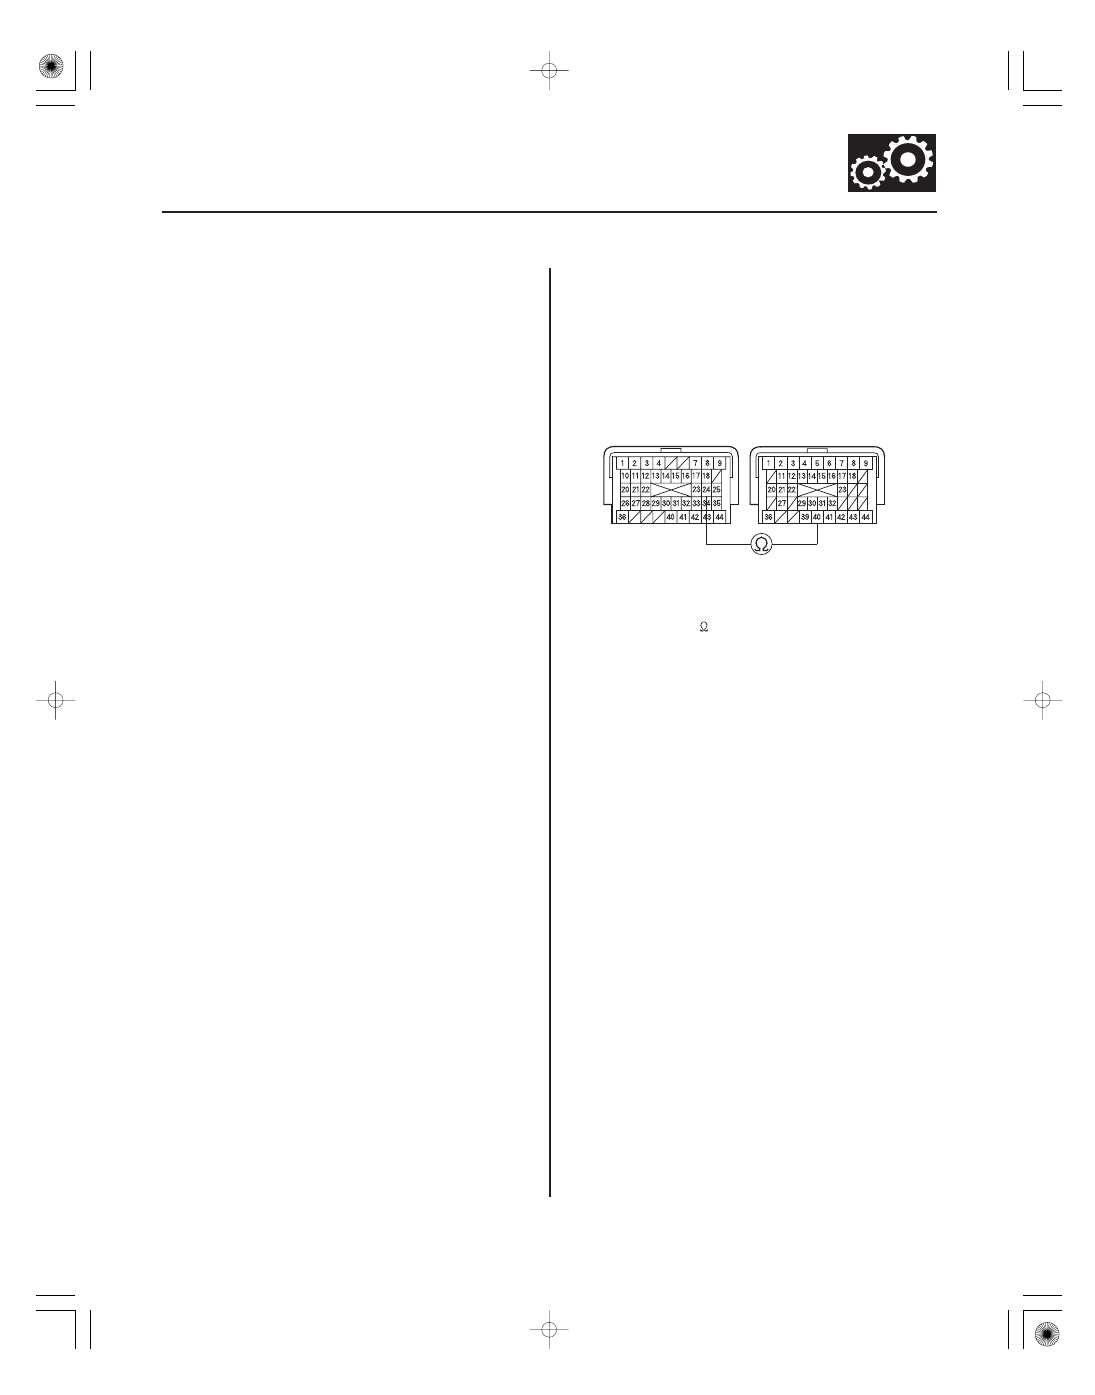
PCM CONNECTORS
B (44P)
C (44P)
LG1 (BRN/YEL)
SHE (YEL)
Open in Shift Solenoid Valve E
Circuit
NOTE:
• Before you troubleshoot, record all freeze data and
any on-board snapshot with the HDS, and review
General Troubleshooting Information (see page 14-3).
• This code is caused by an electrical circuit problem
and cannot be caused by a mechanical problem in the
transmission.
1. Turn the ignition switch to ON (II).
2. Clear the DTC with the HDS.
3. Start the engine with the shift lever in N, and wait
for at least 1 second.
4. Check for Temporary DTCs or DTCs with the HDS.
Go to step 8.
Go to step 5.
5. Select Shift Solenoid Valve E in the Miscellaneous
Test Menu, and test shift solenoid valve E with the
HDS.
Go to step 6.
Go to step 8.
6. Start the engine with the shift lever in N, and wait
for at least 1 second.
7. Monitor the OBD STATUS for P0986 in the DTCs
MENU with the HDS.
Go to step 8.
If the HDS indicates PASSED, intermittent
failure, the system is OK at this time. Check for
poor connections or loose terminals between shift
solenoid valve E and the PCM. If the HDS indicates
NOT COMPLETED, go to step 5.
8. Turn the ignition switch to LOCK (0).
9. Jump the SCS line with the HDS.
10. Disconnect PCM connectors B (44P) and C (44P).
11. Measure the resistance between PCM connector
terminals B24 and C40.
Go to step 22.
Go to step 12.
Terminal side of female terminals
Is DT C P0986 indicated?
Is a clicking sound hear d?
Does the HDS indicate F AILED?
Is ther e 12
25
?
08/08/21 14:45:28 61SNR030_140_0191