Acura CSX. Manual - part 216
*06
06
07
08
13-92
Manual Transmission
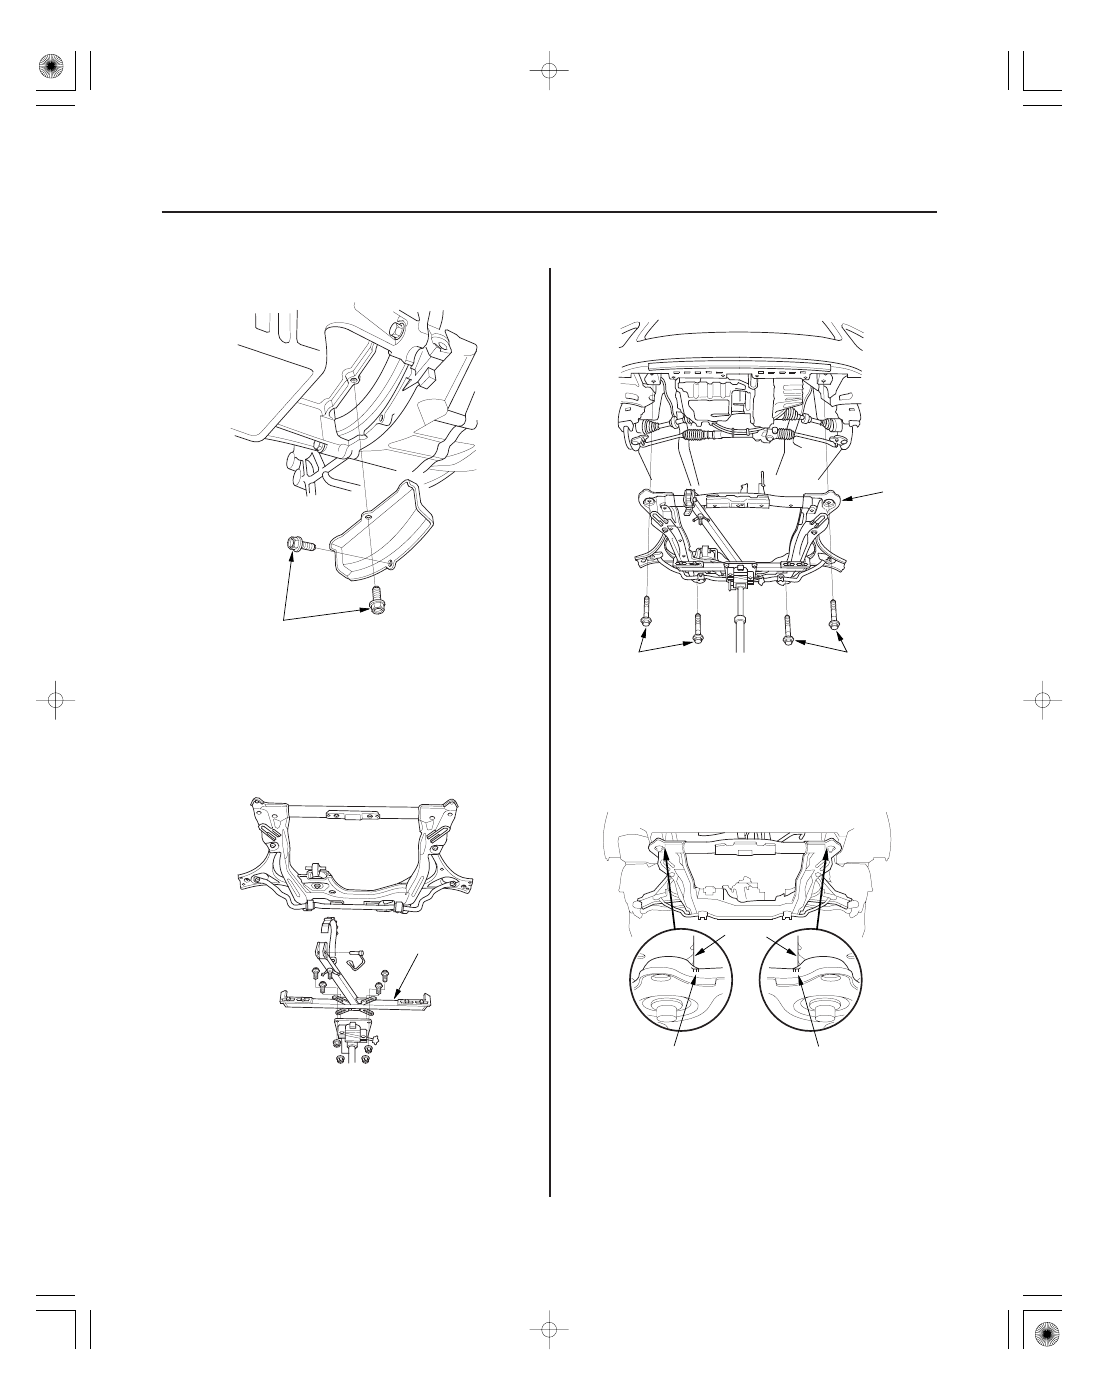
6 x 1.0 mm
12 N·m (1.2 kgf·m, 9 lbf·ft)
VSB02C000016
A
B
14 x 1.5 mm
103 N·m
(10.5 kgf·m,
76 lbf·ft)
B
14 x 1.5 mm
103 N·m
(10.5 kgf·m,
76 lbf·ft)
A
B
B
A
6. Install the clutch cover.
7. Install the intermediate shaft (see page 16-27).
8. Install the driveshafts inboard joint (see step 6 on
page 16-21).
9. Support the front subframe with the subframe
adapter (VSB02C000016) and a jack.
10. Install the front subframe (A). Loosely install new
subframe mounting bolts (B).
11. Align the front subframe reference marks (A) to the
body (B), as noted during removal. Tighten the
front subframe mounting bolts to the specified
torque.
Replace.
Replace.
08/08/21 14:47:26 61SNR030_130_0094