Kia Sedona (2008 year). Manual - part 403


  Главная      Kia     Kia Sedona (2008 year) - Service Repair Manual


поиск по сайту           правообладателям


содержание   ..  401  402  403  404   ..


Kia Sedona (2008 year). Manual - part 403
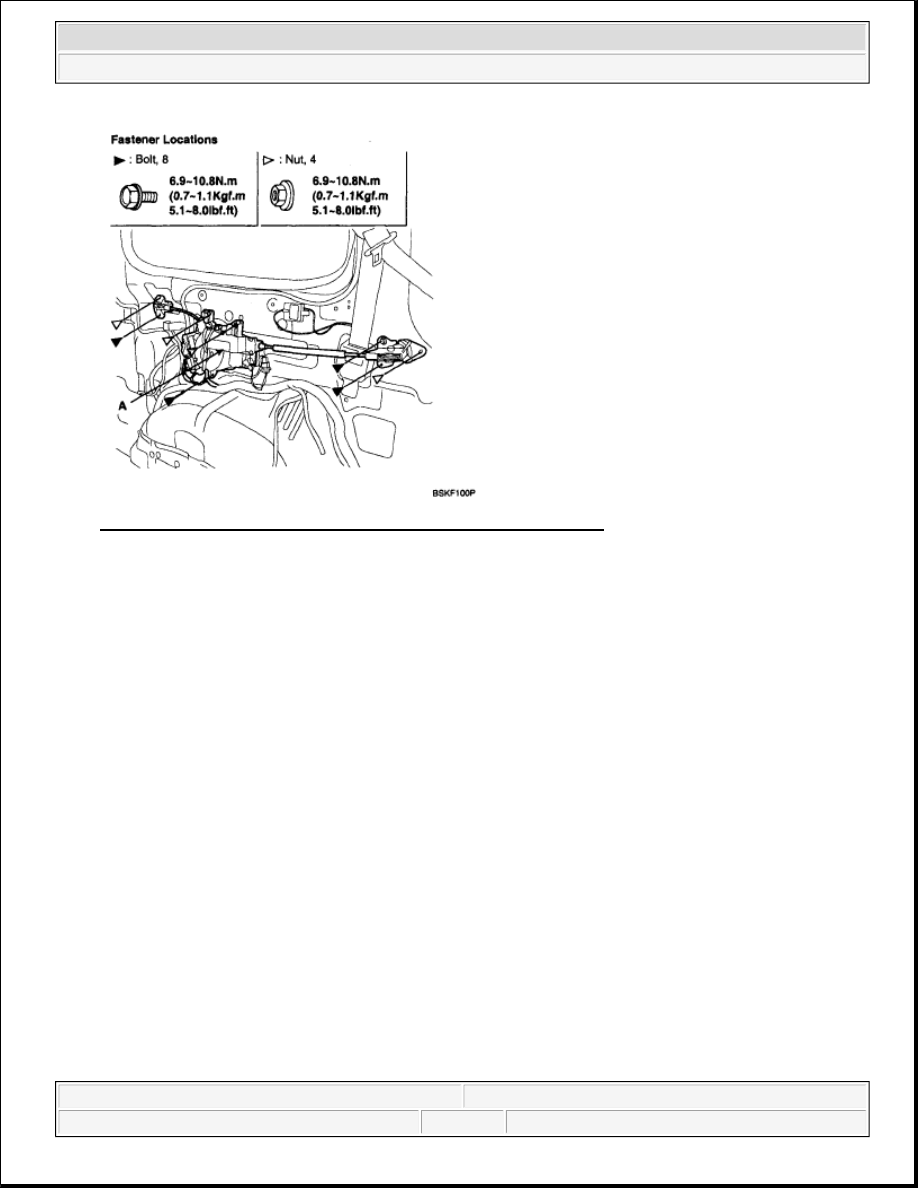


Fig. 92: Identifying Motor, Bolts, Nuts And Torque Specifications 
Courtesy of KIA MOTORS AMERICA, INC. 

8. Installation is the reverse of removal.  

ADJUSTMENT 

GLASS ADJUSTMENT 

1. Remove the following parts. 

Door trim.  

2. Carefully move the glass (A) until you can see the glass mounting bolts then loosen them. 

NOTE:

Check the glass run channel for damage or deterioration, and replace 
them necessary.  


2008 Kia Sedona EX 

2008 ACCESSORIES & BODY, CAB Exterior - Sedona


Microsoft 


Monday, May 24, 2010 4:07:09 PM

Page 64 

© 2006 Mitchell Repair Information Company, LLC. 

Fig. 93: Identifying Glass, Bolts And Torque Specifications 
Courtesy of KIA MOTORS AMERICA, INC. 

3. Push the glass against the channel then tighten the glass mounting bolts.  

4. Check that the glass moves smoothly.  

5. Raise the glass fully, and check for gaps, check that the glass contacts the glass run channel evenly.  

6. Check for water leaks. See Fig. 94. Run water over the roof and on the sealing area and note these items: 

Use a 12 mm (1/2 in.) diameter hose (A).  

Adjust the rate of water flow as shown (B) in illustration.  

Do not use a nozzle.  

Hold the hose about 300 mm (12 in.) away from The door. 


2008 Kia Sedona EX 

2008 ACCESSORIES & BODY, CAB Exterior - Sedona


Microsoft 


Monday, May 24, 2010 4:07:09 PM

Page 65 

© 2006 Mitchell Repair Information Company, LLC. 

Fig. 94: Checking For Water Leaks 
Courtesy of KIA MOTORS AMERICA, INC. 

DOOR STRIKER ADJUSTMENT 

Make sure the door latches securely without slamming It. If necessary, adjust the striker (A): The striker nuts 
Are fixed. The strike can be fine adjusted up or down, and in or out. striker center to be adjusted max ± 1.5mm 

1. Loosen the screws (B), then insert a shop towel between the body and striker (A). 

Fig. 95: Identifying Striker, Screws And Torque Specifications 
Courtesy of KIA MOTORS AMERICA, INC. 

2. Lightly tighten the screws.  

3. Wrap the striker with a shop towel, then adjust the striker by tapping it with a plastic hammer. 


2008 Kia Sedona EX 

2008 ACCESSORIES & BODY, CAB Exterior - Sedona


Microsoft 


Monday, May 24, 2010 4:07:09 PM

Page 66 

© 2006 Mitchell Repair Information Company, LLC. 

Do not tap the striker too hard. 

4. Loosen the screws and remove the shop towel.  

5. Lightly tighten the screws.  

6. Hold the outer handle out, and push the door against the body to be sure the striker allows a flush fit. If 

the door latches properly, tighten the screws and recheck.  

BODY SIDE MOLDINGS 

REPLACEMENT 

ROOF RACK REPLACEMENT 

1. Remove the roof rack cover (A).  

2. Remove the roof rack (B), by removing nut protector covers, and removing the nuts.  

3. Installation is the reverse of removal. 

NOTE:

When prying with a flat-tipped screwdriver, wrap it with protective tape, 
and apply protective tape around the related parts, to prevent damage.  

Put on gloves to protect your hands.  

Take care not to scratch the body surface.  


2008 Kia Sedona EX 

2008 ACCESSORIES & BODY, CAB Exterior - Sedona


Microsoft 


Monday, May 24, 2010 4:07:09 PM

Page 67 

© 2006 Mitchell Repair Information Company, LLC. 


содержание   ..  401  402  403  404   ..