Iran Khodro Pars. Service Manual - part 1


  Index      Manuals     Iran Khodro Pars. Service Manual


Search            copyright infringement  


Content      ..       1      2      ..


Iran Khodro Pars. Service Manual - part 1


-------------------------------------------------------------------------------------------------------------------------------------------------------------

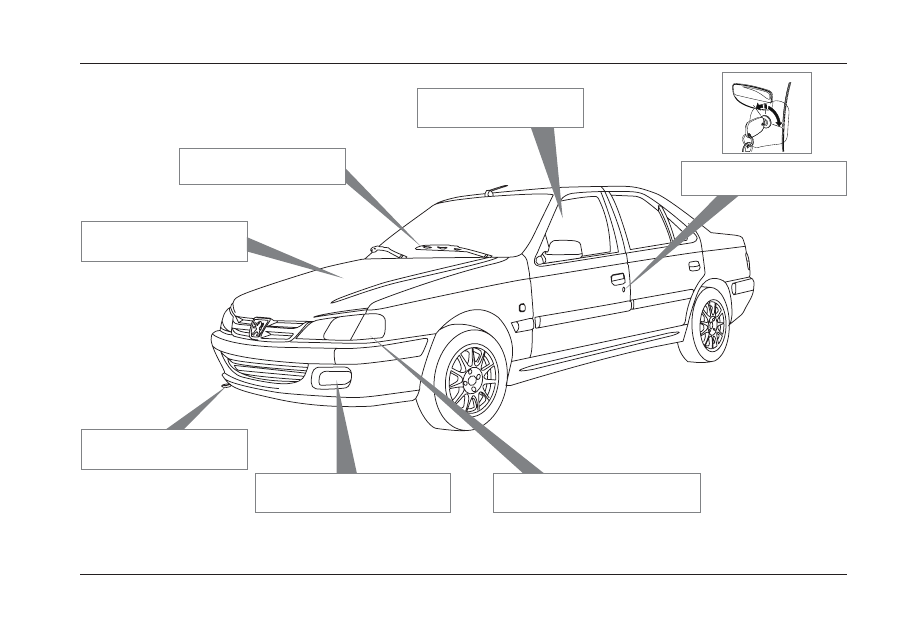
5

PICTORIAL LIST

Front fog lamps ...................... 45

Front fog lamps replacement . .

115

Ignition switch ................ 86

Headlights  ..................................... 44

Headlights replacement   ........ 115

Auto towing .................... 110

Engine compartment .... 98

Windows lifter keys ......... 29

Snow wipers .................... 46

-------------------------------------------------------------------------------------------------------------------------------------------------------------

-------------------------------------------------------------------------------------------------------------------------------------------------------------

6

ABS  .................................. 68

Wheels Replacement  .. 112 

Rear Fog Lamps  .............................. 45

Rear Fog Lamps Replacement  .....116

Tank Cap   .......................................... 27

Fuel Consumption Reduction  ......88

Rear Obstacle Warning System .....

 47

Opening of the trunk ........ 70

Mirrors  ............................. 40

Towing of the Vehicle .... 110

PICTORIAL LIST

-------------------------------------------------------------------------------------------------------------------------------------------------------------

-------------------------------------------------------------------------------------------------------------------------------------------------------------

7

Engine Compartment

Engine Technical Information  ... 140

Fuel Consumption  ........................ 141

Brake Fluid  ..................... 102

Hydraulic Steering Wheel  ...103

Engine Compartment Fuse 

Box ............................... 117

Battery  ........................... 104

Engine Oil Measuring Rod .......... 99

Engine Oil  ...................... 99

Cooling System  ............ 101

Vehicle  Identification  Number 

(VIN) ................................... 138

Glass Washing Liquid Tank ... 100

PICTORIAL LIST

-------------------------------------------------------------------------------------------------------------------------------------------------------------

-------------------------------------------------------------------------------------------------------------------------------------------------------------

8

Engine Compartment *

Engine Technical Information  ........... 140

Brake Fluid  .................... 102

Hydraulic Steering Wheel  ........ 103

Engine Compartment Fuse 

Box ................................. 117

Battery  ............................ 104

Engine Oil Measuring Rod ..........99

Engine Oil  ..................... 99

Cooling System  ............. 101

Vehicle Identification Number 

(VIN)  .................................. 138

Glass Washing Liquid Tank ... 100

*If equipped

PICTORIAL LIST

-------------------------------------------------------------------------------------------------------------------------------------------------------------

-------------------------------------------------------------------------------------------------------------------------------------------------------------

9

PARS AT A GLANCE

1

CONTROLS ..............................................................10 

LOCKING/UNLOCKING DOORS  ..........................12 

ANT-THEFT SYSTEM (IMMOBILIZER) .................13

INDICATORS AND LIGHTS KEY ...........................14

WINDSHIELD WIPER  .............................................14

SEATS .......................................................................15

AUTOMATIC AIR CONDITIONING  ........................16

ELECTRIC WINDOW  ..............................................17

ELECTRICAL MIRRORS  ........................................18

AIR BAG ...................................................................19

CHILD SAFETY LOCK ............................................20

HANDS FREE CELL PHONE  ................................20

CNG FUEL MODE (STARTING/DRIVING)* ...........21

FUEL TYPE ...............................................................21

Audio System Control Panel    ..............................22

*If equipped

-------------------------------------------------------------------------------------------------------------------------------------------------------------

-------------------------------------------------------------------------------------------------------------------------------------------------------------

10

1

PARS AT A GLANCE

CONTROLS:

1- Horn, front light button and side lights 

lever handle.

2- Front dashboard digital monitor.

3- Air vents to avoid freezing and sweating 

of the front glass.

4- Middle adjustable air vent for Air condition.

5- Sound systems

6- Sides adjustable air vent for Air condition.

7- Fuse box.

8-  Handle lever for releasing engine cover door.

9-  Windscreen  wipers and glass cleaners. 

10- Gear lever (Gear shift).

11- Automatic A/C system.

12- Ashtray and lighter.

13- Dashboard box.

14- Driver Air Bag.

15- Passenger Air Bag

16- Passenger Airbag Deactivation Key

-------------------------------------------------------------------------------------------------------------------------------------------------------------

-------------------------------------------------------------------------------------------------------------------------------------------------------------

11

1

PARS AT A GLANCE

CONTROLS:

1-Hands free mobile.*

2- Button for transforming types of fuel in

bi-fuel vehicles.*

3-Oppening key for the boot.

4-Emergency light button (Flasher).

5- Button for Rear glass heater .

6- Button for Front glass heater

7- Locking Switch for the Rear Lifting

Glass.

*If equipped

-------------------------------------------------------------------------------------------------------------------------------------------------------------

-------------------------------------------------------------------------------------------------------------------------------------------------------------

12

1

PARS AT A GLANCE

*If equipped

Locking and unlocking of the doors:

Side doors, rear trunk, fuel tank cap cover:

With the use of key: 

For opening the door, pull up the external 

handle.

From inside:

Push down the interior locking button, door will 

be locked. For opening the lock, pull up the 

same button and for opening the door, pull the 

interior handle.

With the use of key (switch) and central 

locking system:

All doors, rear trunk and fuel tank cap cover, can 

be opened or closed simultaneously with the help 

of switch key from outside and the locking buttons 

on front doors from inside.

3- With the use of remote control:

The operation of this device is like switch key. 

To operate the device, hold it towards the direction 

of the receiver which is situated above the interior 

mirror and push the button.

- Button 3 (Jack knife*) switch blade will get open 

clockwise. 

locking and unlocking of doors:

Engine cover door:

1-From inside: Pull the interior handle below the 

dashboard until the lock is released. 

2- From outside: pull the safety holder beneath 

the engine cover door towards

 yourself until the safety lock is released.

To keep the engine door open, use the leaning 

rod. To close the engine door, bring down the 

leaning rod and 

leave the door to drop by 

itself from  a distance about 30 centimeters. 

Make sure that the door is completely locked.

Fuel Filler Flap

3- To open fuel filler flap, press the frontal flap 

of tank valve.

Opening  the  fuel  filler  flap  in  emergency 

situations

4- If the central locking system does not 

operate, you can open the flap from inside the 

trunk.

Lock and unlocking by remote controller* 

Keep the remote control towards the vehicle :

key no.1 is for unlocking 

key no.2 is for locking

key no.3 is for unlocking of boot

(The boot will get open by two successive pressing 

or in some models holding the key for 5 seconds).

WARNING

The fuel inside the tank, might be 

pressurized. Therefore to avoid fatal 

damages, do not open the fuel cap 

rapidly. Slowly and precisely turn to open 

the cap and wait for a sound of "Hiss" to 

stop. Then open the cap completely

NOTE

Frequent pressing of the keys in short 

intervals will cause the keys functioning 

cessation for 20 seconds.

1

۳

2

1

2

-------------------------------------------------------------------------------------------------------------------------------------------------------------

-------------------------------------------------------------------------------------------------------------------------------------------------------------

13

1

PARS AT A GLANCE

Ignition Switch

POSITION St: St is off, switch is closed.

POSITION A: The steering wheel is 

unlocked. Just electrical accessories and 

equipment operate.

POSITION M: The switch is open.

POSITION D: Turning on the engine (start)

Steering wheel lock

Open the steering wheel lock before 

starting the engine if it is necessary ,turn 

the steering wheel gently while you are 

rotating the key.

It is recomended to press the clutch at the 

time of starting, so that ignition get easier.

Anti- Theft Security System (Immobilizer)

The vehicle with immobilizer system 

can only start up with two keys which is 

delivered to customer with the vehicle.

To copy of key is not enough for start up. 

It is possible to have more keys

if the customer requests and only in IRAN 

KHODRO dealers with the DIAG tool.

CAUTION

- Never drive when the engine of your 

vehicle is cold. 

- Never start engine in closed area

- Never do any alterations in steering lock.

NOTE

There is possibility of breakage for 

internal parts of the remote controller in 

case of sever impact and subsequently 

not functioning of the immobilizer.

WARNING

Avoid keeping the battery or remote 

controller in infants' access, because 

swallowing of the battery can cause 

death. In case of swallowing the 

battery, refer to health care centers 

immediately.

NOTE

A number  has been carved on the key 

plate for replacing the key. Therefore 

keep the plate in a safe place an never 

inside the car.

-------------------------------------------------------------------------------------------------------------------------------------------------------------

-------------------------------------------------------------------------------------------------------------------------------------------------------------

14

1

PARS AT A GLANCE

The key buttons for lights, side light 

lever handle and horn:

1-Small, rear lights and digital trip recorder.

2- Head light, downward/upward beam.

3- Head light, upward beam (pulling the 

lever toward the driver)

4- Front fog lamp

5- Front / rear fog lamp

6- Horn

7- Right side blinker

8- Left side blinker

Windscreen Wipers and Glass Cleaners:

1- Off

2- Time controlled window wipers. (Is 

adjusted according to the vehicle speed)

3- Slow speed window wiper.

4- High speed window wiper.

5- Intermittent move of the window wiper.

6- Glass cleaners. (pulling the lever toward 

the driver)

-------------------------------------------------------------------------------------------------------------------------------------------------------------

-------------------------------------------------------------------------------------------------------------------------------------------------------------

15

1

PARS AT A GLANCE

*If equipped

-------------------------------------------------------------------------------------------------------------------------------------------------------------

-------------------------------------------------------------------------------------------------------------------------------------------------------------

16

1

PARS AT A GLANCE

Automatic pleasant ventilation 

1- Control of non- automatic fan.

2- Cooler

3- Economic consumption.

4- Adjusting temperature

5- Internal circulation of the Air.

6- Off.

7- Rear window heater .

8- Outside Temperature indicator

9- Front window vent(wiping vapor) 

10- Automatic mode .

11- Selection of non-automatic vent 

control. 

12- Display screen (LCD)

-------------------------------------------------------------------------------------------------------------------------------------------------------------

-------------------------------------------------------------------------------------------------------------------------------------------------------------

17

1

PARS AT A GLANCE

Electric side glass lifter *

1- Electric Side glass lifter of driver 

Manual mode: Press or pull the key 

gently; the glass stops moving soon after 

realizing the key.

Auto mode: Press or pull the key 

severely and continuously; the glass gets 

opened or closed completely.

It's possible for the glasses to be opened 

automatically, while the ignition switch is 

on .

2- Electric side glass lifter of 

passenger.

3-left and rear side Electric glass lifter.

4- Right and rear Electric glass lifter.

Electrically regulating the mirror

WARNING

The electric side glass lifters of 

the vehicle, with using Anti pinch 

safety system, only avoids the large 

damages due to excessive forces.

Therefore, it is advised that always 

take usual precautions.

5- locking key of rear glass lifter :

This key prevent the function of rear glass 

lifter keys .

Rear and front electric side glass lifters 

will function ,while the ignition switch is 

on.

Glasses keys *

Any passenger can open or close his/her 

own side glass.

*If equipped

-------------------------------------------------------------------------------------------------------------------------------------------------------------

-------------------------------------------------------------------------------------------------------------------------------------------------------------

18

1

PARS AT A GLANCE

Adjusting Electric mirrors:

Before adjusting, bring the mirror to it’s

normal position with your hand, from 

outside.

6- Selecting the right or left mirror for

adjustment:

By pushing the switch to the right or left,

the mirror on the same side will be ready

to get adjusted.

7- Electrical adjusting of the mirrors:

With the help of related switch, which can 

be moved in all four directions, adjust 

the mirror at your desired position. Then 

bring back the switch no.6 to it’s middle 

position.

*If equipped

Turn the switch 7 to right or left, then 

adjust the desired  mirror in four directions 

by pressing the same switch.

In addition to open and close the 

Mirror via radio remote control, 

rotating 90 degrees key 6 clockwise and 

counterclockwise, mirrors alternatively 

open and closed.

Electric folding mirror:*

In electric folding mirrors, without any 

need to use hands, simultaneously open 

and close with opening and closing of 

vehicle doors trough remote control 

automatically.

The folding mirror is closed after 2 seconds 

of the first remote and 10 seconds by the 

2nd remote. But the mirrors and doors are 

opened together, soon after soon after 

pressing of the opening button on remote.

If  the  flasher  is  used  ,then  the  lamps 

on the folding mirrors starts blinking 

simultaneously with relevant flasher.

-------------------------------------------------------------------------------------------------------------------------------------------------------------

-------------------------------------------------------------------------------------------------------------------------------------------------------------

19

1

PARS AT A GLANCE

Air Bag 

If your car is equipped with air bag, in 

addition to the use of new design seat belt 

, the system has a module air bag for the 

driver and passengers.

When the ignition switch is placed in the 

ON position, the air bag indicator light on 

the instrument panel is turned on and after 

6 times blinking, is turned off. Otherwise, 

(as below) suggests a fault in the air bag 

system which should be referred to the 

dealer of the car and fix it. 

- Air bag light stay on after blinking 6 

times.

- When the ignition switch is placed in the 

ON position, the air bag light does not 

light up and does not blink.

Front passenger air bag : 

Deactivation switch of air bag is located at 

the side of dashboard .

1- You can turn the switch clockwise to 

deactivate the air bag.

2- Avoid keeping the child seat (back to face) 

in the front seat while the air bag switch is on.

3- If the air bag operates ,while the child seat 

has been kept in front seat ,there is every 

possibility of serous injury or death for the 

child.

WARNING    

- All the parts of the air bag must be 

changed by the authorized dealer of IKCO, 

If it is operated once.

- Keep your belt fastened so that the air 

bag operates in a best condition.

Note:

To control the air bag indicator flashes, in 

case of any two consecutive placing the 

switch in ON position, it should be placed 

at least three seconds on the off position 

as well. 

-------------------------------------------------------------------------------------------------------------------------------------------------------------

-------------------------------------------------------------------------------------------------------------------------------------------------------------

20

1

PARS AT A GLANCE

Child safety locks

Positioned under the each rear door lock. 

The child locks prevent the opening of rear 

doors from the inside and act independent 

of the central (door) locking system. 

To latch the children just push the lever 

down to operate.

Hands-free cellphone (Bluetooth)

Equipping your car with Hands-Free 


telephone (with Bluetooth) means 

that Hands-Free kit can manage your 

communication without usage of your cell 

phone in the regular way.

Even if the mobile phone is inside the 

attaché-case or the pocket of the user, the 

call acceptance or refusal key is located on 

the dashboard console.

-------------------------------------------------------------------------------------------------------------------------------------------------------------


Content      ..       1      2     ..