Kubota tractor (BX25DLB-AU, LA240A, LA240A, AU-SG, BT602). OPERATOR'S MANUAL - part 17
37
OPERATING THE TRACTOR
B
Easy Checker(TM)
If the warning lamps in the Easy Checker(TM) come on
during operation, immediately stop the engine, and find
the cause as shown below.
Never operate the tractor while Easy Checker(TM) lamp is
"ON".
A
For checking and servicing of your tractor, consult
your local KUBOTA Dealer for instructions.
B
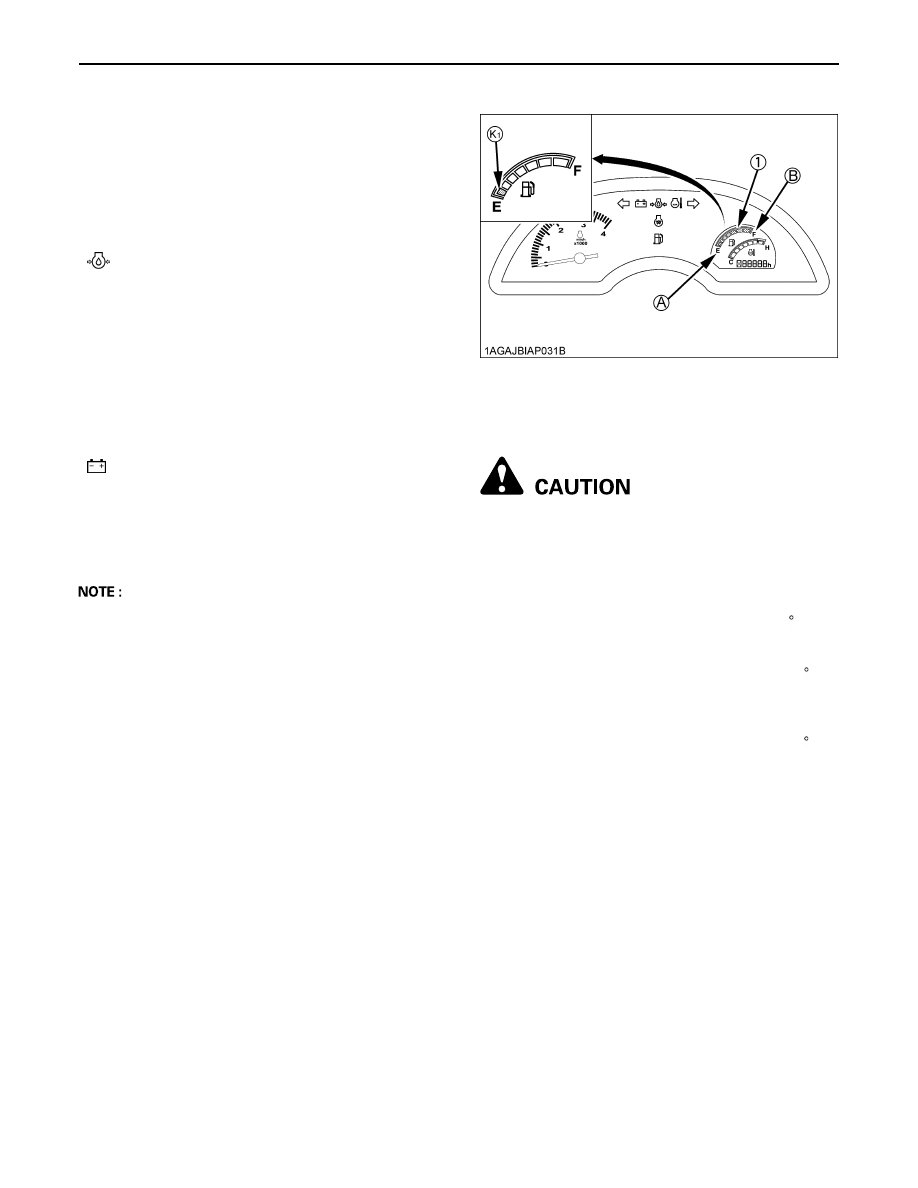
Fuel Gauge
When the key switch is "ON", the fuel gauge indicates the
fuel level.
It's for the check if the gauge is working.
When the fuel is close to empty level, the low fuel indicator
of the Easy Checker(TM) comes on and the segment K1
of the fuel gauge starts blinking at 1-second intervals.
Be careful not to empty the fuel tank. Otherwise air may
enter the fuel system.
Should this happen, the system should be bled. (See
"Bleeding Fuel System" in "SERVICE AS REQUIRED" in
"PERIODIC SERVICE OF THE TRACTOR" section.)
B
Coolant Temperature Gauge
To avoid personal injury:
A
Do not remove radiator cap until coolant
temperature is well below its boiling point.
Then loosen cap slightly to the stop to relieve
any pressure before removing cap completely.
Overheat indication:
1. When the coolant temperature stays at 125 C for 5
seconds, the indicator on the Easy Checker(TM)
comes on.
2. When the coolant temperature stays above 130 C for
5 seconds, the indicator remains on and all segments
of the coolant temperature gauge start blinking at 1-
second intervals.
3. When the coolant temperature stays below 120 C for
5 seconds, the indicator turns off.
If the coolant temperature indicator on the Easy
Checker(TM) comes on:
1. Place the PTO clutch lever in "OFF" (DISENGAGE)
position.
2. Move the machine to the level surface, and apply the
parking brake.
3. Place the throttle lever in the engine idle position, and
let the engine run for a few minutes.
4. Check the Cooling System, after it has sufficient time
to cool down.
Check the following items:
1. Shortage or leakage of the coolant.
2. Foreign matter on the radiator net or dust and dirt
between the radiator fins.
3. Looseness of fan belt.
4. Blockage in the radiator tube.
(See "PERIODIC SERVICE OF THE TRACTOR"
section.)
Engine oil pressure
If the oil pressure in the engine goes below the
prescribed level, the warning lamp in the Easy
Checker(TM) will come on.
If this should happen during operation, and it does
not go off when the engine is accelerated to more
than 1000 rpm, check level of engine oil.
(See "Checking Engine Oil Level" in "DAILY CHECK"
in "PERIODIC SERVICE OF THE TRACTOR"
section.)
Electrical charge
If the alternator is not charging the battery, the
indicator in the Easy Checker(TM) will come on.
If this should happen during operation, check the
electrical charging system or consult your local
KUBOTA Dealer.
(1) Fuel gauge
(A) "EMPTY"
(B) "FULL"
(K1) Blinking segment