Hyundai Excavator R210LC-7. Service and repair manual - page 25
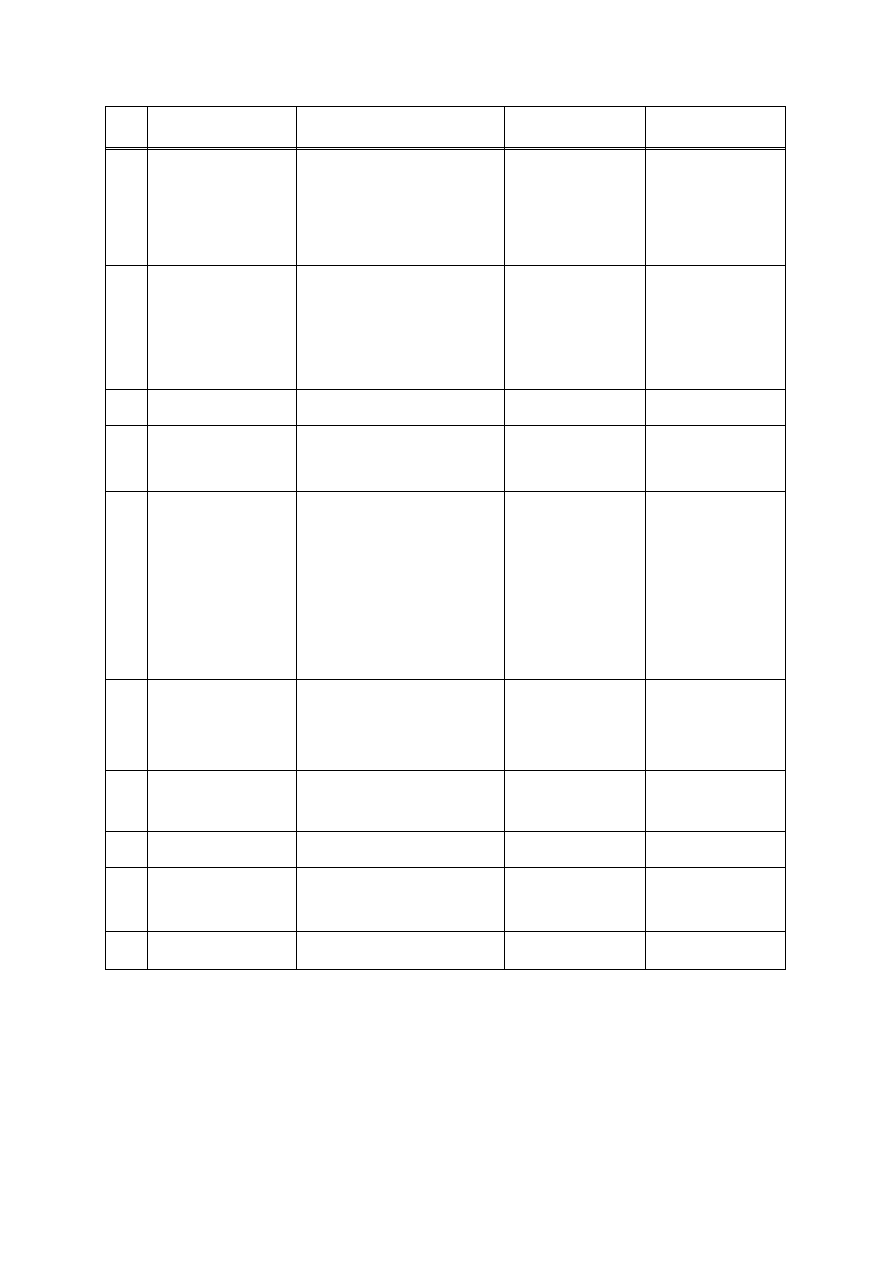
7 - 26
The spherical sliding section that
contacts the retainer plate(107)
is nonuniformly worn out.
The sliding surface has the traces
of seizure or nonuniformly wear.
Both edges are nonuniformly
worn out.
The required torque cannot be
achieved.
The traces of seizure are present.
The seat surface is damaged.
The outer surface is damaged.
The seat surface is damaged.
The sliding section that contacts
the spool(137) is damaged.
The clearance against the
spool(137) is too large.
The outer surface is damaged.
The outer surface is nonuniformly
worn out.
Dents are present.
Flaking develops.
Nonuniform wear is observed.
The outer surface is damaged.
The seat surface is damaged.
The seat surface is damaged.
The outer surface is damaged.
The seat surface is damaged.
The seat surface is damaged.
Thrust ball
Timing plate
Friction plate
Mating plate
Valve seat
Valve
Body kit
Body
Spool
Roller bearing
Ball bearing
Valve
Stopper
Valve
Valve seat
-
Braking torque
49.3kgf m or less
-
-
Linear clearance :
20
-
-
-
-
-
-
Braking torque
49.3kgf m or more
-
-
Linear clearance :
7 to 15
-
-
-
-
-
108
109
115
116
118
119
136
137
149
150
163
164
142
172
Situation
Standard dimension
Part name
Maximum allowable
value(Criteria)
Item
No.