BMW Motorcycle (R1100RT, R1100RS, R850/1100GS, R850/1100R). Manual - part 49
 

  Index      Manuals     BMW AG Motorcycle (R1100RT, R1100RS, R850/1100GS, R850/1100R). Repair Manual


Search            


Content   ..  47  48  49  50   ..


BMW Motorcycle (R1100RT, R1100RS, R850/1100GS, R850/1100R). Manual - part 49


46.47

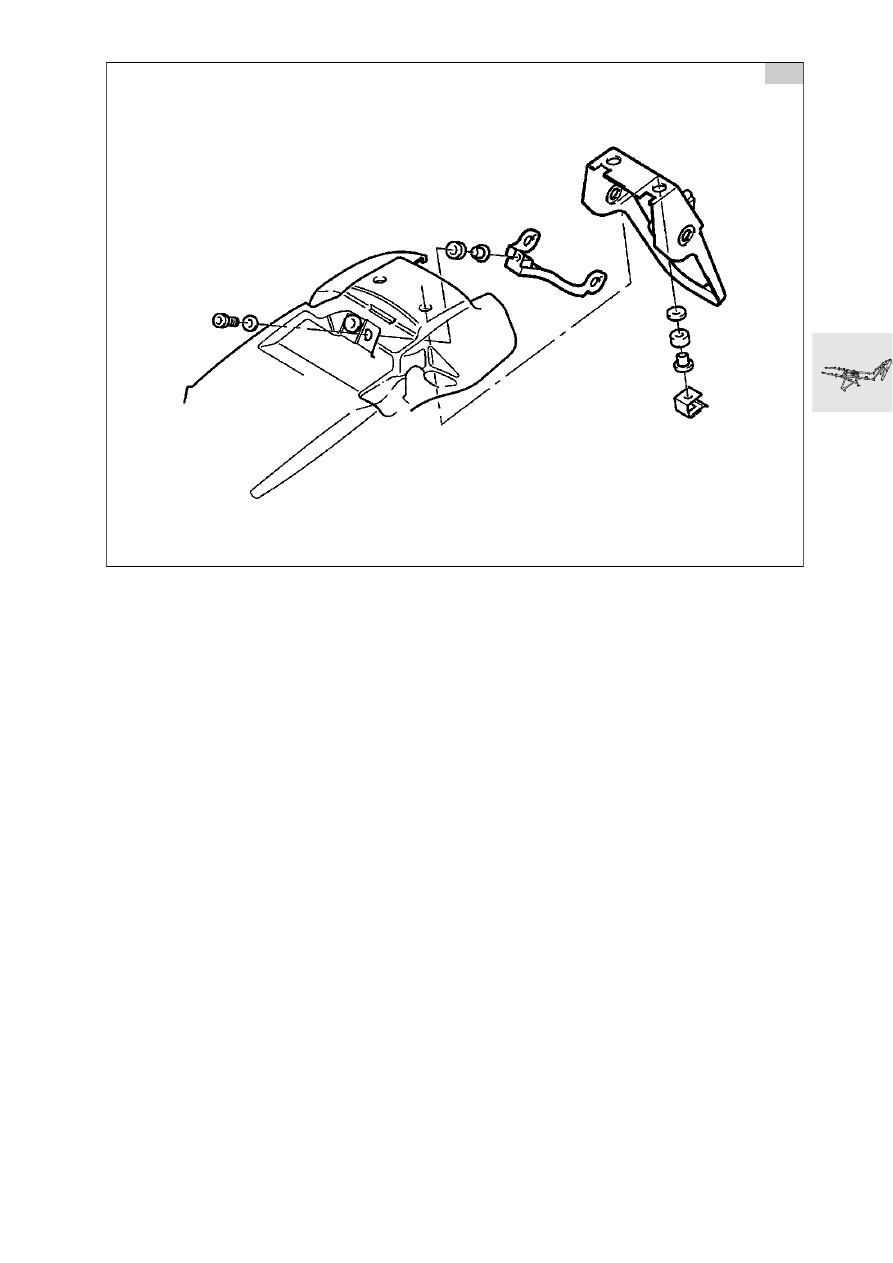
[GS/R] Removing and installing 
number plate bracket

•

Take off rear section of dualseat.

•

[GS] Remove tool box.

•

[GS] Remove rear light.

•

Remove turn indicators.

•

Remove number plate bracket.

•

Install in the reverse order of work.

GS

GS460151

46.48

[GS/R] Removing and installing rear 
mudguard

e

 Caution:

Switch off ignition.
Disconnect ground (earth) lead from battery.
Insulate ground (earth) lead.

•

Remove dualseat.

•

[GS] Remove tool box.

•

[R] Remove rear fairing.

•

Disconnect plugs and leads from rear light and 
indicators.

•

Remove number plate bracket.

•

Detach mudguard.

•

Remove wiring harness from rear section.

•

Install in the reverse order of work.

GS

GS460251

46.49

[GS/R] Removing and installing rear 
footrest plate

X

 Tightening torque:

Footrest plate to rear frame .......................... 21 Nm

GS460181

46.50

[GS] Removing and installing front 
footrest plate

X

 Tightening torque:

Hydraulic spring adjuster
to footrest plate ............................................ 22 Nm

GS460191

46.51

[R] Removing and installing rear 
fairing

RS460041

46.52

Checking running gear

Measuring wheel track offset

•

Place vehicle on level ground on center stand.

•

Place track alignment gauge, 
BMW No. 36 3 920, against left or right side of 
motorcycle.

L

 Note:

In order to use the track alignment gauge on either 
the left or right side, simply screw the supports in on 
the other side.

•

Adjust support (1) so that the measuring plane is 
as close as possible to the wheel centerline. The 
gauge must slide freely up to the motorcycle.

•

Adjust measuring stops (arrows) until they con-
tact the wheel rim - not the tyre.

•

Attach hook (2) to wheel spoke to secure the 
gauge firmly to the wheel.

•

Align front wheel parallel with the gauge.

•

Measure distance between outer edge of gauge 
and wheel rim, using depth gauge (3) or ruler, 
and make a note of the dimension.

36 3 920

1

2

3

RS460200

46.53

•

Calculate wheel track offset S:

•

Wheel track offset S is the distance to left or right 
between the longitudinal axes of the front and 
rear wheels.

Permissible track offset (S): ...........  9 mm (0.354 in)

L

 Note:

Explanation of measurement:
Minus sign = track offset to left
Plus sign = track offset to right

EXAMPLE:

Formula

Fixed value (A) 

+half rim width

A

=

50,0 mm (1.9685 in)

=

44,5 mm (1.752 in)

=

94,5 mm (3.72 in)

Measured value (B)

+half rim width

B

=

52,0 mm (2.047in)

=

41,0 mm (1.614 in)

=

93,0 mm (3.66 in)

Fixed value (A)

—measured value (B) = S

94,5 mm (3.72 in) 

—93,0 (3.66 in) = S

Wheel track offset:

S

= 

1,5 mm (0 059 in)

B

B

A

A

F

h

F

h

S

RS460210

A

F

h

2

-----

B

F

v

2

-----

+

–

+

S

=

F

h

2

------

A

F

h

2

-----

+

F

v

2

----

B

F

h

2

-----

+

51.1

Contents

Page

51

Removing and installing ignition switch/steering lock 

...........................................3

Removing and installing ignition/light switch 

.....................................................................3

Removing and installing lock barrel 

.......................................................................................3

Drilling out lock barrel ..........................................................................................................................3

Removing and installing lock barrel for fuel tank filler cap 

..................................4

Drilling out lock barrel ..........................................................................................................................4

[RS/RT] Removing and installing dualseat lock 

..........................................................5

Removing and installing lock barrel 

.......................................................................................5

[GS] Removing and installing dualseat lock 

..................................................................5

Removing and installing lock barrel 

.......................................................................................5

[R] Removing and installing dualseat lock 

.....................................................................6

Removing and installing lock barrel 

.......................................................................................6

[GS] Removing and installing helmet lock 

.....................................................................6

[RT] Removing and installing storage compartment lock 

.....................................6

51 Equipment


Content   ..  47  48  49  50   ..