Volkswagen Golf / Golf GTI / Jetta. Manual - part 708


  Index      Volkswagen     Volkswagen Golf / Golf GTI / Jetta - service repair manual 1999-2005 year


Search            copyright infringement  


Content   ..  706  707  708  709   ..


Volkswagen Golf / Golf GTI / Jetta. Manual - part 708


Installation notes


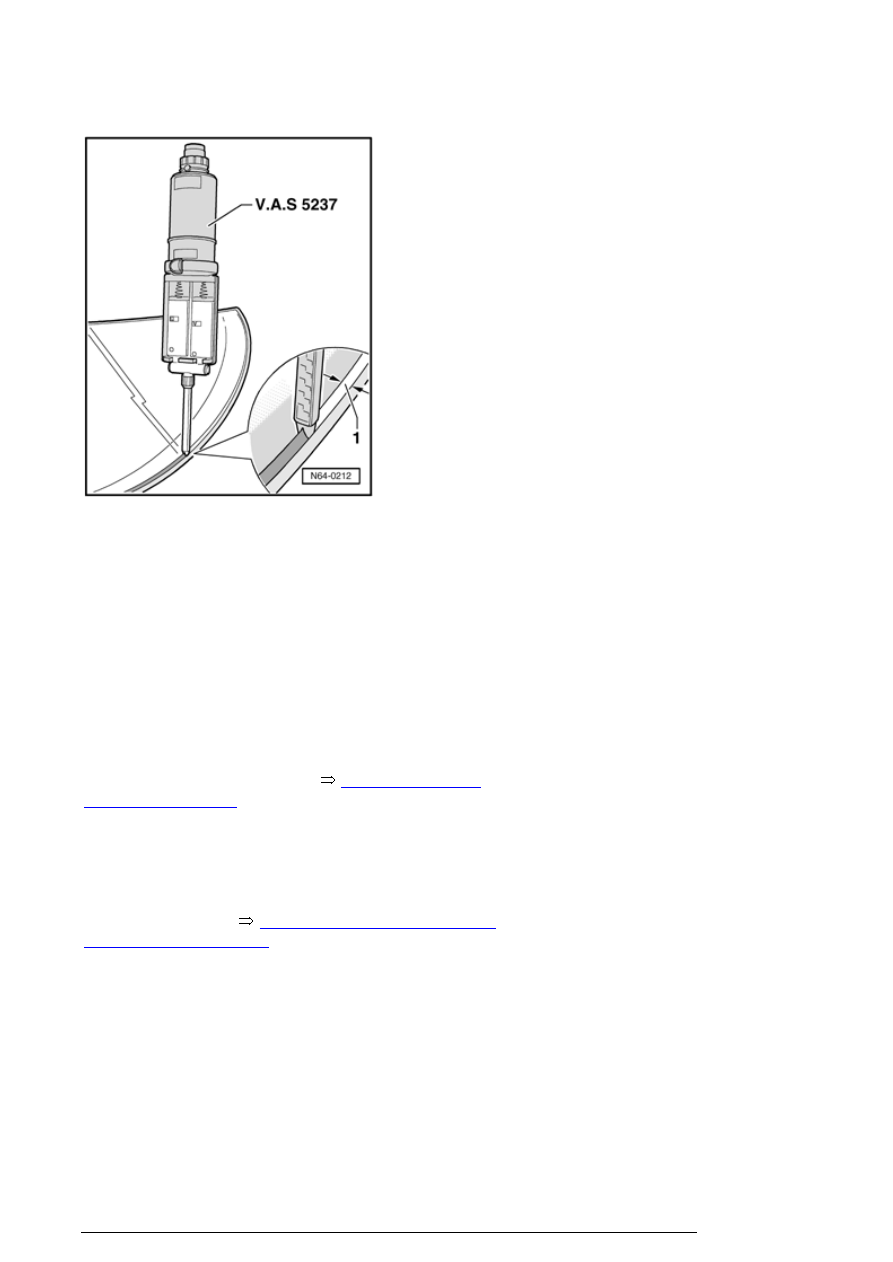
- Apply adhesive material all around onto pre-coating  - 1 - 
at right angle to window. 

Warning!  

Window must be installed within 10 minutes, otherwise 
bonding properties of window adhesive will be 
impaired.

Insert window into window cut out using two double suction 
lifters Suction lifters VAG 1344 ), center and press in up to 
spacer.  
 
Gap dimension of windshield 


64-1, Windshield, 

assembly overview

 .  

 
Secure windshield using window adjuster (443 845 631 A) 
during curing time.  
 
Plenum chamber cover must always be installed as 
described on page 


64-1, Plenum chamber cover, 

removing and installing

 .  

 
Re-affix any stickers (e.g. for airbag).  
 

Flush-bonded windows

13/2/2005


- When installing mirror - 1 - , attach at 6090   offset to 
installation position and turn - arrow - until retaining spring 
engages. 

Insert rubber seal for axle of rear windshield wiper motor 
into rear window.  
 
For Jetta, check gap dimension between rear lid and rear 
window using Adjusting gauge 3371 ; rear window gap 
dimension 


64-1, Rear window (Jetta), assembly 

overview

 .  

 
Rear window gap dimension 


64-1, Rear window (Golf), 

assembly overview

 .  

 
Activator must not be applied onto distributing wire for 
window heater.  
 
Secure rear window using adhesive tape during curing 
time.  
 
For Jetta, secure rear window using window adjusters (443 
845 631 A) during curing time.  
 
If adhesive bead has been applied too thick and adhesive 
expands onto area of window heating, then excess 
adhesive must be removed.  
 

Minimum curing time


Warning!  


Special requirements must be fulfilled for replacing 
bonded windows. This includes that e.g. a newly 
bonded windshield is safe for vehicle operation also in 
case of an accident after a specified minimum curing 
time.

Using new 2K adhesive DA 004 600 A2 , a shorter 

Flush-bonded windows

13/2/2005


minimum curing time may be achieved. 

Window

Vehicle

Window 

adhesive

Minimum curing 

time

Windshields

with and without 
airbag

DA 004 600 A2

3 hours

Side windows and rear 
windows


Minimum curing time is time from applying components up 
to vehicle use. During this time, vehicle must stand on an 
even surface at room temperature (at least 15   C). 

Warning!  


Vehicle is operationally ready only after this waiting 
time has elapsed.

Repairing paint damage


Paint construction must be re-established according to 
specifications of Repair Manual "Paint" . 


Following repair method applies to paint damage in an area 
which is not visible:

- Paint twice (wet on wet) using Glass/paint primer D 009 
200 02 - minimum air drying time 10 minutes. 

Adhesive sealing material, cleaning off 
surplus 

- Adhesive removal solution D 002 000 10 is recommended 
cleaning solution. Observe safety precautions when 
processing. 

Warning!  


When cleaning from vehicle interior out, window just 
installed must not be pressed outward.

- First, clean coarse paint surfaces with a dry cloth. 
Remove further material using Adhesive removal solution  D 
002 000 10 . 

- Clean plastic trim: Allow adhesive sealing material to 
harden (about 1 hour) and then peel off.  

Flush-bonded windows

13/2/2005

64 - 2


Door windows


Tools


Special tools, testers and auxiliary items 
required
 

Socket wrench T10011  
 
Socket wrench T10072  
 
Assembly tool T10034  
 
Box spanner 3320/2 for 3320  
 
Box spanner 3320/3 for 3320  
 
Socket 3410  
 

Door windows

13/2/2005


Content   ..  706  707  708  709   ..