Volkswagen Fox (2004 year). Manual - part 49
 

  Index      Volkswagen     Volkswagen Fox - service repair manual 2004 year


Search            copyright infringement  


Content   ..  47  48  49  50   ..


Volkswagen Fox (2004 year). Manual - part 49


der.

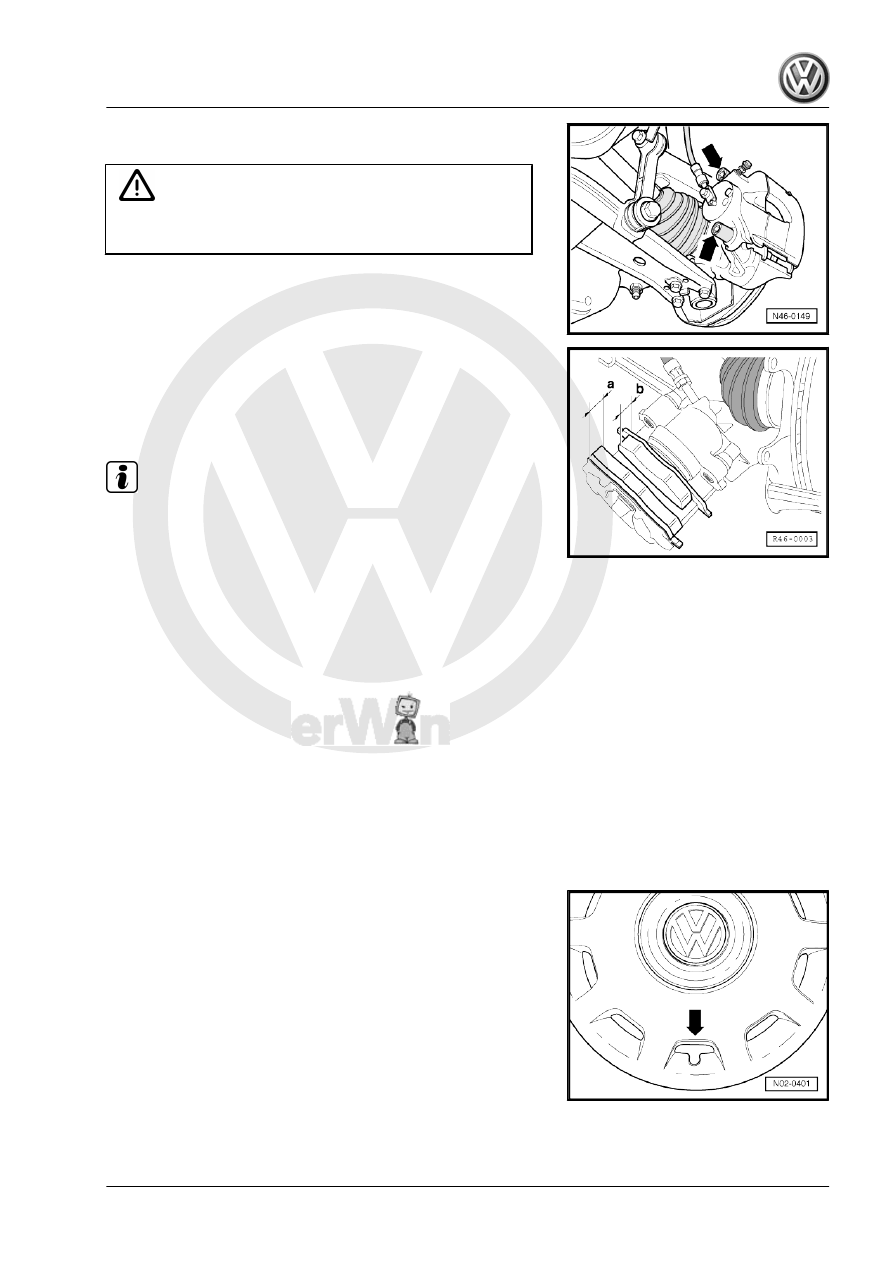
WARNING

Remove the brake cylinder and fasten it with wire so that its

weight does not stress and damage the flexible brake pipe.

– Measure the internal and external pad thickness.
– External pad thickness including rear plate-a-.
– Internal pad thickness including rear plate-b-.
– Wear limit: 7 mm with the rear plate.

Note

For a pad thickness of 7 mm (including the rear plate), the

brake pads have reached their wear limit and must be replaced

(repair measure). The customer must be informed

If the disc brake pads are replaced, you must also check the

brake discs for wear! Checking and occasionally replacing the

brake discs is a repair measure.

– Installation is performed in the reverse process to the removal.
– The larger brake pad is installed on the outside! (FS II brake

system).

– Torque the brake cylinder fastening screws to 25 Nm (FS II

brake system).

– Torque the brake cylinder fastening screws to 30 Nm (FS III

brake system).

– When installing the wheel, screw in the indicated position.
– Install the wheel fastening screws in a cross pattern and tight‐

en them to 120 Nm.

– After completing the tasks, keep the hub cap/super hub cap

removal hook with the tools.

– Install the super hub cap so that the tire inflation valve passes

through the opening -arrow- for this purpose.

4.25.2

Brake disc - check the thickness

Please check the following:

FOX 2004 ➤

4. Service descriptions    

69

Note

Always replace both discs from the same axle.

4.25.3

Brake disc with visual check - check

Note

The wear indicators on the front brake discs (visual check) in‐

dicate when the brake discs must be changed. This check is

made by using the marks on the contact surface of the brake

discs.

Always check both discs on the same axle and, if necessary,

replace them.

4.25.4

?Vehicles with light-alloy wheel

Position the wheel so that the brake disc wear indicators (visual

check) can be visualized.

FOX 2004 ➤

70

    4. Service descriptions

contact area.

♦ Wear indicator -2- is located close to the internal edge of the

brake disc.

Note

If the front brake disc wear indicator markings (visual check)

cannot be visualized due to wheel design, the wheels must be

removed.

If the front wheels must be removed to check the brake discs,

after reinstalling them, tighten the screws to 120 Nm.

Checking conditions of front brake disc wear:
1 - Wear indicators -1- and -2- are visible:
The brake discs need not be replaced.
2 - Only wear indicator -2- is visible:
The brake discs do not require replacement, but be aware if the

next change is close.
3 - No brake disc wear indicator is visible.

FOX 2004 ➤

4. Service descriptions    

71

4.25.5

Vehicles with steel wheel

Note

In order to visualize the brake disc wear indicators (visual

check) in vehicles with steel wheels, the front wheels must be

removed.

After checking the brake discs, install the wheels and tighten

fastening screws to 120 Nm.

♦ Wear indicator -1- is located on the centre of the brake disc

contact area.

♦ Wear indicator -2- is located close to the internal edge of the

brake disc.

Checking conditions of front brake disc wear:
1 - Wear indicators -1- and -2- are visible:

FOX 2004 ➤

72

    4. Service descriptions


Content   ..  47  48  49  50   ..