Dacia Solenza (engine E7J). Manual - part 121
62
AIR CONDITIONING
62- 10
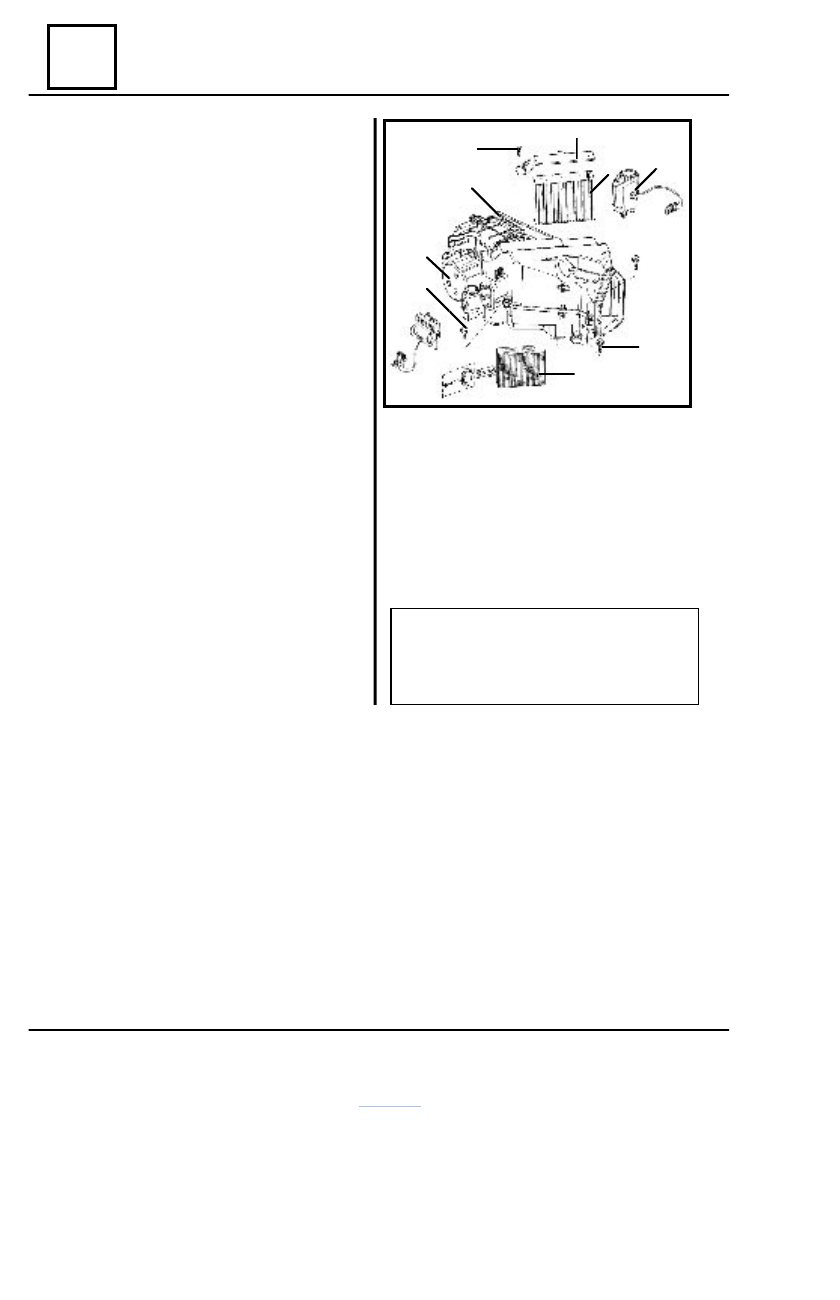
DISMOUNTING
Disconnect the battery.
Drain the air condiotioning unit to the station
by recovering the refrigerant fluid
Dismount it from screws (6) and release the
cold air-blowing device (2) from the climate con-
trol box (see D.S.A.F. dismounting-remounting)
Disconnect and release the two attachment
screws (3) of the air blower.
Dismount the resistance’s assembly (7)
Supply the gear motor in order to bring the
recycling control flap in vertical position.
Dismount the attachment screw (1) of the air
filter protection cap (9) and release the filter (8).
Dismount the attachment screws (4) of the
D.S.A.F. cases and release the evaporator (5).
REMOUNTING
Perform the dismounting operations in the
reverse order.
Vacuum then charge the air conditioning
circuit with refrigerant fluid HFc 134a by
means of the charging station.
Check the good operation of the air
conditioning system.
NOTÃ:
Garniturile autoadezive ale D.S.A.F.
vor fi înlocuite cu altele noi.
Evaporator
3
4
5
6
2
1
9
8
7