Content .. 1182 1183 1184 1185 ..
Nissan Pathfinder. Manual - part 1184
TCM
TM-195
< REMOVAL AND INSTALLATION >
[CVT: RE0F10E]
C
E
F
G
H
I
J
K
L
M
A
B
TM
N
O
P
TCM
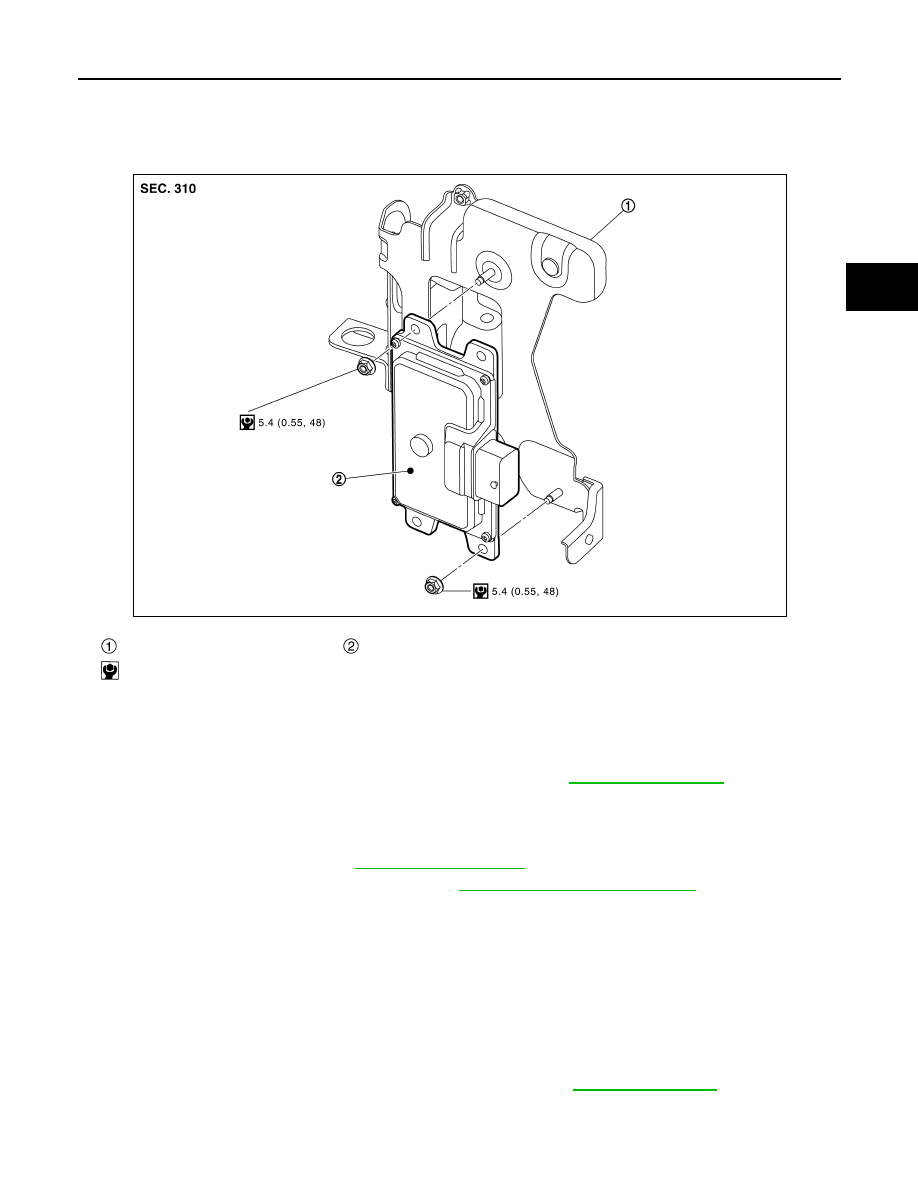
Exploded View
INFOID:0000000009177653
Removal and Installation
INFOID:0000000009177654
CAUTION:
• To replace TCM, perform " WRITE IP CHARA – REPLACEMENT TCM" of the CONSULT Work Support
before removing TCM and save TCM data in CONSULT. Refer to
• When replacing TCM, note the “CVTF DETERIORATION DATE” value displayed on CONSULT “CON-
FORM CVTF DETERIORTN” in MAINTENANCE BOOKLET, before start the operation.
REMOVAL
1. Remove the front air duct. Refer to
2. Disconnect the negative battery terminal. Refer to
PG-90, "Removal and Installation"
3. Disconnect the TCM harness connector.
4. Remove the TCM and bracket as a set.
5. Remove the TCM from the bracket.
INSTALLATION
Installation is the reverse order of removal.
Adjustment
INFOID:0000000009177655
ADJUSTMENT AFTER INSTALLATION
Perform "ADDITIONAL SERVICE WHEN REPLACING TCM". Refer to
.
Bracket
TCM
: N·m (kg-m, in-lb)
JSDIA3618GB