Mitsubishi Lancer Evolution 8 MR. Manual - part 10
3-2
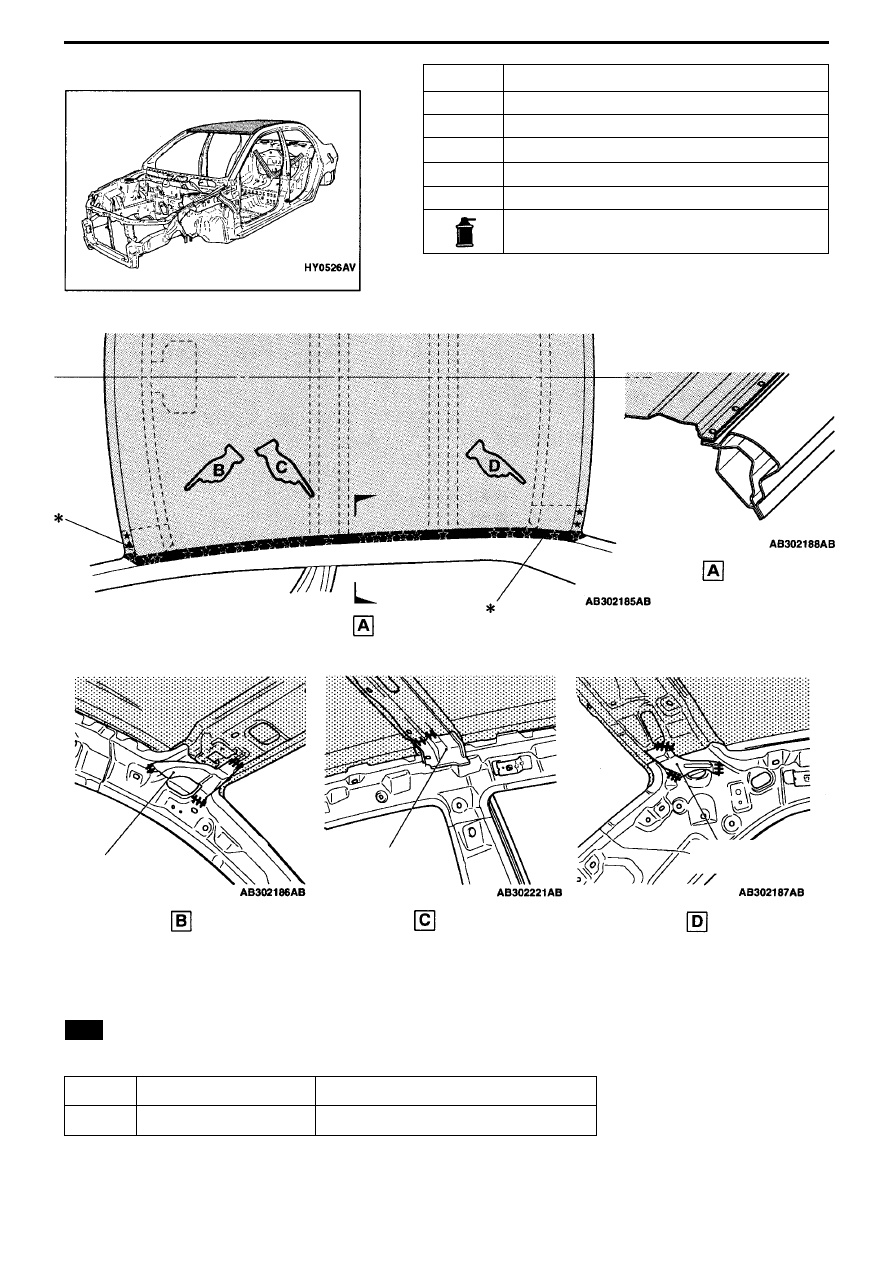
CHANGING WELDED PANELS – ROOF
Symbol
Operation details
● ● ● ●
Spot welding
■ ■ ▲ ▲
MIG plug welding (
■
: two layers
▲
: three layers)
+ + + +
MIG spot welding
✝✝✝✝✝✝✝✝
MIG arc welding (continuous)
★ ★ ★ ★
Rivet
Areas where rust inhibitor is applied. (Applied using
holes in butt welded locations)
Front pillar
upper support
Centre pillar
upper support
Rear pillar upper
support
Note
❉
: these welding points are done by manufacturer (not necessary during repairs).
:
black shading indicates areas where structural adhesive is applied.
Adhesive Type
Product name
Epoxy structural adhesive Sumitomo 3M Auto Mix Panel Bond 8115
SERVICE JOINTS