Mazda CX-9 Grand Touring. Manual - part 472
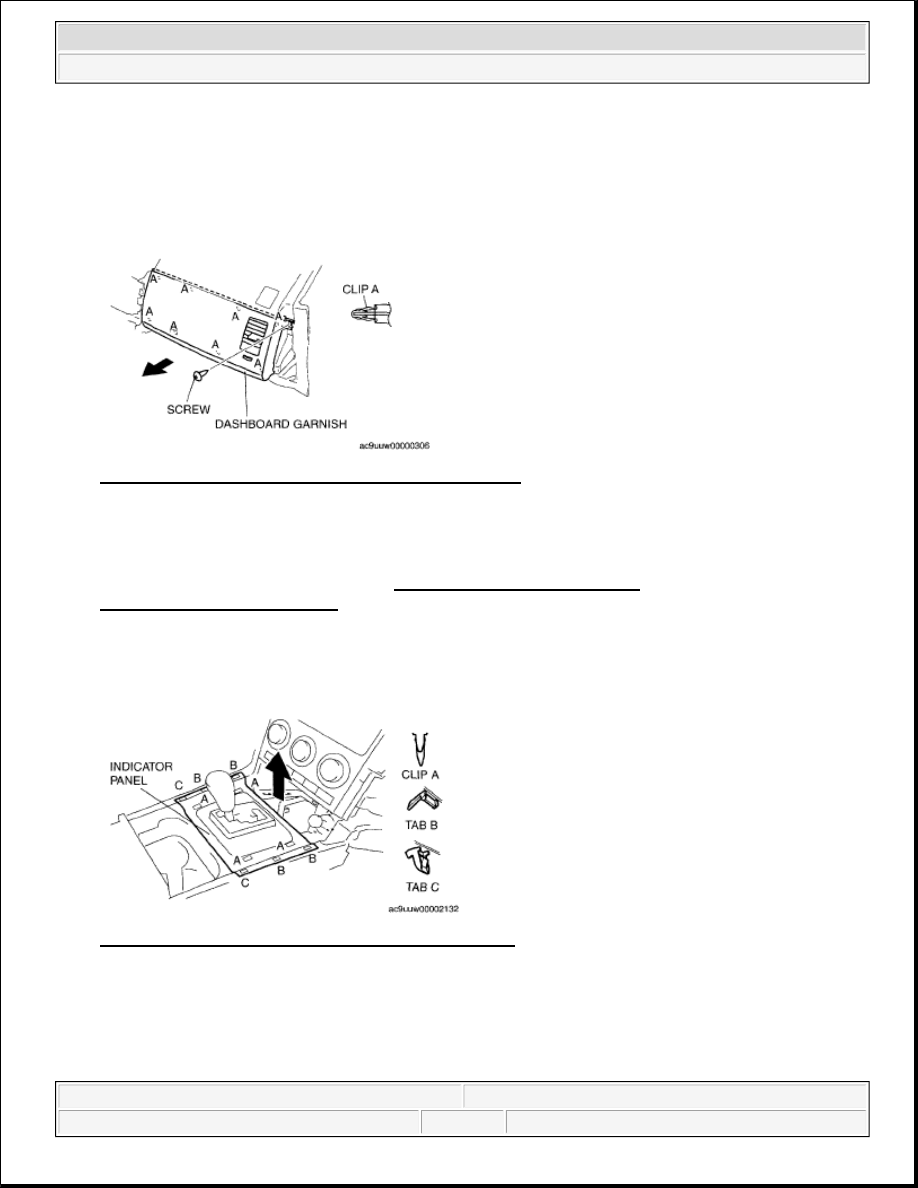
3. Remove the screw.
4. Detach clips A by pulling them in the direction of the arrow.
5. Remove the dashboard garnish.
6. Install in the reverse order of removal.
Fig. 29: Identifying Dashboard Garnish Screw & Clips
Courtesy of MAZDA MOTORS CORP.
INDICATOR PANEL REMOVAL/INSTALLATION
1. Remove the front console box mat. (See FRONT CONSOLE BOX MAT
REMOVAL/INSTALLATION.
2. Detach clips A and tabs B and C by pulling them in the direction of the arrow.
3. Remove the indicator panel.
4. Install in the reverse order of removal. indicator
Fig. 30: Identifying Indicator Panel With Clips & Tab
Courtesy of MAZDA MOTORS CORP.
FRONT CONSOLE BOX MAT REMOVAL/INSTALLATION
1. Insert a tape-wrapped flathead screwdriver between the indicator panel and front console box mat.
2008 Mazda CX-9 Grand Touring
2008 BODY & ACCESSORIES Interior Trim - Mazda CX-9
Microsoft
Sunday, November 15, 2009 10:43:26 AM
Page 21
© 2005 Mitchell Repair Information Company, LLC.