Mazda 6. Manual - part 302
S–102
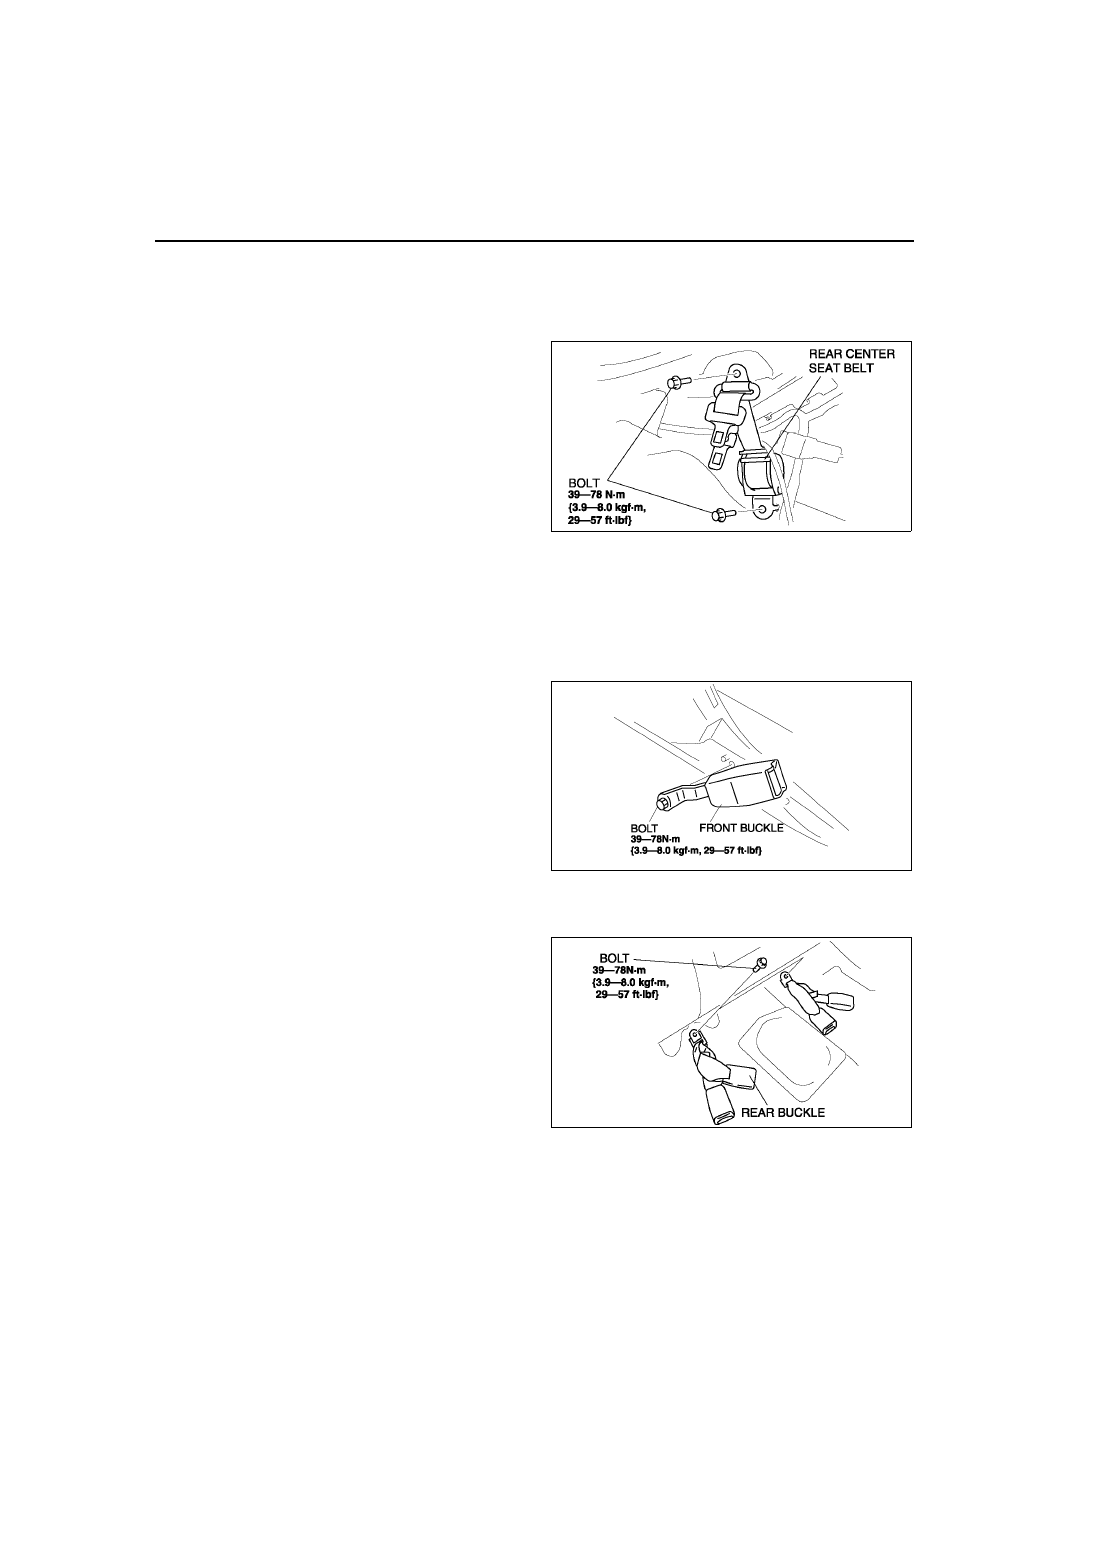
SEAT BELT
5HB
1. Remove the rear scuff plate.
2. Remove the tire house trim.
3. Remove the trunk side upper trim.
4. Remove the C-pillar trims.
5. Remove the bolts.
6. Remove the rear center seat belt.
7. Install in the reverse order of removal.
End Of Sie
FRONT BUCKLE REMOVAL/INSTALLATION
A6E775057620W01
1. Perform the following procedure for vehicles with seat belt warning.
(1) Disconnect the negative battery cable.
(2) Remove the front seat.
(3) Disconnect the buckle switch connector.
2. Perform the following procedure for vehicles without seat belt warning.
(1) Remove the console.
3. Remove bolt.
4. Install in the reverse order of removal.
End Of Sie
REAR BUCKLE REMOVAL/INSTALLATION
A6E775057720W01
1. Remove the rear seat cushion.
2. Remove the bolts.
3. Remove the rear buckles.
4. Install in the reverse order of removal.
End Of Sie
A6E7750W004
A6E7750W002.
A6E7750W006