Frelander 2. Manual - part 169
Refer to:
Engine Mount RH
(303-01A Engine - I6 3.2L Petrol,
Removal and Installation).
Remove the timing cover.
Refer to:
Timing Cover
(303-01A Engine - I6 3.2L Petrol, Removal
and Installation).
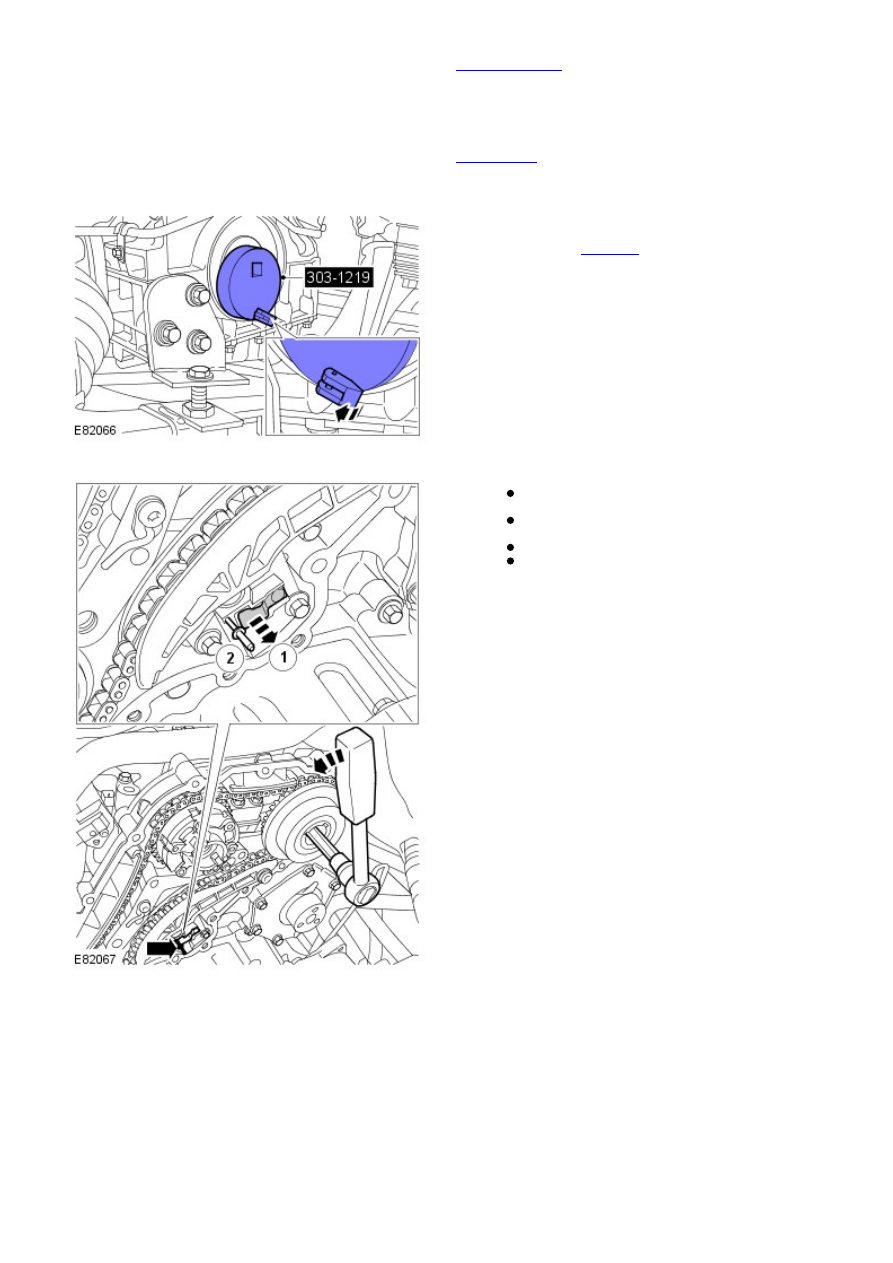
5.
Position and lock the crankshaft.
Special Tool(s):
303-1219
6.
To depress the chain tensioner piston and lock it
in position with a 2mm, or less, diameter pin.
Apply an even pressure in a counter clockwise
direction.
Lift the piston ratchet clip.
Install a pin with 2mm, or less, diameter.
7.