Defender. Manual - part 161


  Index      Land Rover     Land Rover Defender - service manual 2007 year


Search            


Content   ..  159  160  161  162   ..


Defender. Manual - part 161


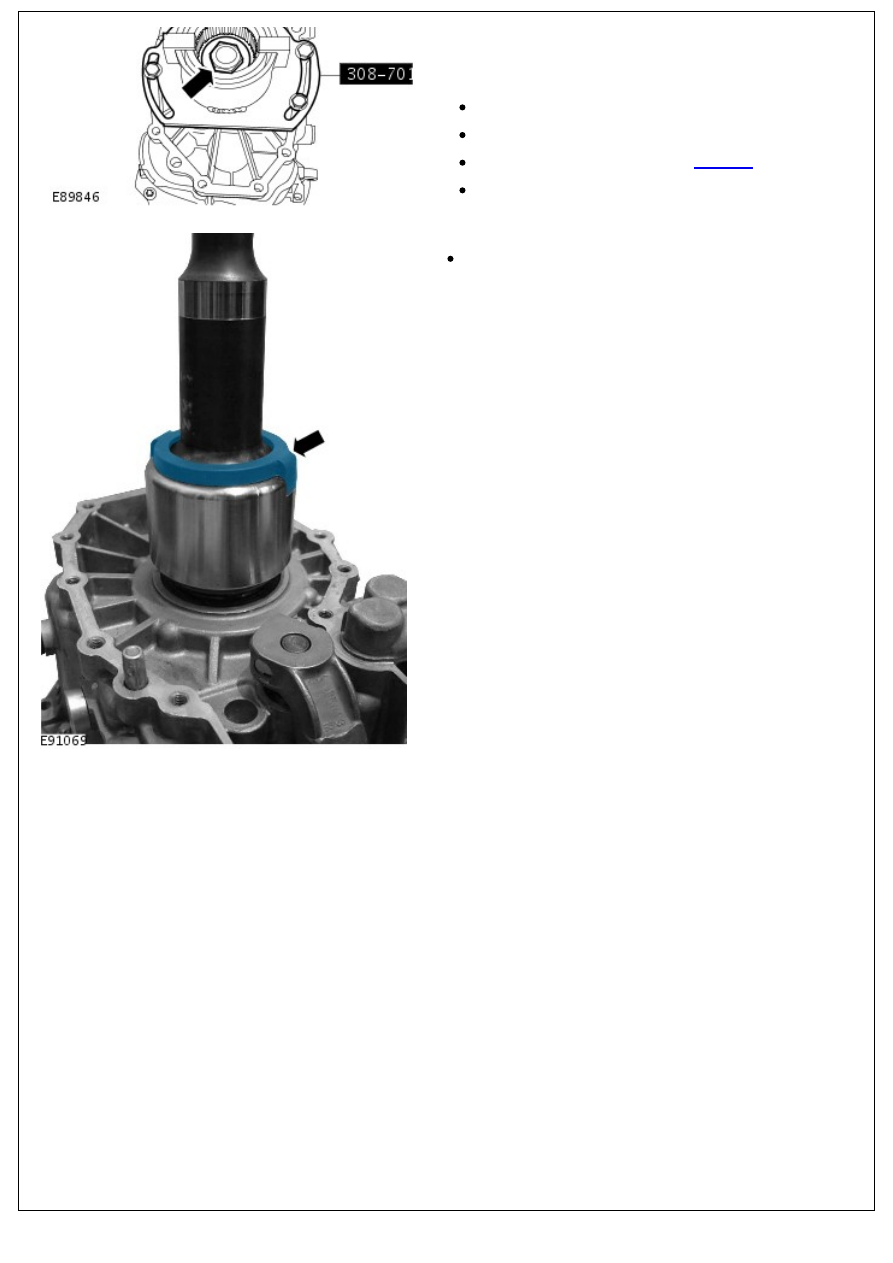
• NOTE: Heat the output flange to approx. 100 °C using a hot

air blower.

Using the special tool, install the transmission output flange.

Tighten the bolt to 210 Nm (155 lb.ft).

Loosen the bolt.

Apply thread locking compound.

adhesive

Tighten the bolt to 180 Nm (133 lb.ft).

3. Install the transmission extension shaft.

Install the seal.

4. NOTE: Make sure that the tie strap joint is between the

4. NOTE: Make sure that the tie strap joint is between the

fingers of the extension shaft seal cover and that it has been

cut flush.

Install the transmission extension shaft cover.

1. Install the cover.

2. Install the tie strap.

5. Install the transmission extension housing.

Tighten the bolts to 25 Nm (18 lb.ft).

6. Install the transfer case. 

For additional information, refer to: 

Transfer Case

 (308-07A

Transfer Case - 2.4L Duratorq-TDCi HPCR (103kW/140PS) -

Puma, Installation).

7. Fill the transmission. 

For additional information, refer to: 

Transmission Draining

and Filling

 (308-03 Manual Transmission/Transaxle, General

Procedures).

8. Install the gearshift lever. 

For additional information, refer to: 

Gearshift Lever

 (308-06

Manual Transmission/Transaxle External Controls - 2.4L

Duratorq-TDCi HPCR (103kW/140PS) - Puma, Removal and

Installation).

9. Connect the battery ground cable. 

For additional information, refer to: 

Battery Connect

 (414-01

Battery, Mounting and Cables, General Procedures).

Manual Transmission/Transaxle - Selector Shaft Detents

Removal and Installation

Special Tool(s)

Slide Hammer

100-012

Remover, Detent

308-657

Adapter, Slide Hammer

100-012-05

General Equipment

Hammer
Soft Drift

Removal

1. Remove the transmission.

For additional information, refer to: 

Transmission

 (308-03

Manual Transmission/Transaxle, Removal).

2. 

CAUTION: Make sure area surrounding component is

clean.

Assemble the special tools.

CAUTION: Make sure area surrounding component is


Content   ..  159  160  161  162   ..