Jeep XJ. Manual - part 483
(4) Attach the door waterdam to the door inner
panel with adhesive/sealant.
(5) Install the waterdam.
(6) Install the door trim panel.
REAR DOOR TRIM PANEL
REMOVAL
(1) Roll window down.
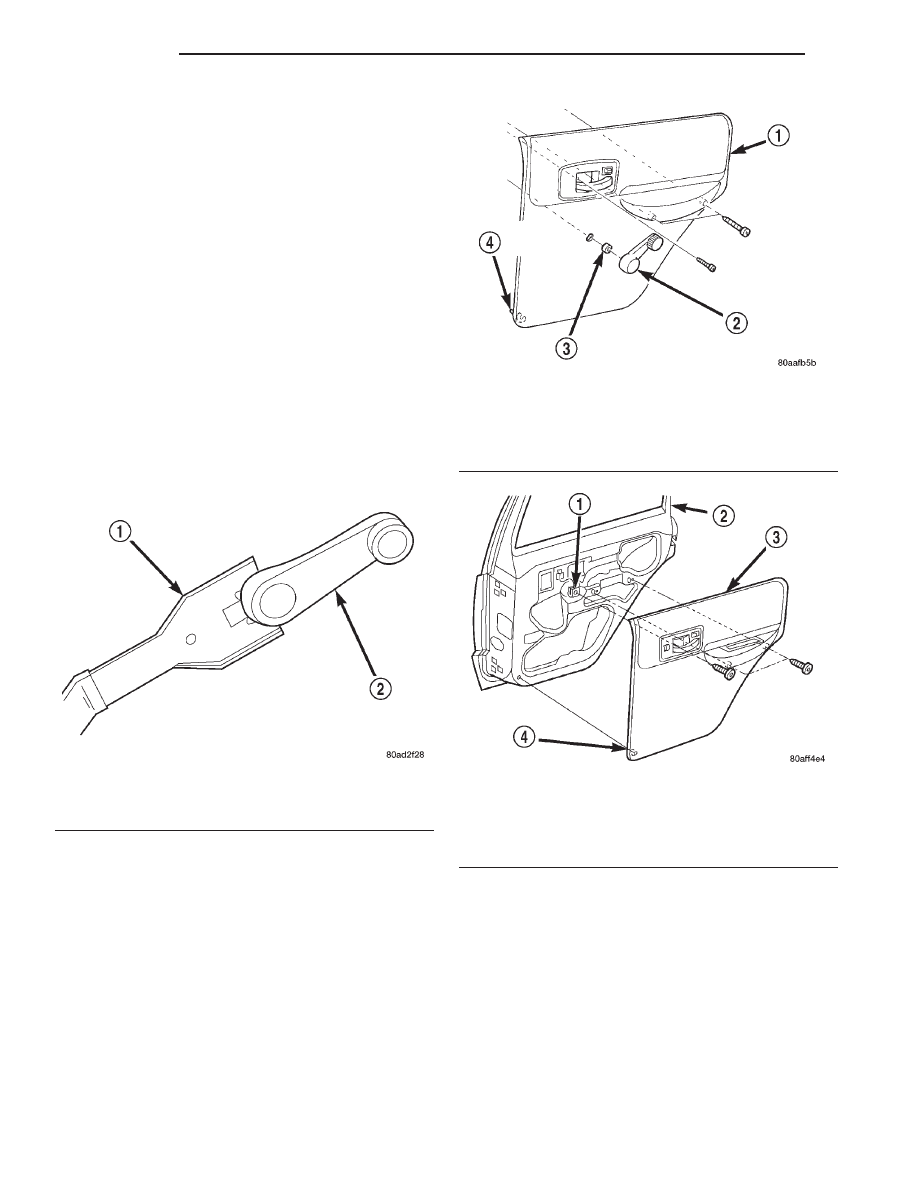
(2) Remove window crank, if equipped (Fig. 42).
(3) Remove the screws attaching the trim panel to
the door inner panel (Fig. 43) and (Fig. 44).
(4) Separate the trim panel fasteners from door
inner panel with a pry tool (use special tool C-4829)
(Fig. 45).
(5) Lift the trim panel up and outward to separate
from the inner belt seal.
(6) Move the door trim panel outward and discon-
nect the handle-to-latch rods (Fig. 46).
(7) Disconnect the power windows wire harness
connectors, if equipped.
(8) Remove the trim panel from door.
INSTALLATION
(1) Replace any broken or damaged push-in fasten-
ers.
(2) Connect the power window wire harness con-
nectors, if equipped.
(3) Move the door trim panel outward and connect
the handle-to-latch rods.
(4) Position the trim panel on the inner belt seal
and push down to seat.
(5) Align the locating pins and push-in fasteners
(Fig. 47). Press inward to secure.
(6) Install the screws attaching the trim panel to
the door inner panel.
(7) Install the window crank, if equipped.
REAR DOOR WATERDAM
REMOVAL
(1) Remove door trim panel.
(2) Peel the waterdam from the door.
(3) Route the latch rods and wire harnesses
through the waterdam.
(4) Separate the waterdam from the door inner
panel.
INSTALLATION
(1) Route the latch rods and wire harnesses
through the waterdam.
Fig. 42 Window Crank—Typical
1 – WINDOW CRANK REMOVAL TOOL
2 – WINDOW CRANK
Fig. 43 Rear Door Trim Panel—Manual Window
1 – TRIM PANEL
2 – WINDOW CRANK
3 – SPACER
4 – PUSH-IN FASTENER
Fig. 44 Rear Door Trim Panel—Power Window
1 – U-NUT
2 – REAR DOOR
3 – TRIM PANEL
4 – PUSH-IN FASTENER
23 - 42
BODY
XJ
REMOVAL AND INSTALLATION (Continued)