Isuzu Amigo / Axiom / Trooper / Rodeo / VehiCross. Manual - part 962


  Index      Isuzu     Isuzu Amigo / Axiom / Trooper / Rodeo / VehiCross - service repair manual 1999-2002 year


Search            


Content   ..  960  961  962  963   ..


Isuzu Amigo / Axiom / Trooper / Rodeo / VehiCross. Manual - part 962


7C–18

CLUTCH

Torque Specifications

D

Master cylinder to dash panel
Torque: 16 N·m (12 lb ft)

D

Clutch pedal to dash panel
Torque: 21 N·m (15 lb ft)

D

Master cylinder push rod to yoke
Torque: 17 N·m (12 lb ft)

D

Clutch pipe to master cylinder
Torque: 12 N·m (9 lb ft)

D

Clutch pipe to flexible hose
Torque: 16 N·m (12 lb ft) 

D

Slave cylinder to case
Torque: 43 N·m (32 lb ft)

D

Slave cylinder bleeder screw
Torque: 8 N·m(69 lb in) 

D

Flexible hose to slave cylinder
Torque: 20 N·m (14 lb ft) 

Bleeding

1. Check the level of clutch fluid in the reservoir and

replenish if necessary

2. Bleeding the slave cylinder.

1. Remove the rubber cap from the bleeder screw

and wipe clean the bleeder screw. Connect a vinyl
tube to the bleeder screw and insert the other end
of the vinyl tube into a transparent container.

2. Pump the clutch pedal repeatedly and hold it

depressed.

203RS005

3. Loosen the bleeder screw to release clutch fluid

with air bubbles into the container, then tighten
the bleeder screw immediately.

4. Release the clutch pedal carefully.  Repeat the

above operation until air bubbles disappear from
the clutch fluid being pumped out into the
container.  During the bleeding operation, keep
the clutch fluid reservoir filled to the specified
level. Reinstall the rubber cap. 
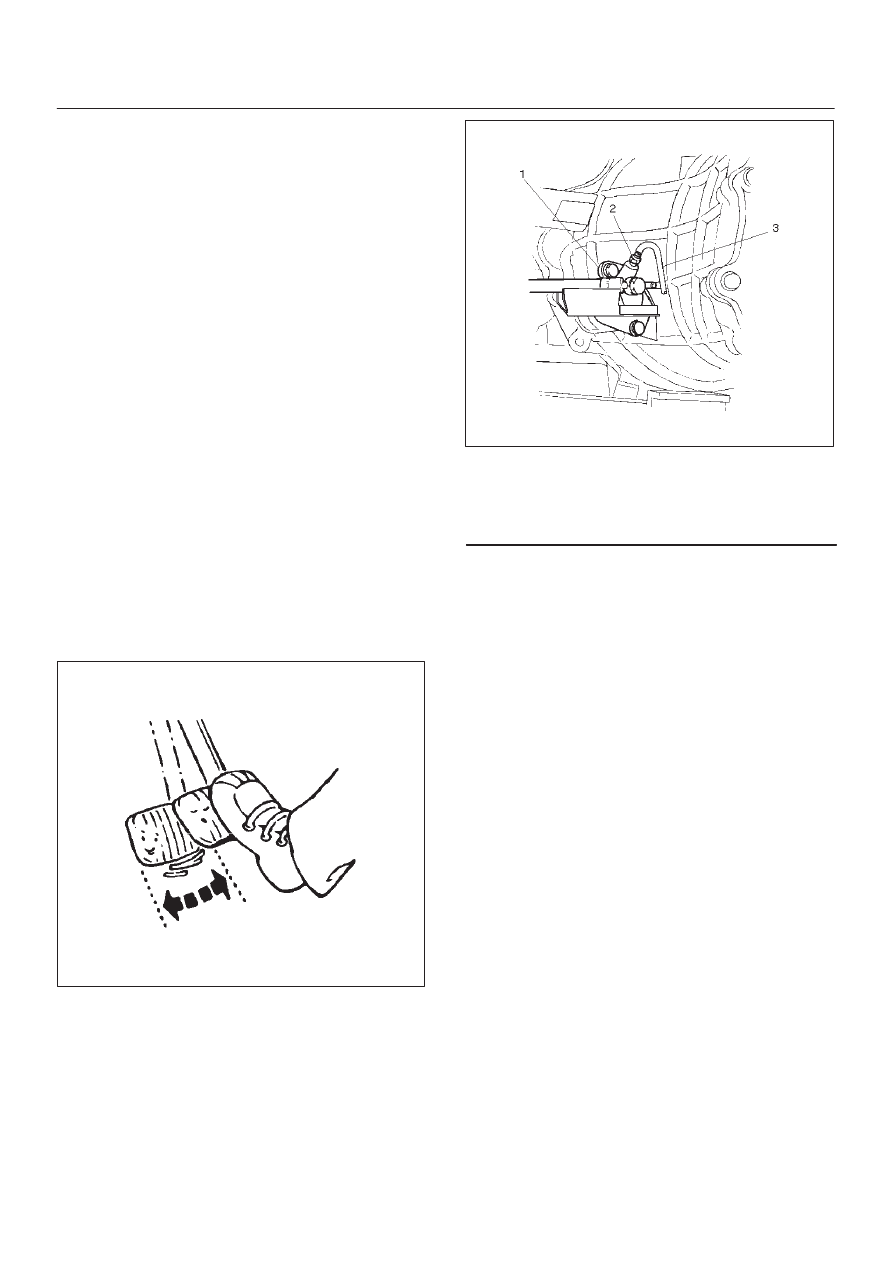
206RW003

Legend

(1) Slave Cylinder
(2) Bleeder Screw
(3) Vinyl Tube

CLUTCH

7C–19

Master Cylinder

208RW017

Inspection and Repair

Inspect the removed parts. If there are abnormalities
such as wear, oil leak or other damage, replace the
master cylinder assembly.

NOTE: The master cylinder assembly cannot be
disassembled because of point–staked rod stopper.

7C–20

CLUTCH

Slave Cylinder

Disassembled View

206RW004

Legend

(1) Cylinder Body
(2) Spring

(3) Piston and Piston Cup 
(4) Boot 
(5) Push Rod

Disassembly

1. Remove boot.
2. Remove push rod.
3. Remove piston and piston cup.
4. Remove spring.
5. Remove cylinder body.

Inspection and Repair

Make the necessary adjustments, repairs, and part
replacements if excessive wear or damage is discovered
during inspection.

Cylinder Body

206RS003

1. Clean the cylinder body.
2. Check the fluid return port for restrictions and clean it

if necessary.

CLUTCH

7C–21

Piston and Piston Cup

1. Visually inspect the disassembled piston and piston

cup for excessive wear and damage.

2. Replace the inner parts with new parts shown in the

illustration.

206RS004

3. Measure the clearance between slave cylinder wall

and piston.

4. If the measured value exceeds the specified limit, the

slave cylinder assembly must be replaced. 

Standard: 0.07 mm (0.0028  in)
Limit: 0.15 mm (0.0059  in)

206RS005

Reassembly

To reassemble, follow the disassembly steps in the
reverse order, noting the following points:

1. Before installing the parts, apply a thin coat of rubber

grease.

2. Install cup in groove in piston with the lip turned to the

front of cylinder.  Use care so as not to scratch the
cylinder. 

206RS006


Content   ..  960  961  962  963   ..