Isuzu Amigo / Axiom / Trooper / Rodeo / VehiCross. Manual - part 591
3D–2
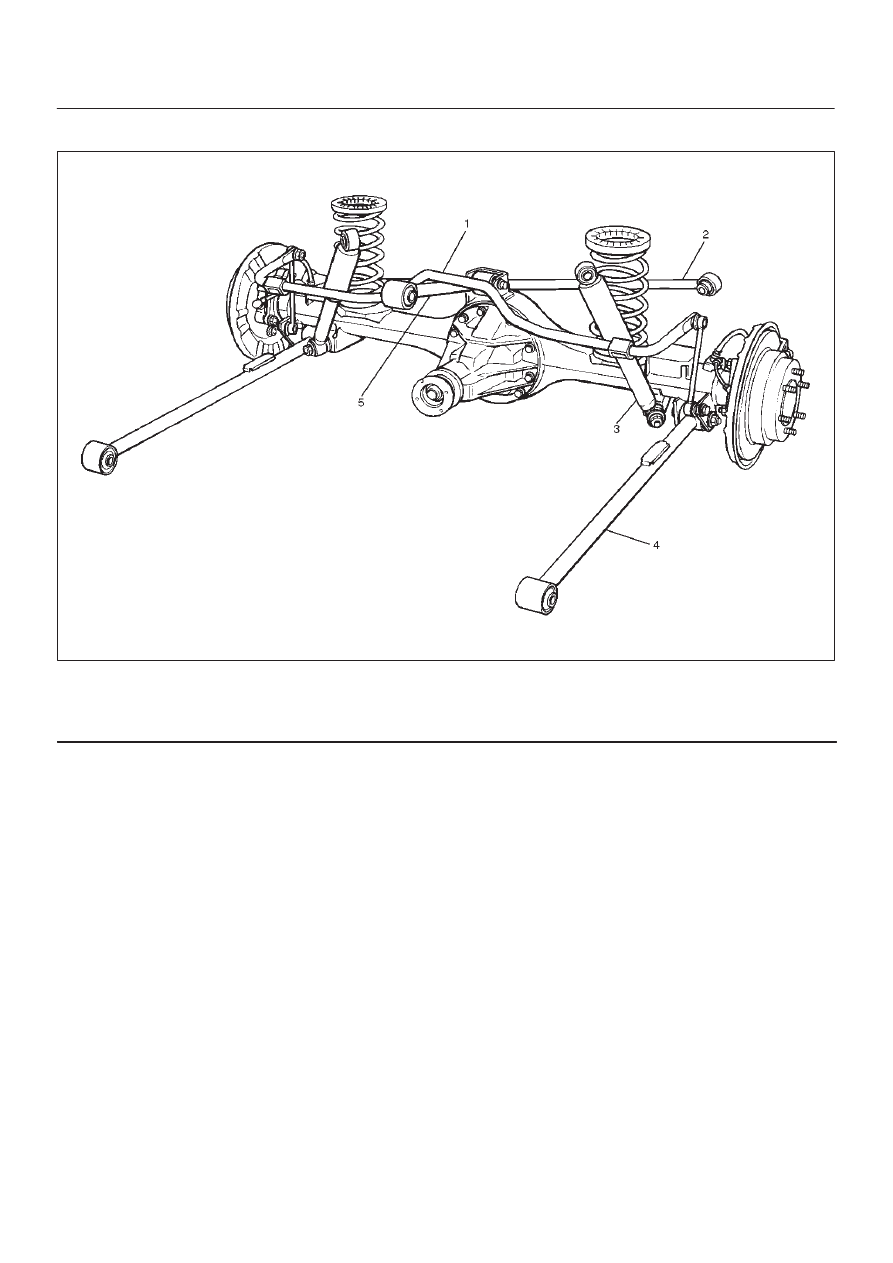
REAR SUSPENSION
General Description
C03RS003
Legend
(1) Stabilizer Bar
(2) Lateral Rod
(3) Shock Absorber
(4) Trailing Link
(5) Center Link
The rear suspension is a 4-link, coil spring type
suspension with a stabilizer bar, consisting of two trailing
links, center link, lateral rod, shock absorber, and
stabilizer. In this suspension, the links are specially
arranged to enable the rear axle to move freely, thereby
expanding suspension stroke, reducing friction, and
improving lateral rigidity and roll control. All these result in
improved stability, riding comfort, and rough road
maneuverability.
Each link connects the axle housing with the frame
through a runner bushing. The axle housing is supported
by the trailing links and center link longitudinally and by
the lateral rod latitudinally.