Isuzu Amigo / Axiom / Trooper / Rodeo / VehiCross. Manual - part 484
8F–57
BODY STRUCTURE
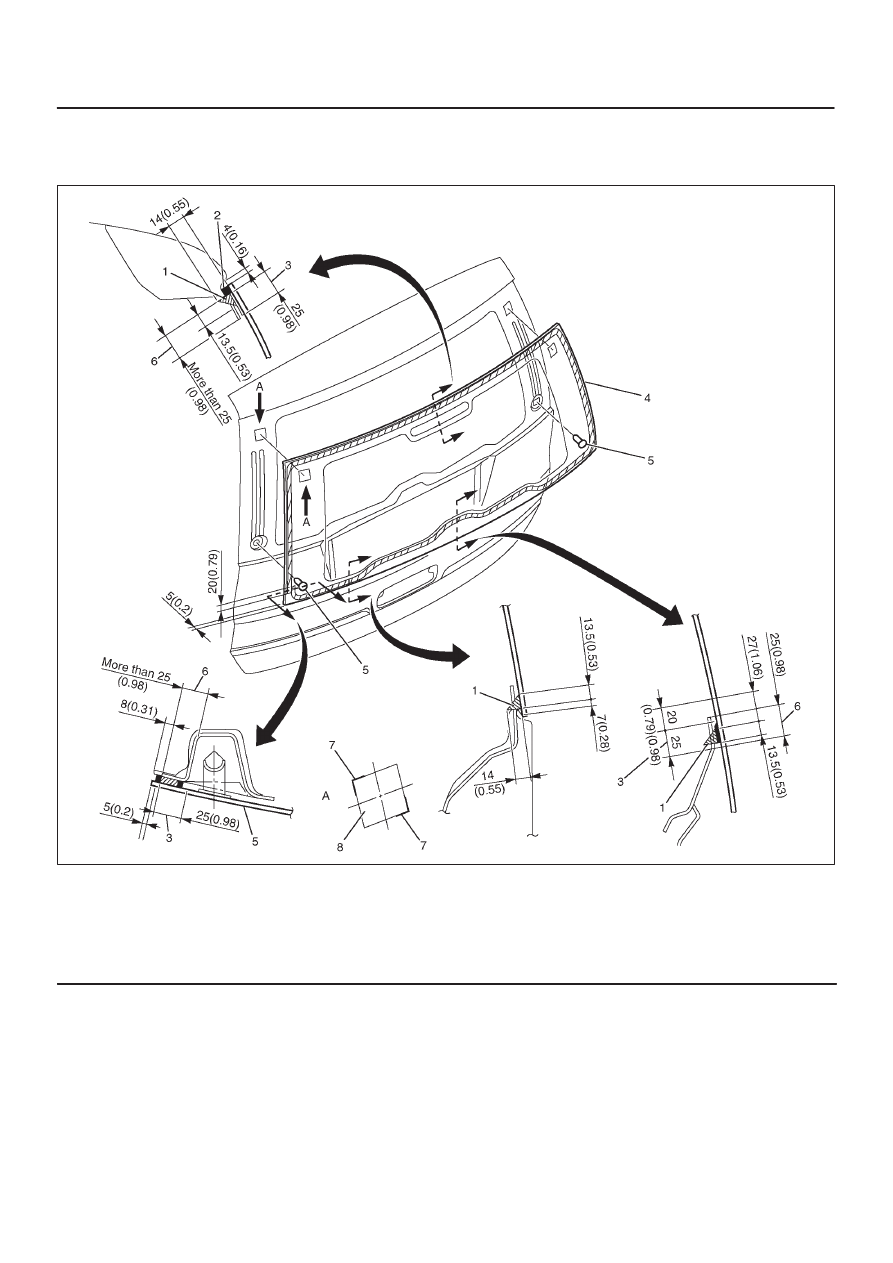
Tailgate Glass
Parts Location
641R200004
Legend
(1) Adhesive
(2) Sealing Dam
(3) Primer Coating Area (Glass Side)
(4) Tailgate Glass
(5) Clip
(6) Primer Coating Area (Body Panel Side)
(7) Mark Stamping Location
(8) Fastner
Removal
1. Disconnect the battery ground cable.
2. Remove the tailgate trim covers.
D
Refer to
Tail Gate in Body Structure section.
3. Remove the rear wiper arm.
D
Refer to
Rear Wiper Arm/Blade in Wiper/Washer
System section.
4. Remove the license plate garnish.
D
Refer to
Tailgate in this section.
5. Disconnect the high mount stoplight and rear
defogger harness connector.
6. Remove the high mount stoplight.