Isuzu Amigo / Axiom / Trooper / Rodeo / VehiCross. Manual - part 1677


  Index      Isuzu     Isuzu Amigo / Axiom / Trooper / Rodeo / VehiCross - service repair manual 1999-2002 year


Search            


Content   ..  1675  1676  1677  1678   ..


Isuzu Amigo / Axiom / Trooper / Rodeo / VehiCross. Manual - part 1677


EXTERIOR/INTERIOR TRIM

8J–15

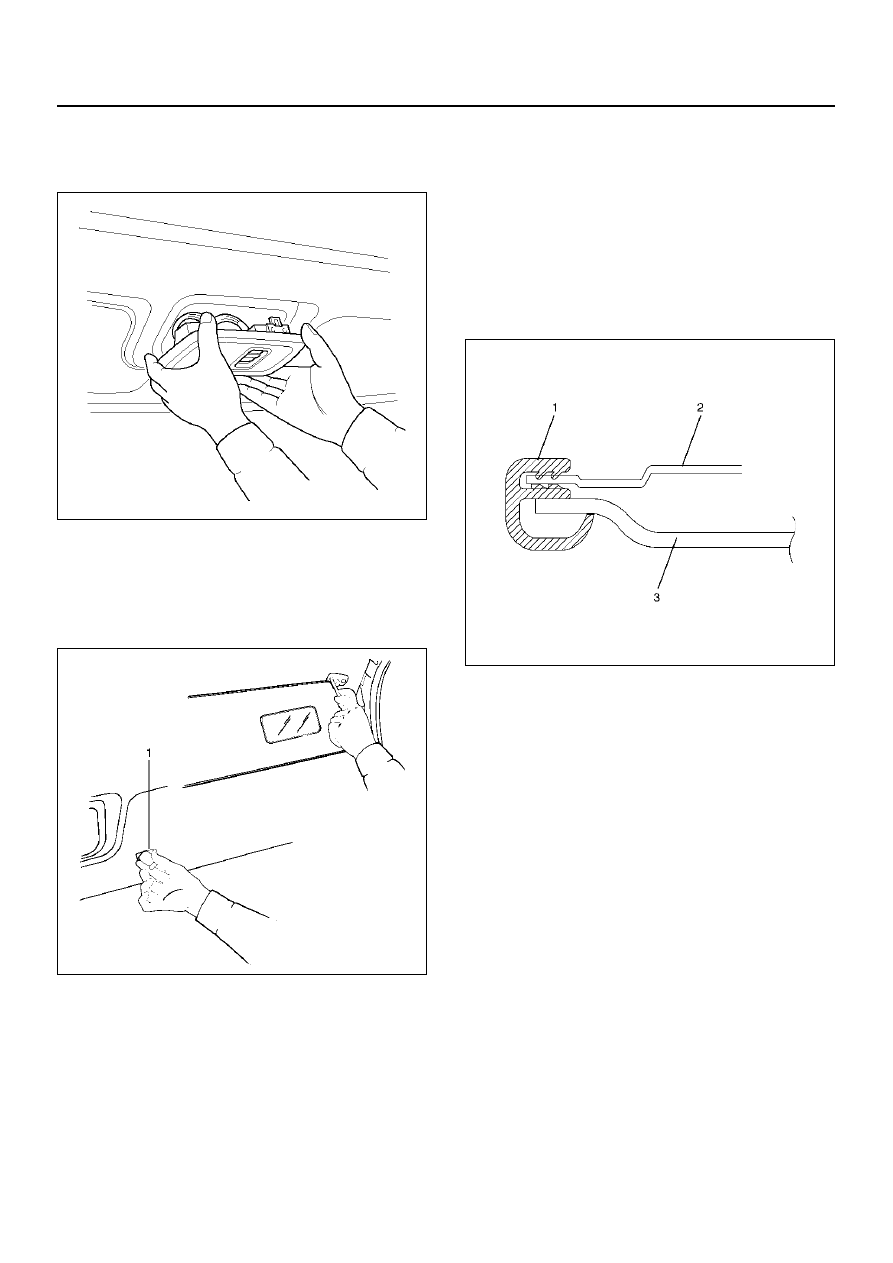
4. Remove the sunroof switch (With sunroof).

• Pry the clip positions free from the sunroof switch

bracket and disconnect the connector.

665RW002

5. Remove the sunvisors.

• Remove the fixing screws and pull out the

sunvisor holder (1) to remove it.

• Disconnect the vanity mirror illumination

connector. (if so equipped)

743RS006

6. Remove the sunroof finisher (With sunroof).

7. Remove the headlining.

• Remove the headlining fixing clips.

Installation

To install, follow the removal steps in the reverse order,
noting the following points.

1. Install the headlining so that the fixing clips will not

come off.

2. To install the sunroof finisher (1), first fit it in at one

place with the headlining (3) close to the sunroof
frame (2), then install the entire finisher tightly by
hitting it with a plastic hammer, not allowing it to
move up.

665RW003

8J–16

EXTERIOR/INTERIOR TRIM

Headlining (SWB)

Parts Location

This illustration is based on the Soft top model.

666RY00001

EndOFCallout

Legend

(1) Interior Trim Panels
(2) Soft Top Latch
(3) Rear Roof Trim Cover
(4) Assist Grip

(5) Dome Light
(6) Sunroof Finisher
(7) Sunvisors
(8) Headlining

EXTERIOR/INTERIOR TRIM

8J–17

Removal

1. Disconnect the battery ground cable.

2. Remove the soft top latch (Soft top model).

• Remove two bolts.

665RW023

• Remove the rear roof bracket cover (4), rear roof

bracket (2) connecting with resin top (1) and rear
roof trim cover (3) by removing four fixing bolts
(Resin top model).

666RW006

3. Remove the dome light lens.

4. Remove the dome light.

• Remove the fixing screws.

• Disconnect the dome light connector.

5. Remove the rear roof trim cover.

666RW004

6. Remove the interior trim panels.

• Refer to Interior Trim Panels (SWB) in Exterior/

Interior Trim section.

7. Remove the sunroof glass assembly.

• Refer to Sunroof Glass in Sunroof/Convertible

Top section.

8. Remove the sun roof handle cover and sunroof

handle plate.

• Remove the screw from the cover and the three

fixing nuts from the plate.

9. Remove the sunvisor.

• Remove the sunvisor fixing screws and the

sunvisor holder.

10. Remove the sunroof finisher.

11. Remove the headlining.

8J–18

EXTERIOR/INTERIOR TRIM

Installation

To install, follow the removal steps in the reverse order,
noting the following point.

1. In case of installing sunroof finisher (1), fit the lip (2)

to the headlining surely.

666RW007


Content   ..  1675  1676  1677  1678   ..