Isuzu Amigo / Axiom / Trooper / Rodeo / VehiCross. Manual - part 1676


  Index      Isuzu     Isuzu Amigo / Axiom / Trooper / Rodeo / VehiCross - service repair manual 1999-2002 year


Search            


Content   ..  1674  1675  1676  1677   ..


Isuzu Amigo / Axiom / Trooper / Rodeo / VehiCross. Manual - part 1676


EXTERIOR/INTERIOR TRIM

8J–11

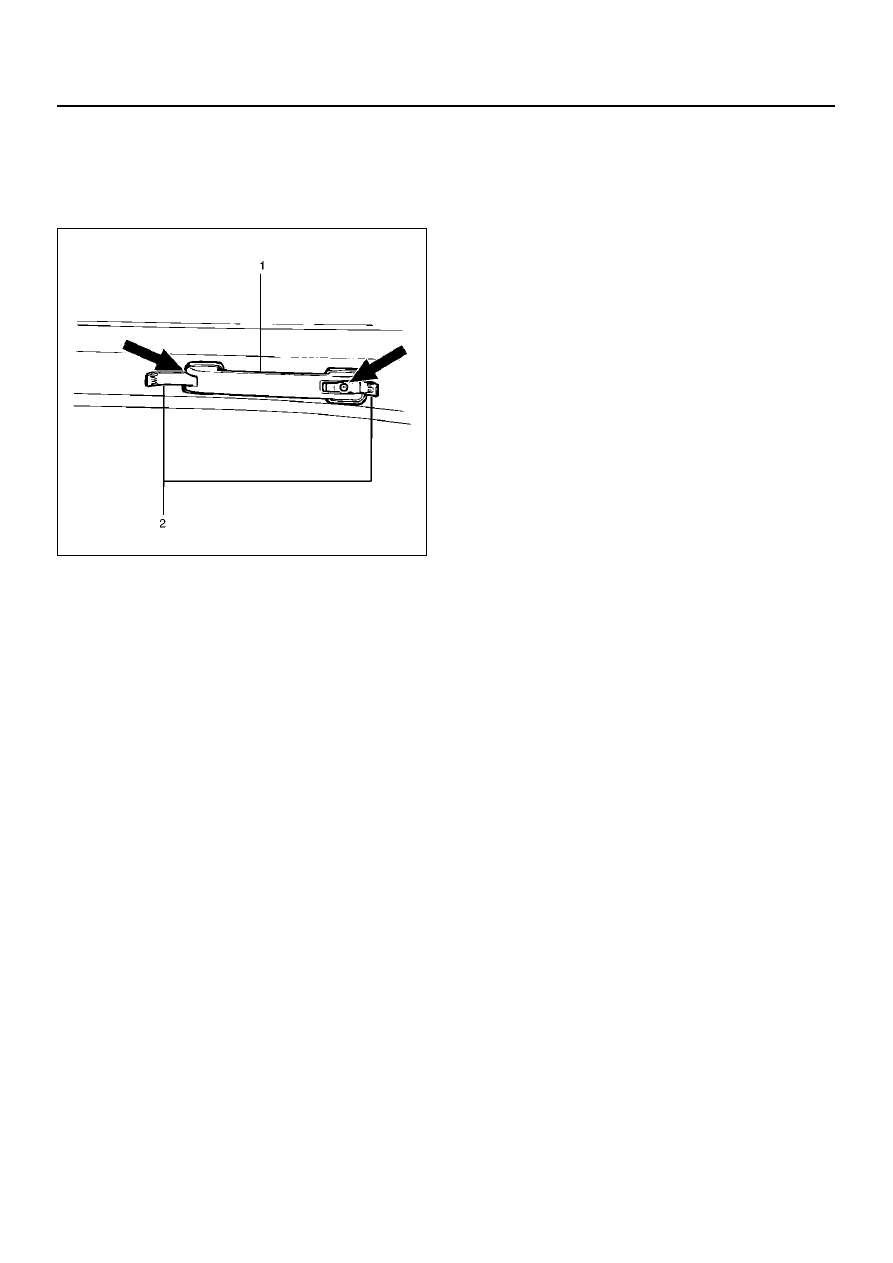
16. Remove the front pillar assist grip (1) (Front &

Rear).

• Open the both sides of the assist grip cover (2)

and remove the fixing screws and the front pillar
assist grip.

743RW003

Installation

To install, follow the removal steps in the reverse order,
noting the following point:

1. Tighten the seat belt anchor bolt to the specified

torque.

Torque: 39 N·m (29 lb ft)

8J–12

EXTERIOR/INTERIOR TRIM

Interior Trim Panels (SWB)

Interior Trim Panels and Associated Parts

643RW010

EndOFCallout

Removal

1. Disconnect the battery ground cable.

2. Remove the soft top assembly or resin top

assembly.

• Refer to Soft Top Assembly or Resin Top

Assembly in Sun Roof/Convertible Top section.

3. Remove the rear seat assembly.

• Refer to Rear Seat Assembly (SWB) in Seats

section.

4. Remove the weather strip.

5. Remove the rear end floor trim cover.

6. Remove the luggage sid trim cover.

• Refer to Seat Belt Cross Bar Assembly in Sun

Roof/Convertible Top section.

7. Remove the sill plate.

8. Remove the dash side trim cover.

9. Remove the rear speaker assembly.

• Disengage the front portion of the speaker grille

(1) and pull it forward and off.

Legend

(1) Assist Grip (Front & Rear)
(2) Upper Quarter Trim Cover
(3) Weather Strip
(4) Rear Roof Trim Cover
(5) Rear End Floor Trim Cover

(6) Luggage Side Trim Cover
(7) Lower Quarter Trim Cover
(8) Sill Plate
(9) Door Finisher

(10) Front Pillar Trim Cover

EXTERIOR/INTERIOR TRIM

8J–13

• Remove the three fixing screws securing the

speaker (2) in place and disconnect the
connector (3).

890RW048-1

10. Remove the front and rear seat belt lower anchor

bolts.

11. Remove the lower quarter trim cover.

• Disengage the clips from the body panel by

twisting them free.

12. Remove the assist grips (1) (Front & Rear).

• Open the both sides of the assist grip cover (2)

and remove the fixing screws.

743RW003

13. Remove the door finisher.

14. Remove the dome light.

• Remove the dome light lens (2) and the fixing

screws.

• Disconnect the dome light connector.

805RX001

15. Remove the rear roof bracket (Resin top model) or

the soft top latch (Soft top model).

16. Remove the rear roof trim cover.

17. Remove the upper quarter trim cover.

18. Remove the front pillar trim cover.

Installation

To install, follow the removal steps in the reverse order,
noting the following point.

1. Tighten the front and rear seat belt anchor bolts to

the specified torque.

Torque: 39 N·m (29 lb ft)

8J–14

EXTERIOR/INTERIOR TRIM

Headlining (LWB)

Parts Location

666RY00002

EndOFCallout

Removal

1. Disconnect the battery ground cable.

2. Remove the interior trim panels.

• Refer to Interior Trim Panels (LWB) in this

section.

3. Remove the dome light.

• Remove the dome light lens and the fixing

screws.

• Disconnect the dome light connectors.

Legend

(1) Interior Trim Panels
(2) Clip
(3) Headlining (Without Sunroof)
(4) Assist Grip
(5) Dome Light

(6) Headlinng (With Sun Roof)
(7) Sunroof Finisher (With Sunroof)
(8) Sunroof Switch (With Sunroof)
(9) Sunvisors

(10) Sunvisor Holder


Content   ..  1674  1675  1676  1677   ..