Isuzu Amigo / Axiom / Trooper / Rodeo / VehiCross. Manual - part 1655


  Index      Isuzu     Isuzu Amigo / Axiom / Trooper / Rodeo / VehiCross - service repair manual 1999-2002 year


Search            


Content   ..  1653  1654  1655  1656   ..


Isuzu Amigo / Axiom / Trooper / Rodeo / VehiCross. Manual - part 1655


8F–62

BODY STRUCTURE

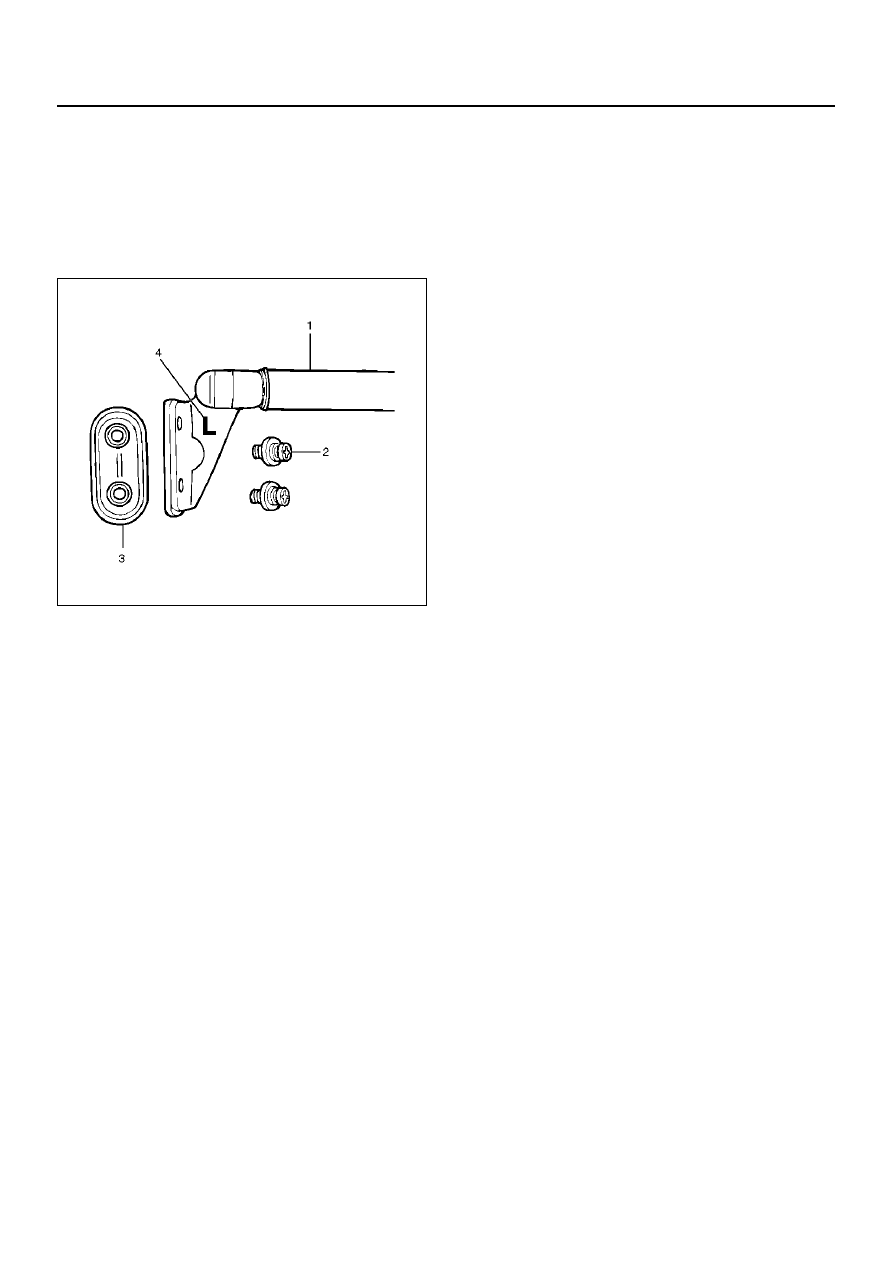
3. When installing gas stay assembly (1), first install

the gas stay onto the rear quarter panel with fixing
screw (2) and fastener (3) and then attach the gas
stay upper end to the ball stud by spreading the
retainer with screwdriver, etc. Gas stay assemblies
for left and right sides differ from each other (The
letter (4) L(LH) or R(RH) is embossed on the gas
stay assembly.)

683RW005

4. When installing hatchgate striker assembly, first

partially tighten the fixing screw and close the
hatchgate and tailgate. Then fully tighten the fixing
screw with the condition that the striker fits the
hatchgate lock assembly at the tailgate.
Make sure that clearance exists between hatchgate
striker and lock assembly.
After installation, again make sure that the striker
fits the lock assembly properly.

5. Tighten the nuts; hinge to body (LH and RH)

Torque : 6 N·m (52 lb in)

6. Tighten the screws; glass and hinge fix (LH and RH)

Torque : 6 N·m (52 lb in)

NOTE:  When installing the hinge to the body, exercise
special care not to damage the body paint surface.

7. Tighten the hatchgate striker fixing screws.

Torque : 6 N·m (52 lb in)

BODY STRUCTURE

8F–63

Adjustment

• Hatchgate alignment is obtained by moving

hatchgate hinges.

682RY00003

EndOFCallout

Legend

(1) Hatchgate Striker
(2) Hatchgate Glass
(3) Tailgate Outer Panel
(4) Tailgate Inner Panel

(5) Trim Cover
(6) Hatchgate Lock Assembly
(7) Quarter Trim
(8) Hatchgate Glass Seal
(9) Quarter Outer Panel

8F–64

BODY STRUCTURE

Tailgate Glass (Resin Top)

Parts Location

682RW011

EndOFCallout

Legend

(1) Tailgate Trim Cover
(2) Tailgate Seal
(3) Tailgate Glass Assembly
(4) Tailgate Moulding
(5) Tailgate Glass Stay
(6) Bolt

(7) Cap
(8) Screw
(9) Collar

(10) Gasket

(11) Clip

(12) Grommet
(13) Nut

BODY STRUCTURE

8F–65

Removal

1. Disconnect the battery ground cable.

2. Remove the spare tire.

3. Remove the rear wiper.

• Refer to Rear Wiper Arm/Blade in Wiper/Washer

System section.

4. Disconnect the rear defogger connectors (LH &

RH).

5. Remove the tailgate glass stays.

• Remove the two seats of two tailgate trim cover

fixing bolts.

6. Remove the tailgate glass assembly.

• Remove the two caps on the left and right sides,

then remove the screws.

• Remove the two clips from the two ends of the

tailgate moulding, then lift the glass assembly up
and out.

• Removing and installing the glass assembly

require two persons.

7. Remove the tailgate seal.

Installation

To install, follow the removal steps in the reverse order,
noting the following points.

1. Tighten the tailgate glass stay fixing bolts to the

specified torque.

Torque : 19 N·m (14 lb ft)

2. Make sure the lip is properly oriented when

installing the tailgate seal.


Content   ..  1653  1654  1655  1656   ..