Content .. 1613 1614 1615 1616 ..
Isuzu Amigo / Axiom / Trooper / Rodeo / VehiCross. Manual - part 1615
LIGHTING SYSTEM
8A–3
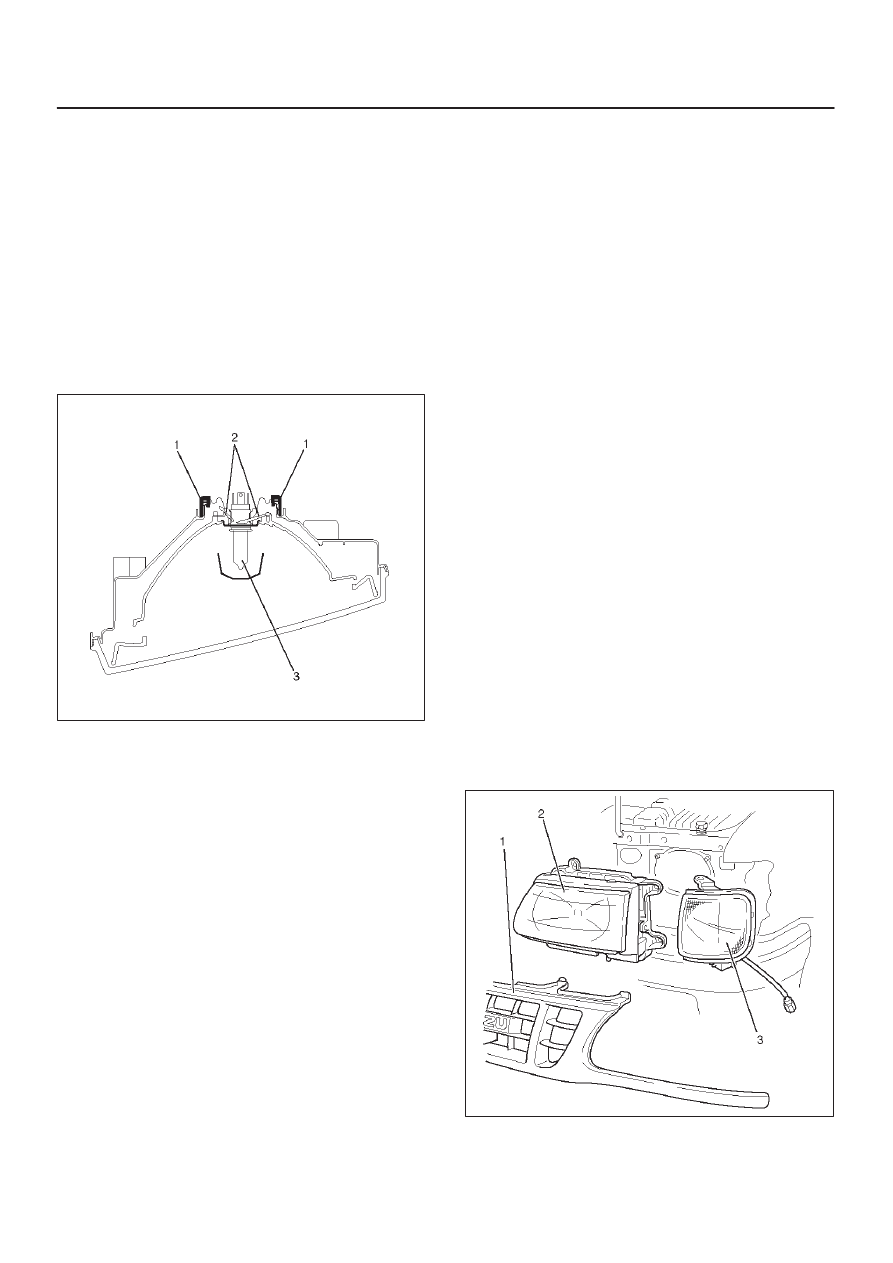
Headlight Bulb
Removal
1. Disconnect the battery ground cable.
2. Remove the headlight bulb (3).
D
Disconnect the connector.
D
Remove the bulb cover (1).
D
Release the retaining ring (2).
CAUTION: Don not touch the headlight bulb with
your fingers. The oil on your fingers will leave a
residue which will shorten the life of the halogen
bulb. In order to prevent this problem, clean the bulb
lens before installing the headlight bulb.
821RY00063
Installation
To install, follow the removal steps in the reverse order.
noting the following point:
1. Make sure to set the retaining ring and the bulb cover.
If the set is incomplete, there is a possibility that the
water comes in the light.
Headlight Assembly
Removal
1. Disconnect the battery ground cable.
2. Remove the radiator grille (1).
D
Remove eight clips and a screw.
3. Remove the front combination light (3).
D
Remove three screws.
D
Disconnect the connector.
4. Remove the headlight assembly (2).
D
Disconnect the connector.
D
Remove four screws.
801RY00017