Content .. 1132 1133 1134 1135 ..
Isuzu Amigo / Axiom / Trooper / Rodeo / VehiCross. Manual - part 1134
4A2–4
DIFFERENTIAL (REAR)
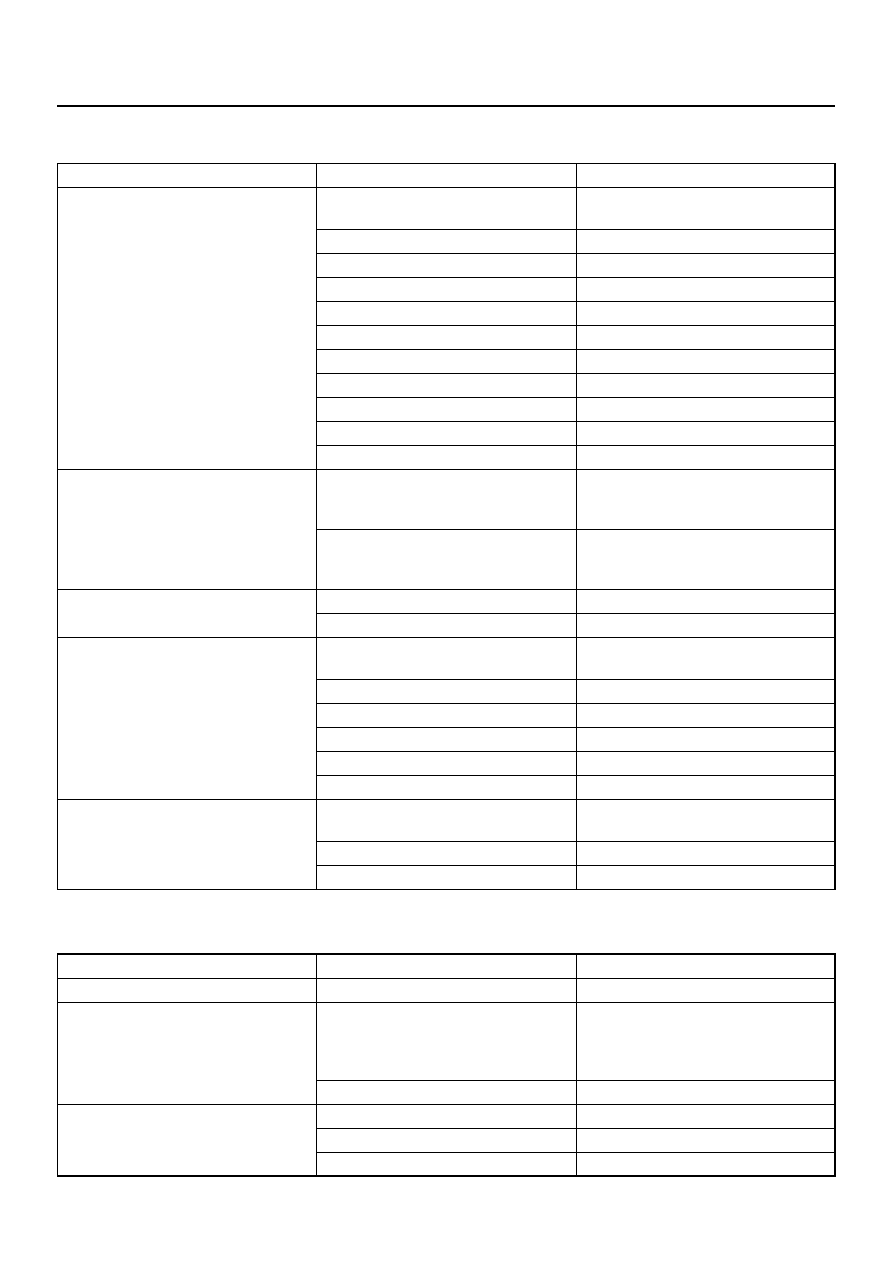
Rear Axle Noise
Limited Slip Differential
Condition
Possible cause
Correction
Noise
in
Drive
Excessive pinion to ring gear
backlash.
Adjust.
Worn pinion and ring gear.
Replace
Worn pinion .bearings.
Replace.
Loose pinion bearings.
Adjust.
Excessive pinion end play.
Adjust.
Worn side bearings.
Replace.
Loose side bearings.
Adjust.
Excessive ring gear run-out.
Replace.
Low oil level.
Replenish.
Wrong or poor grade oil.
Replace.
Bent axle housing.
Replace.
Noisy when coasting
Axle noise heard when driving will
usually be heard also on coasting,
although not as loud.
Adjust or replace.
Pinion and ring gear too tight
(audible when slowing down and
disappears when driving).
Adjust.
Intermittent noise
Warped bevel ring.
Replace.
Loose differential case bolts.
Tighten.
Constant
noise
Flat spot on pinion or ring gear
teeth.
Replace.
Flat spot on bearing.
Replace.
Worn pinion splines.
Replace.
Worn axle shaft dowel holes.
Replace.
Worn hub studs.
Replace.
Bent axle shaft.
Replace.
Noisy
on
turns
Worn differential side gears and
pinions.
Replace.
Worn differential shaft.
Replace.
Worn axle shaft splines.
Replace.
Condition
Possible cause
Correction
Does not lock
Broken clutch plates.
Replace the clutch plates.
Chatters in turns
Lubricant contaminated.
Drain lube when hot. Wipe carrier
clean. Refill with lube specified in
Main Data and Specifications at the
end of this section.
Clutch plates dateriorated.
Replace clutch plates.
Noise (in addition to normal clutch
engagement)
Broken clutch plates.
Replace clutch plates.
Damaged case.
Replace unit.
Broken differential gears.
Replace gears.