Infiniti Q45. Manual - part 764


  Index      Infiniti     Infiniti Q45 - service repair manual 2006 year


Search            copyright infringement  


Content   ..  762  763  764  765   ..


Infiniti Q45. Manual - part 764


SUNROOF

RF-21

C

D

E

F

G

H

J

K

L

M

A

B

RF

GAP ADJUSTMENT

1.

Open sun shade.

2.

Tilt glass lid up and then remove side trims.

3.

Loosen glass lid securing nuts (2 each on left and right sides), then tilt glass lid down.

4.

Adjust glass lid from outside of vehicle so it resembles “A – A” as shown in the figure above.

5.

Tilt glass lid up and down until it is adjusted to “C – C” as shown in the figure above.

6.

After adjusting glass lid, tilt glass lid up and then tighten nuts.

7.

Tilt glass lid up and down several times to check that it moves smoothly.

HEIGHT DIFFERENCE ADJUSTMENT

1.

Tilt glass lid up and down.

2.

Check height difference between roof panel and glass lid to see
if it is as  “A – A” as shown in the figure above.

3.

If necessary, adjust it by using one of following procedures.
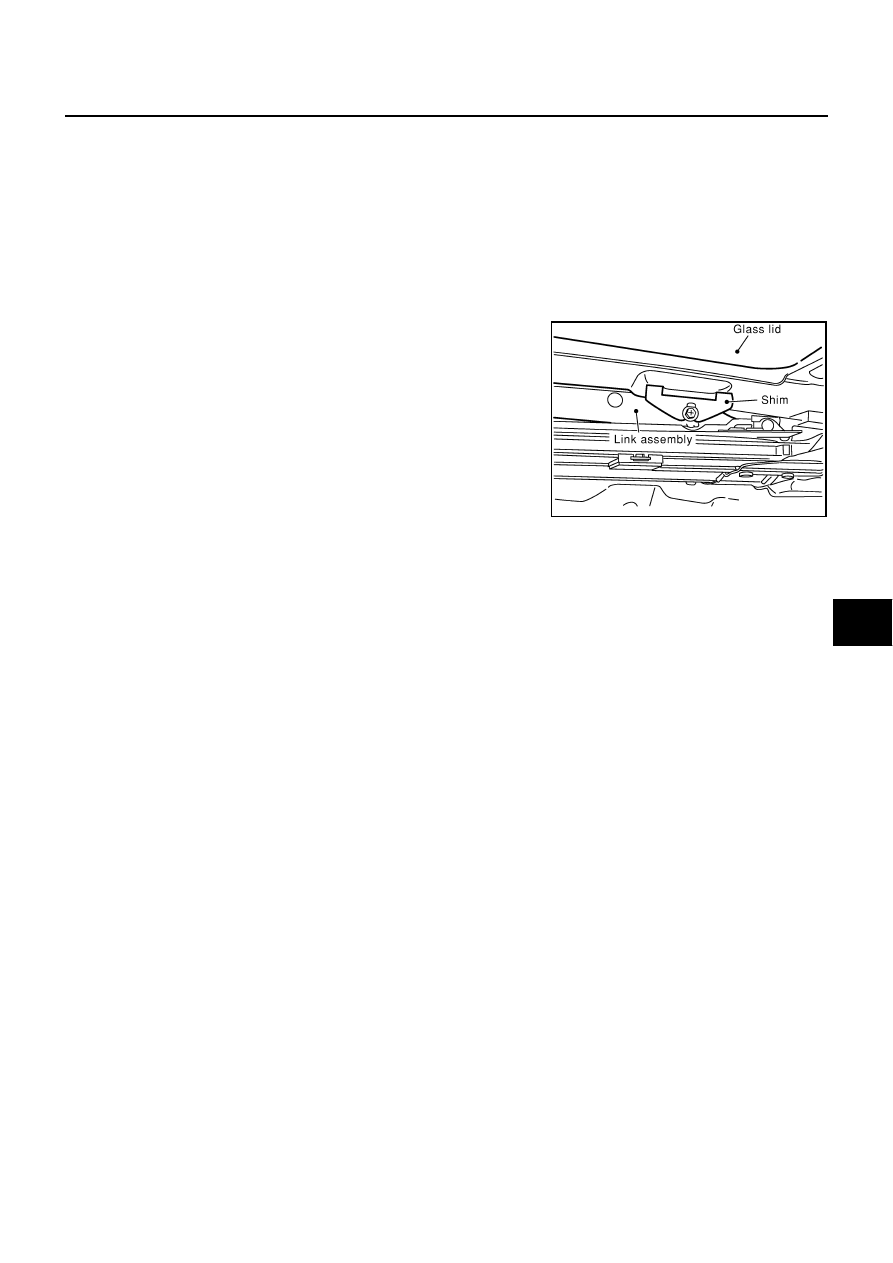
Adjust by adding or removing adjustment shim(s) between glass
lid and link assembly.

If glass lid protrudes above roof panel, add shim(s) or plain
washer at sunroof mounting bracket or stud bolt locations to
adjust sunroof installation as required.

Removal and Installation

NIS0010Y

After any adjustment, check sunroof operation and lid alignment.

Handle finisher plate and glass lid with care so not to cause damage.

It is desirable for easy installation to mark each point before removal.

CAUTION:

Always work with a helper.

SIIA0276E

RF-22

SUNROOF

Fully close the glass lid assembly, before removal, then do not operate motor assembly after
removal.

SIIA0277E

SUNROOF

RF-23

C

D

E

F

G

H

J

K

L

M

A

B

RF

SUNROOF UNIT
Removal

CAUTION:

Always work with a helper.

When taking sunroof unit out, use clothes to protect the seats and trim from damage.

After installing the sunroof unit and glass lid, be sure to carry out the leak test and check that
there is no malfunction.

1.

Remove the headlining. Refer to 

EI-58, "Removal and Installation"

 . 

2.

Disconnect drain hoses.

3.

Remove glass lid. Refer to 

RF-26, "GLASS LID"

 .

4.

Remove screws, then remove the sunroof switch bracket.

5.

Remove motor mounting screws. Disconnect connector from
sunroof motor and then remove sunroof motor.

CAUTION:

Before removing sunroof motor, make sure that sunroof
lid is fully closed.

After removing sunroof motor, do not attempt to rotate
sunroof motor as a single unit.

6.

Remove nuts from the front end and side rail.

7.

Remove side curtain air bag bracket bolts. Refer to 

SRS-46, "SIDE CURTAIN AIR BAG MODULE"

 .

SIIA0275E

SIIA0274E

SIIA0273E

RF-24

SUNROOF

8.

Remove bolts, and then remove assist grip bracket.

9.

Remove front sunroof bracket bolts.

10. Remove rear sunroof bracket bolts, and then remove sunroof

unit from roof panel.

11. Remove sunroof unit through the passenger compartment while being careful not to damage the seats

and trim.

Installation

1.

Temporarily tighten the mounting bolts to the rear sunroof brack-
ets (RH/LH).

PIIB1774E

SIIA0272E

SIIA0271E

SIIA0270E


Content   ..  762  763  764  765   ..