Infiniti I35 (A33). Manual - part 156
Removal and Installation
NHBT0013
REMOVAL
NHBT0013S01
PIIB0008E
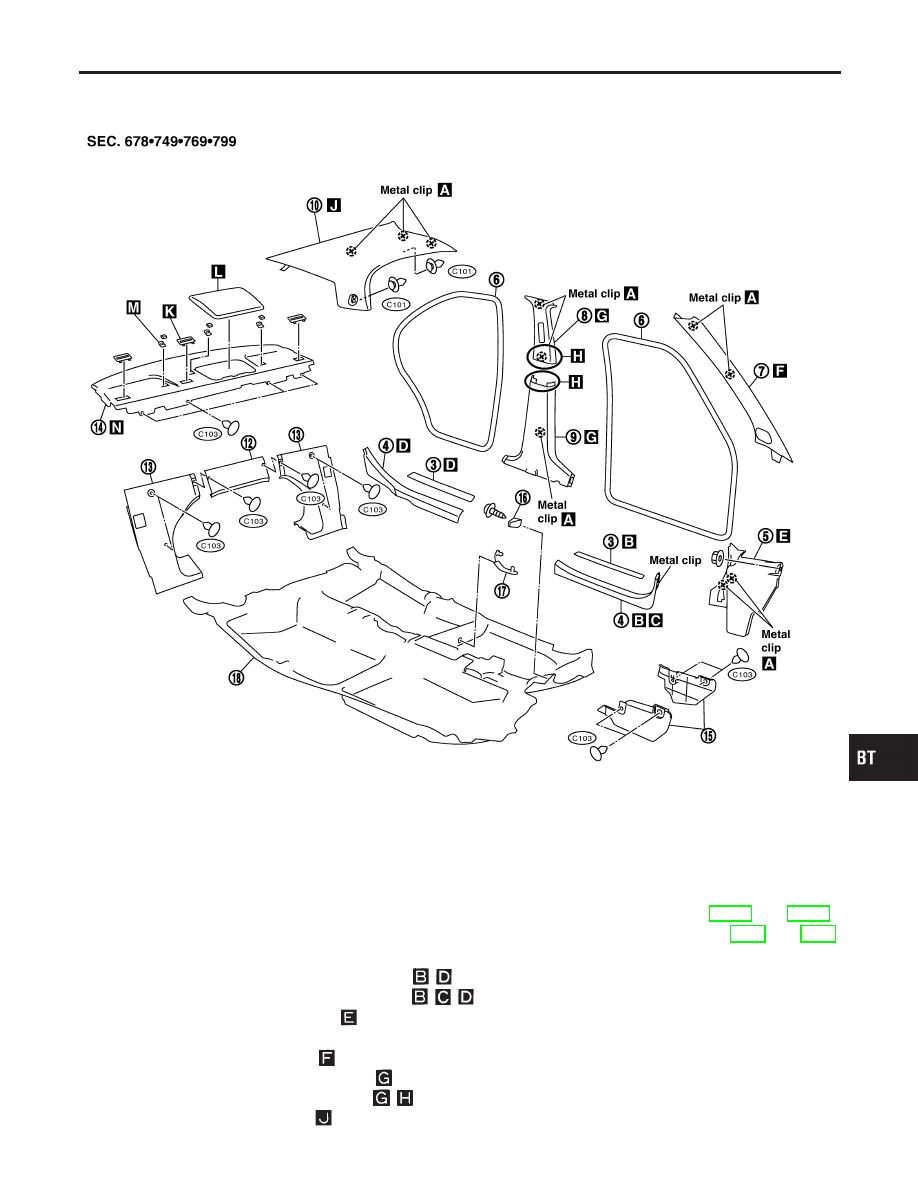
CAUTION:
I
Wrap the tip of flat-bladed screwdriver with a cloth when removing metal clips from garnishes.
I
When removing or installing body side welts, do not allow butyl seal to come in contact with pil-
lar garnish.
1. Remove front and rear seats. Refer to “FRONT SEAT” and “REAR SEAT” for details, BT-50 and BT-53.
2. Remove floor anchor bolts and shoulder anchor bolts of front and rear seat belts. Refer to RS-4 and RS-6,
“Front Seat Belt” and “Rear Seat Belt” for details.
3. Remove front and rear outer kicking plates.
4. Remove front and rear inner kicking plates.
5. Remove dash side lower finisher.
6. Remove front and rear body side welts.
7. Remove front pillar garnishes.
8. Remove center pillar upper garnishes.
9. Remove center pillar lower garnishes.
10. Remove rear pillar garnishes.
GI
MA
EM
LC
EC
FE
AT
AX
SU
BR
ST
RS
HA
SC
EL
IDX
SIDE AND FLOOR TRIM
Removal and Installation
BT-35